eCheck-In Integration
- Get Started
- Release Notes
- Triggers
- Patient Channel
- Troubleshooting and FAQ
- Patient Facesheet
- Technical Specifications
- Insights & Analytics
- Inbox
- Conversation Flows
- Campaigns
- Lines & Resources Requests
- Lines, Events, Resources
- SMS Basics
- Automations
- Referrals
- AI Agents
- Add-Ons
- Users and Groups
- Platform Settings and Configuration
- Self-Rescheduling
- Recalls
- Marketplace
- Artera Harmony Federal Edition
Table of Contents
eCheck-In ProcessConfigure eCheck-in{eventPreVisitFormsLink} Smart PhraseUpdating Appointment AutomationsEnterprise-WidePractice-SpecificMyChart Considerations (Epic-Specific)Quick ResponsesArtera customers can integrate an eCheck-In form link in their Appointment Automations to create a paperless and virtual pre-visit process. When an appointment is booked in your EMR that contains an eCheck-In URL, this link will be passed into Artera and can be populated with the {eventPreVisitFormsLink} Smart Phrase.
NOTE:The eCheck-In link will not be displayed in Artera and will only populate in messages sent to the patient using the Smart Phrase.
eCheck-In Process

Configure eCheck-In
To use eCheck-In links within your Appointment Automations, an integration effort is required. During this process, your Project Manager will work with you to:
Setup your Upcoming Appointment extract to include the eCheck-In link.
Configure a Secure File Transfer Protocol (SFTP) to send the extract to Artera regularly (daily is recommended).
Update your Automations to include the {eventPreVisitFormsLink} Smart Phrase.
NOTE: You will need to engage with your EMR Application Analyst to complete this setup.
{eventPreVisitFormsLink} Smart Phrase
This Smart Phrase can be used in manual and automated messages.
Manual Messages: Pulls in the eCheck-In link for the patient’s most upcoming appointment.
Automated Messages: Pulls in the eCheck-In link for the appointment that triggered the Automation to send.
If there is no associated eCheck-In link for the appointment, the Smart Phrase space will be blank in the patient-facing message. If the patient does not have an upcoming appointment, the message will not send (this is standard behavior for any Event Smart Phrase).
Updating Appointment Automations
We recommend updating your Appointment Confirmation messages to include the eCheck-In Smart Phrase.
Enterprise-Wide
If your entire Enterprise will use eCheck-In, you can update your Default Automations to include the eCheck-In language and Smart Phrase. We recommend updating the message for the Appointment Confirmation Acknowledgement and the 1-Day Confirmed Automations if you are following Artera's Leading Appointment Reminder recommendations.
NOTE: One thing to consider about updating the Confirmation Acknowledgement message (e.g. the message sent to a patient when they confirm their appointment) is that the patient could be sent their eCheck-In link earlier than desired. For example, if the patient receives an appointment reminder 7 days prior to their appointment and they confirm, they would be sent the Confirmation Acknowledgement message containing the eCheck-In prompt a week before their visit. If that is not in alignment with your procedures, you can choose not to update the Confirmation Acknowledgement message and potentially create a separate Automation for eCheck-In to capture patients who would not qualify for the 1 Day Confirmed message.
Practice-Specific
If a single Practice is implementing eCheck-In, you may find it easier to simply build Practice-specific Automations for eCheck-In and disable any Default Automations that conflict. Alternatively, if you have multiple Practices implementing eCheck-In, you may want to build the Automation at the Default level and only configure these new Automations in the Practices implementing eCheck-In.
Suggested Messaging
“Please complete eCheck-in prior to your appointment with this link: {eventPreVisitFormsLink}”
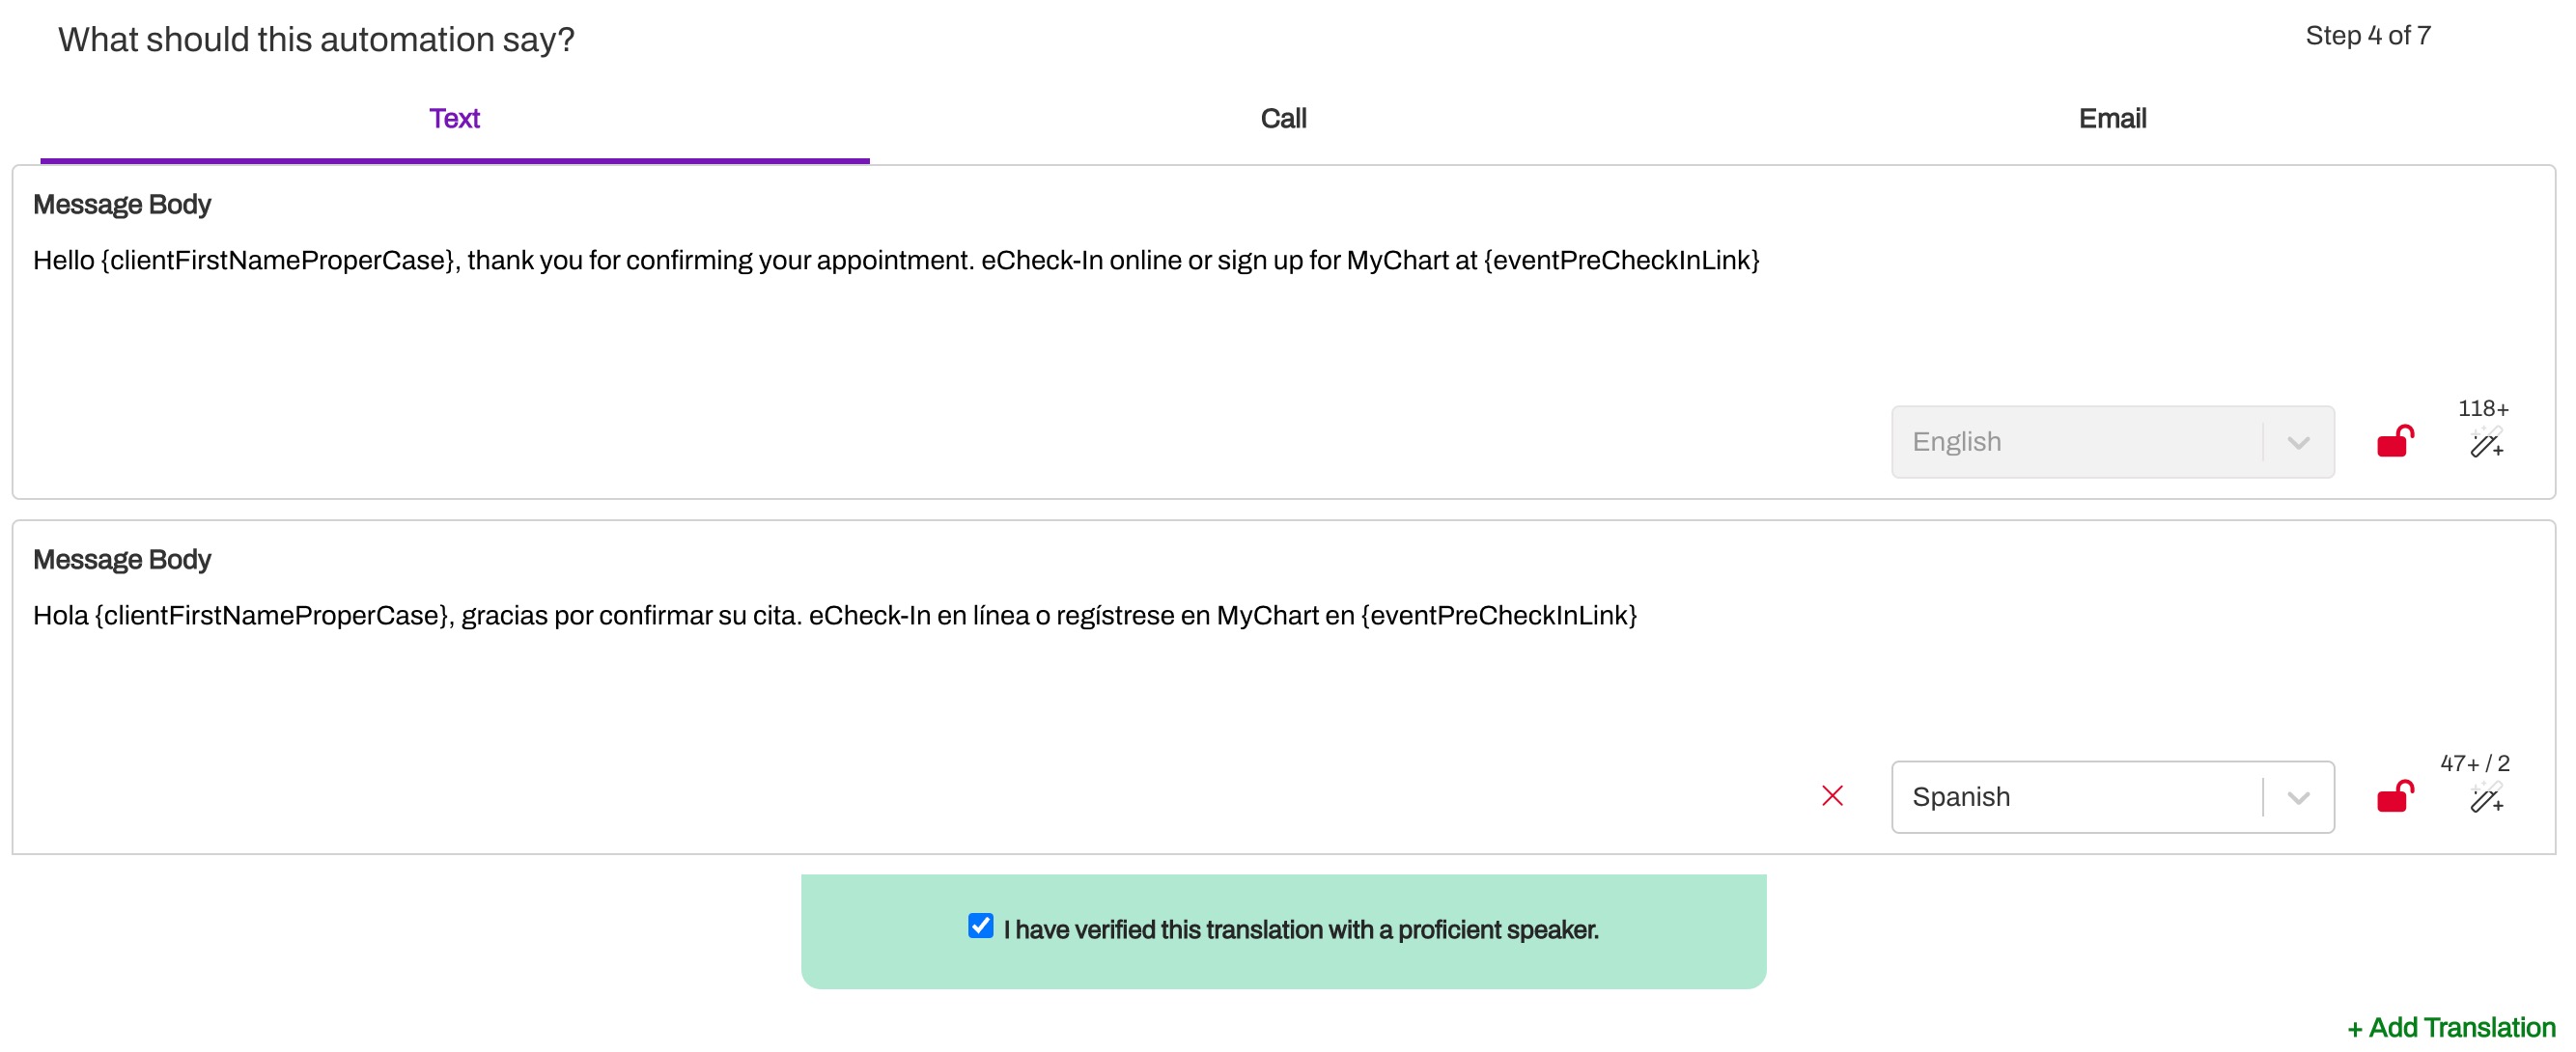
“Hello {clientFirstNameProperCase}, thank you for confirming your appointment. eCheck-In online or sign up for MyChart at {eventPreVisitFormsLink}”
“Prior to your video visit, you must complete our eCheck-In process. Please use this link: {eventPreVisitFormsLink}”
MyChart Considerations (Epic-Specific)
Enrollment Status
Epic sends the link for all upcoming patient visits, regardless of a patient's MyChart enrollment status. Once the patient clicks on the eCheck-In link, MyChart patients are routed to their MyChart account to complete the eCheck-In process and non-MyChart patients verify their Date of Birth before being routed to the eCheck-In steps.
If you have an Automation that prompts unenrolled portal patients to sign up for MyChart, you may want to consider disabling that Automation for Practices implementing eCheck-In since the URL allows patients to check-in for their appointment and create a MyChart account.
MyChart Proxy
Patients with a MyChart proxy will not generate a link. This often impacts pediatric and geriatric patients, so it is important to ensure that Automations are built appropriately and age-based exclusions are used, as needed. It is likely that multiple Automations will need to be built to accommodate Practices with large proxy populations.
18 Years & Over
Automation Description |
Previous Automation |
New Automation |
Configuration |
|---|---|---|---|
Appointment Confirmation - 1D Confirmed with eCheck-In |
{clientFirstNameProperCase}, {eventProviderName} is looking forward to seeing you tomorrow {eventDateAtTimeShort} at {eventLocationAddress}. |
{clientFirstNameProperCase}, we look forward to seeing you, {eventDateAtTimeShort} at {eventLocationAddress}. Complete eCheck-in before your appt {eventPreVisitFormsLink} |
Restrict by Patient Age = Age Range is From 18 Years |
|
Acknowledgment Confirmation with eCheck-In |
Thanks for confirming your visit, {clientFirstNameProperCase}! {eventProviderName} is looking forward to seeing you soon. |
Thanks for confirming your visit, {clientFirstNameProperCase}! {eventProviderName} is looking forward to seeing you soon. Complete eCheck-in before your appt {eventPreVisitFormsLink} |
Restrict by Patient Age = Age Range is From 18 Years |
|
Virtual Visit - 1D Confirmed with eCheck-In |
{clientFirstNameProperCase} your Virtual Visit is {eventDateAtTimeShort} with {eventProviderName}. Please use the link to login at the time of your visit. [Insert Link] |
{clientFirstNameProperCase} your Virtual Visit is {eventDateAtTimeShort} with {eventProviderName}. Please eCheck-in before your appt {eventPreVisitFormsLink} |
Restrict by Patient Age = Age Range is From 18 Years |
|
Virtual Visit - Acknowledgement Confirmation with eCheck-In |
Thanks for confirming your Virtual Visit, {clientFirstNameProperCase}! Please use this link to login on {eventDateAtTimeShort}. [Insert Link] |
Thanks for confirming your Virtual Visit, {clientFirstNameProperCase}! Please use this link to login on {eventDateAtTimeShort}. [Insert Link] |
Restrict by Patient Age = Age Range is From 18 Years |
|
Virtual Visit - 1 Hour Before Appointment Time |
N/A | {clientFirstNameProperCase} your Virtual Visit is {eventDateAtTimeShort} with {eventProviderName}. Please use the link to login at the time of your visit. [Insert Link] | Restrict by Patient Age = Age Range is From 18 Years |
17 Years & Under
Automation Description |
Automation (No Changes) |
Configuration |
|---|---|---|
Appointment Confirmation - 1D Confirmed & Under 18 |
{clientFirstNameProperCase}, {eventProviderName} is looking forward to seeing you tomorrow {eventDateAtTimeShort} at {eventLocationAddress}. |
Restrict by Patient Age = Age Range is To 17 Years |
| Acknowledgement Confirmation & Under 18 | Thanks for confirming your visit, {clientFirstNameProperCase}! {eventProviderName} is looking forward to seeing you soon. |
Restrict by Patient Age = Age Range is To 17 Years |
|
Virtual Visit - 1D Confirmed & Under 18 |
{clientFirstNameProperCase} your Virtual Visit is {eventDateAtTimeShort} with {eventProviderName}. Please use the link to login at the time of your visit. [Insert Link] |
Restrict by Patient Age = Age Range is To 17 Years |
|
Virtual Visit - Acknowledgement Confirmation & Under 18 |
Thanks for confirming your Virtual Visit, {clientFirstNameProperCase}! Please use this link to login on {eventDateAtTimeShort}. [Insert Link] | Restrict by Patient Age = Age Range is To 17 Years |
Example Automation Build
In this example, we are going to build an Automation for a specific Practice implementing eCheck-In. The goal is to send the eCheck-In link to a patient when they confirm their appointment.
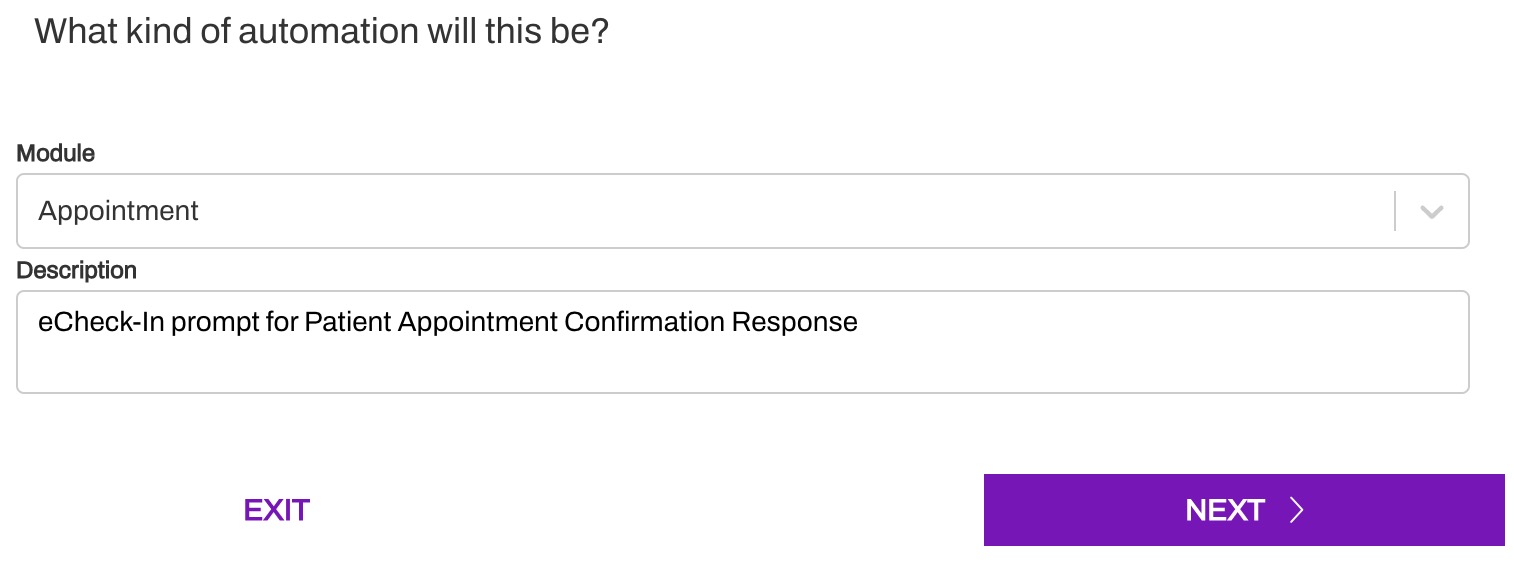
Select Appointment from the Module drop-down and include a description for the Automation.

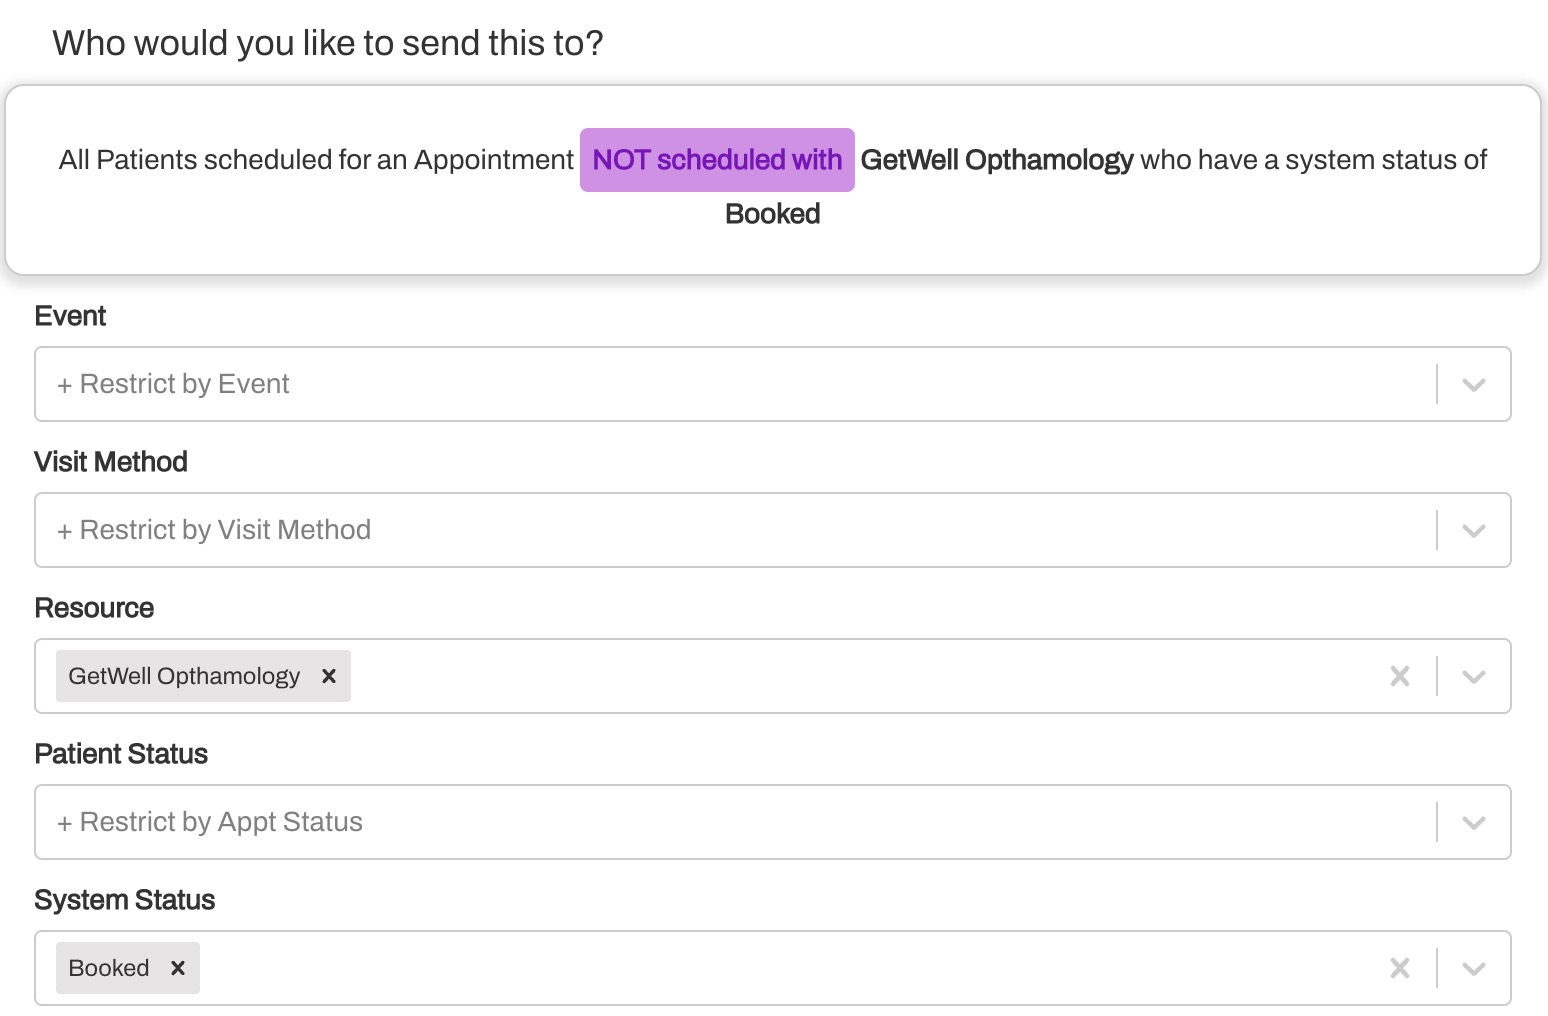
Match your Resource choice to your other Automations. Most customers use Location.

Set up any filters needed. Consider who should receive the Automation. If you are running eCheck-In workflows for a select subset of the Practice’s patients, which Event Types, Visit Methods, or Resources should be excluded?

Add your Automation message and include translations, as needed. Text only is recommended.

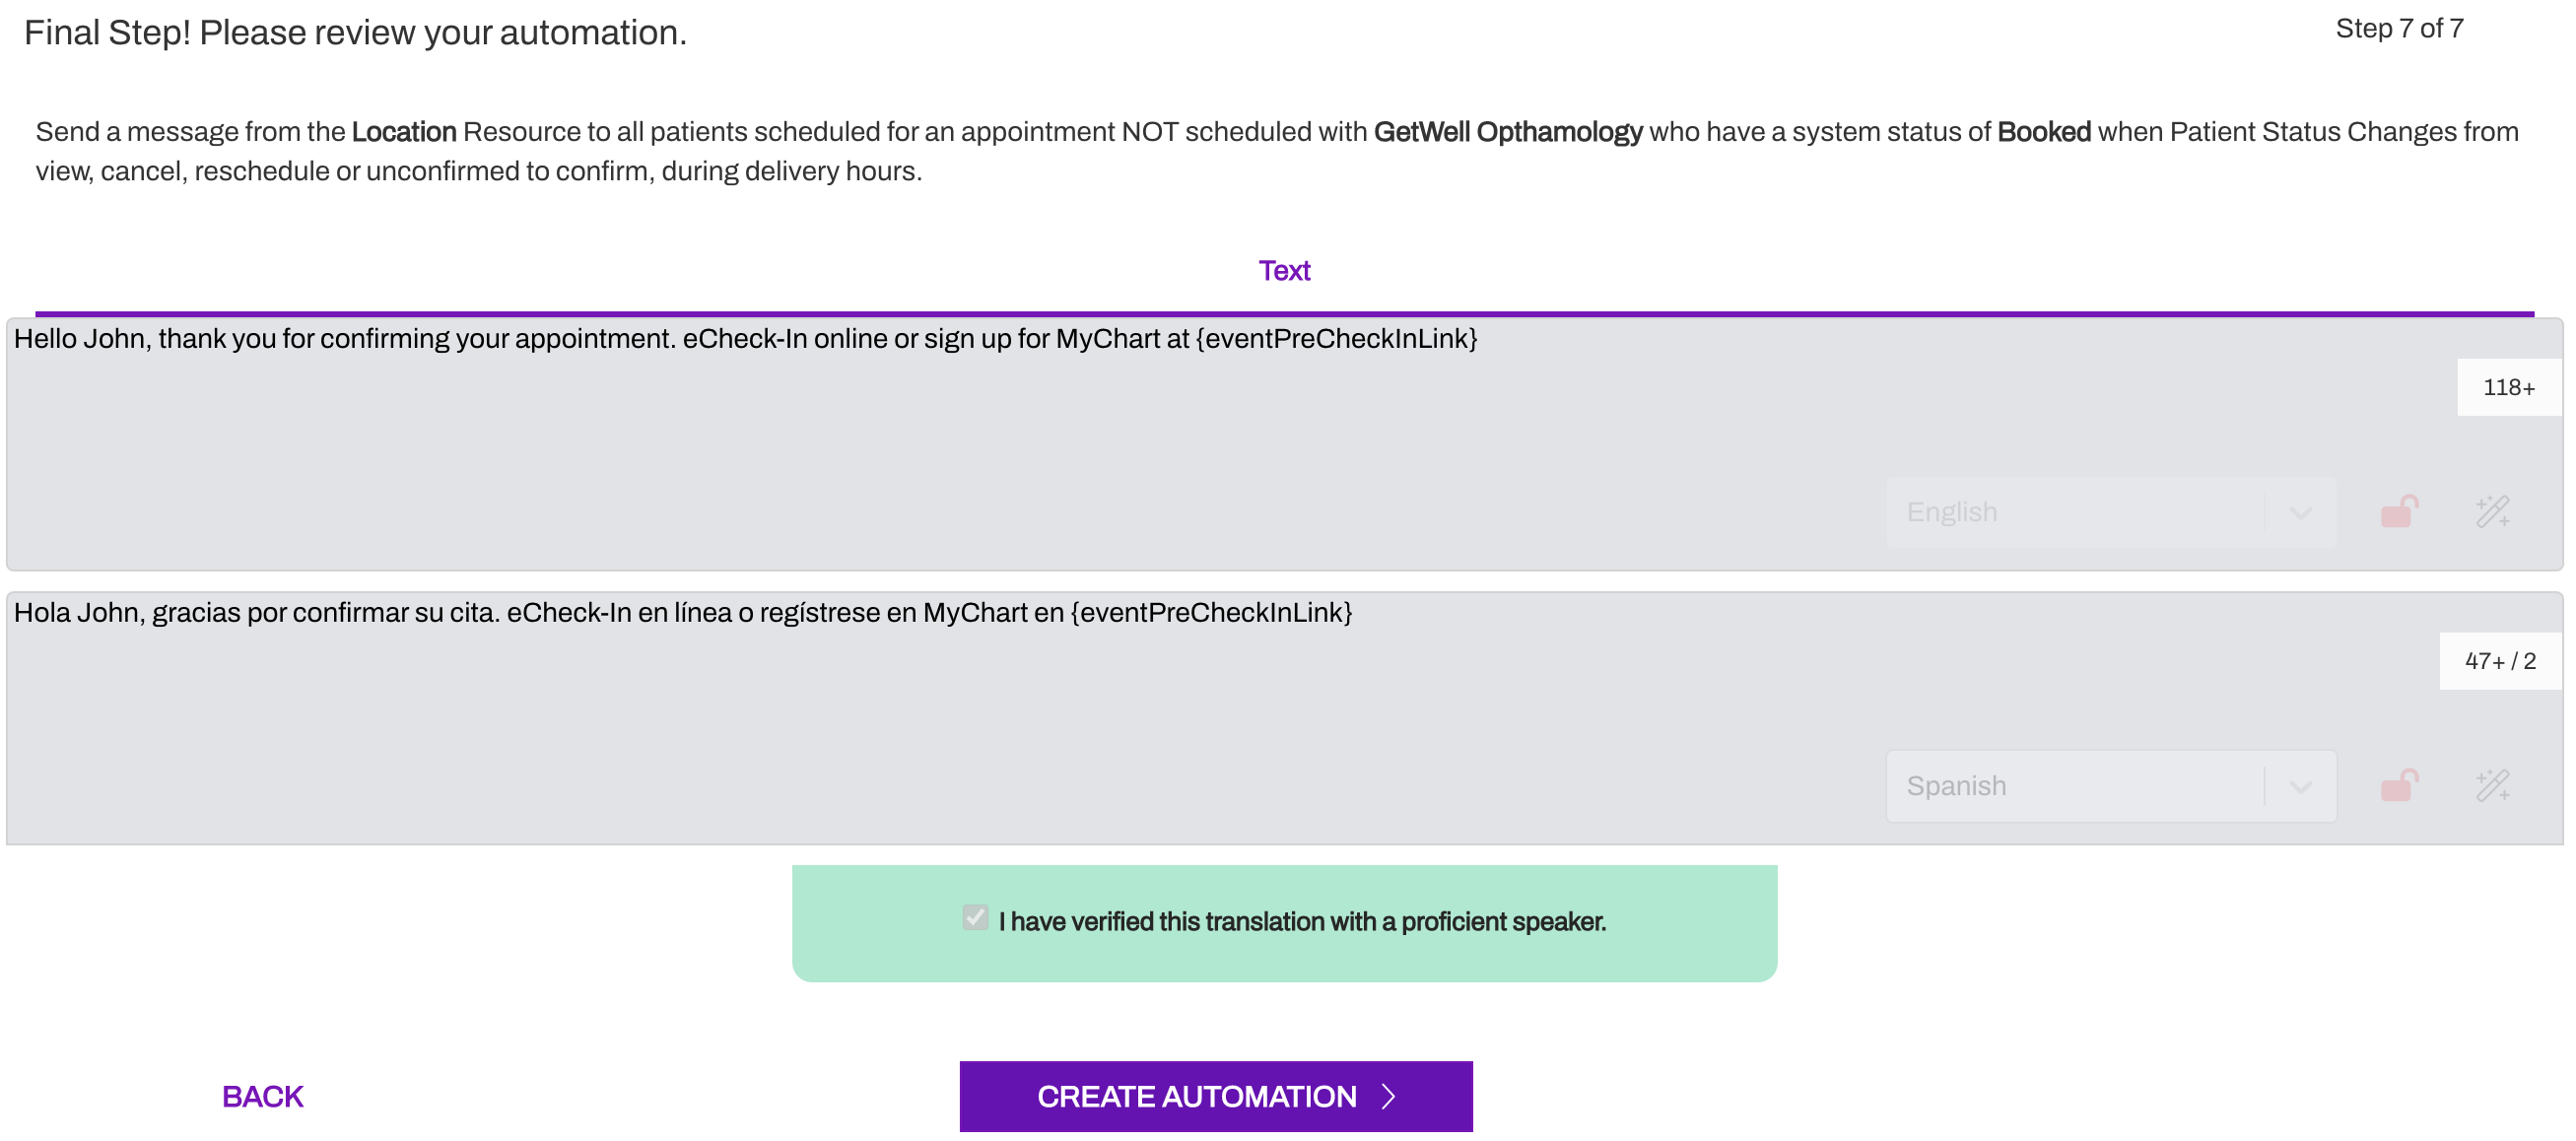
Next, configure the send timing to send the Automation to the patient after they have confirmed their appointment. We recommend using 0 minutes after Patient Status Changes from view, cancel, reschedule, unconfirmed to confirm.

Determine if you would like to merge this message. Typically, Artera does not recommend merging messages that are sent instantly in response to a patient action.
Select Create Automation.

The Automation will be available to start from your paused tab. Before starting your new Automation, confirm that any conflicting Automations (e.g. Automations triggered based on the Patient Status Change to confirm) have been paused.
To pause a running Automation, select the (...) menu and choosr Stop Automation. This will move the Automation to the paused tab.

Next, open the paused tab and locate the eCheck-In Automation. Use the (...) menu to select Start Automation.

Quick Responses
You may find it helpful to build a few Quick Responses that allow users to quickly send the {eventPreVisitFormsLink} Smart Phrase to patients who have not completed their eCheck-In form prior to their visit. Click here for instructions on building Quick Responses.
Sample Language
- “Hi {clientFirstNameProperCase}, we look forward to seeing you! To expedite your visit, please complete your digital check-in before you arrive: {eventPreVisitFormsLink}”
- “To join your telehealth visit with {eventProviderName}, complete your eCheck-In using this link: {eventPreVisitFormsLink}”