Triggers - Referrals
- Get Started
- Release Notes
- Triggers
- Patient Channel
- Troubleshooting and FAQ
- Patient Facesheet
- Technical Specifications
- Insights & Analytics
- Collaborative Inbox
- Conversation Flows
- Campaigns
- Lines & Resources Requests
- Lines, Events, Resources
- SMS Basics
- Automations
- Referrals
- Add-Ons
- Users and Groups
- Platform Settings and Configuration
- Self-Rescheduling
- Recalls
- Marketplace
Table of Contents
Create a New Referral Trigger Configure Artera Practices Configure FiltersReview FiltersConfigure Trigger MessagingMerging MessagesSet Referral Trigger TimingSend RulesReview TriggerFAQsAs an Enterprise User, you can configure Referral Triggers that can be used across your Practices. This functionality allows you to set a standard for your organization, controlling both message timing and brand voice.
Create a New Referral Trigger
-
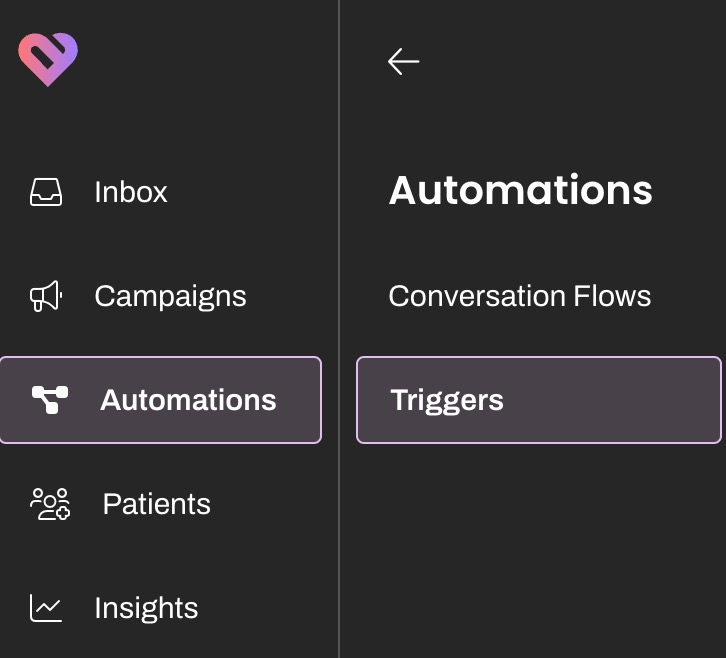
From the Navigation Bar, select Automations > Triggers.
-
Select Create New in the top-right corner.

-
Add a Trigger Name. This will serve as the Referral Trigger's title, so be sure to use consistent naming conventions. Next, select Referral from the Trigger Module drop-down and determine which Resource this Trigger should be sent from.
Tip: Resource types are Provider, Location, Device, and General. Many customers send by Location Resource.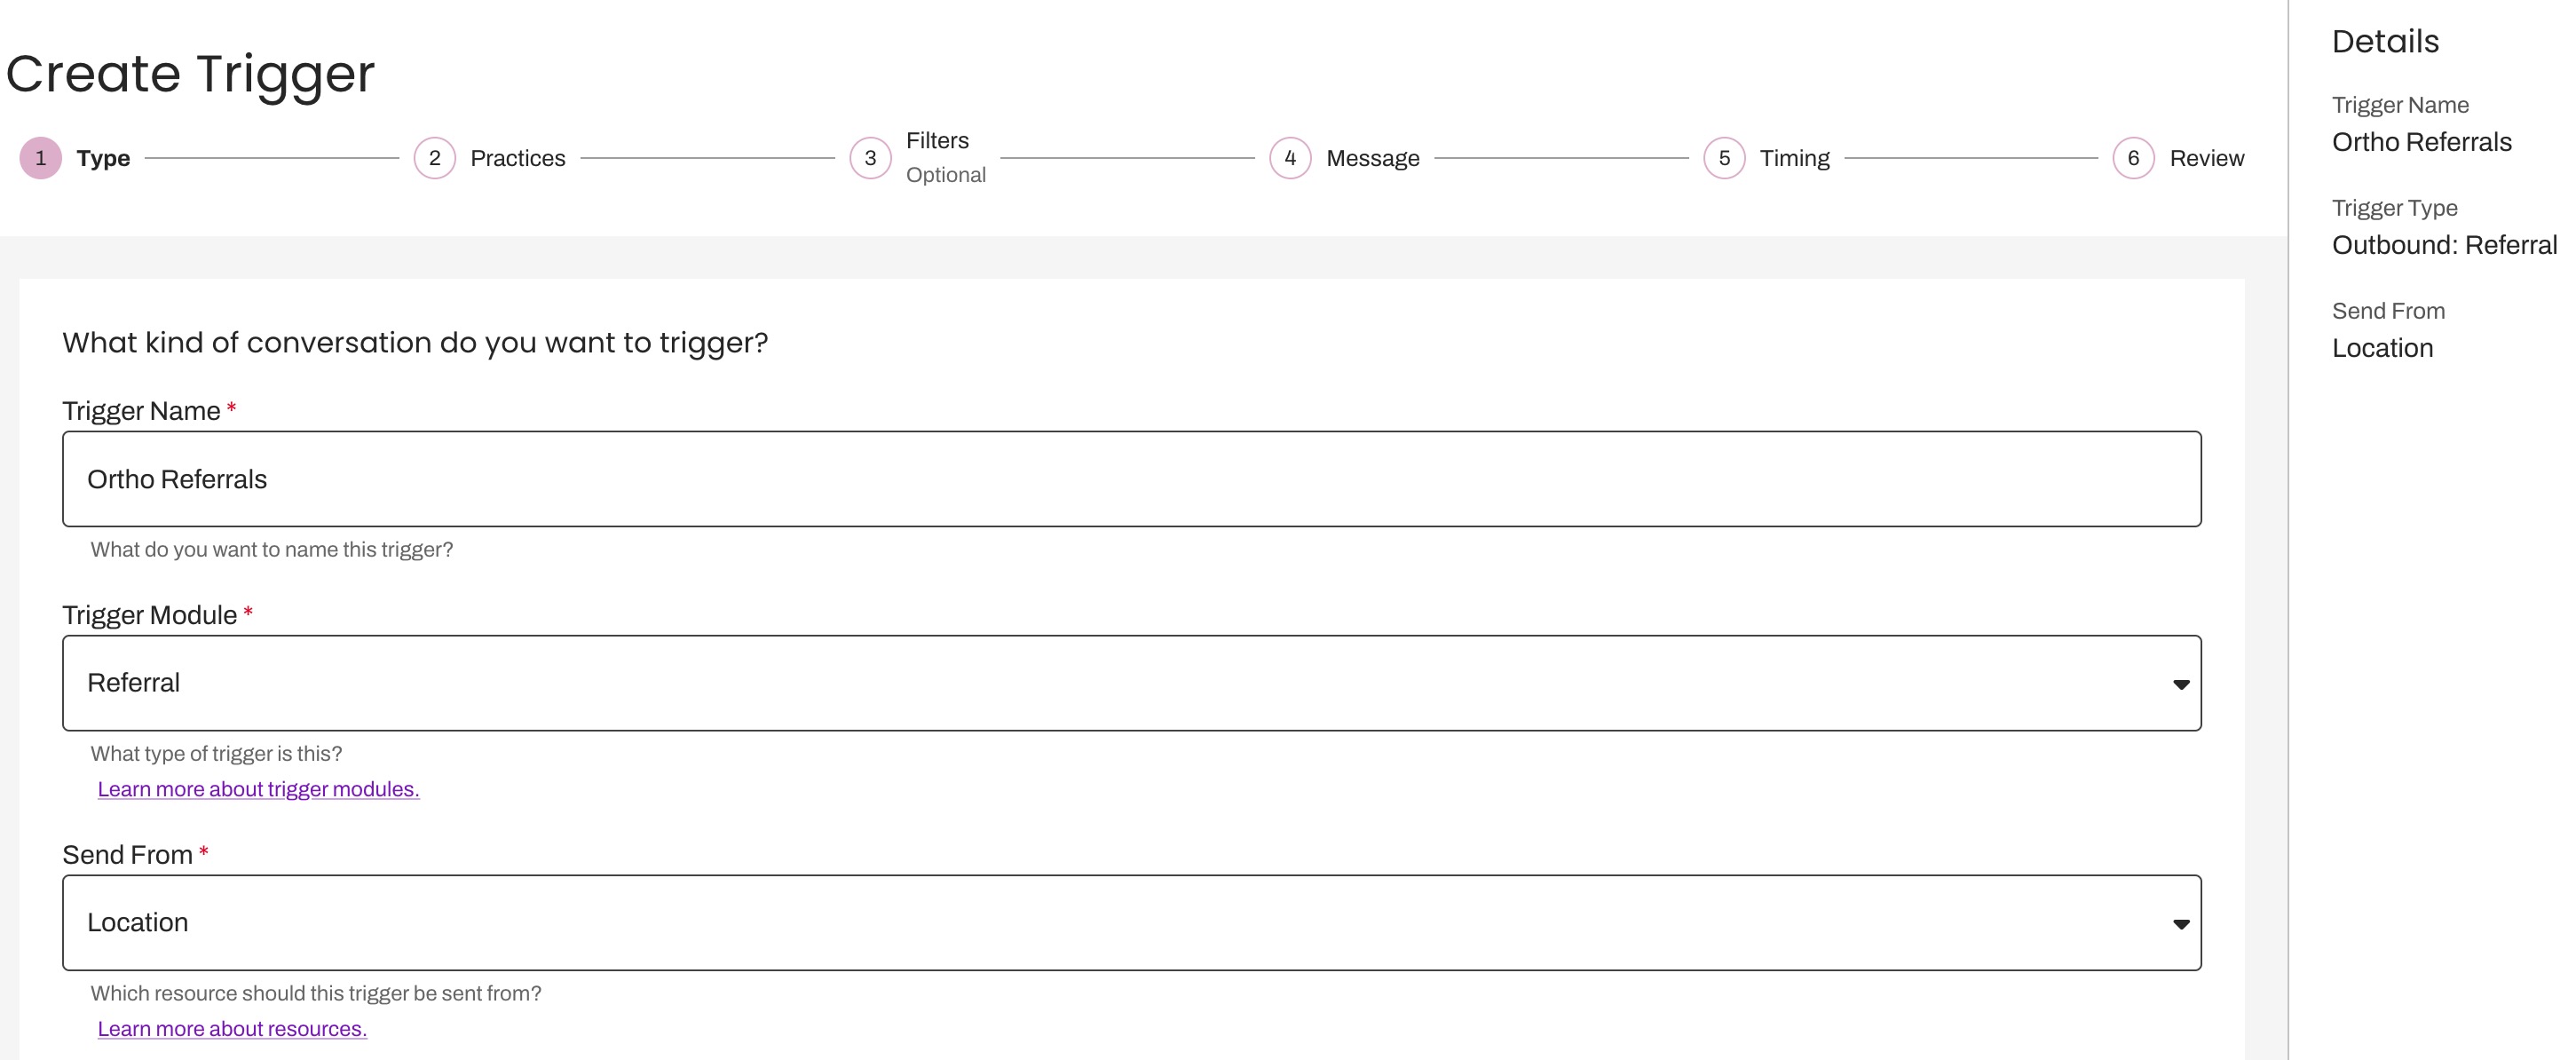 Note: As you progress through each step, the Details panel on the right-hand side will update with the Trigger's information.
Configure Artera Practices
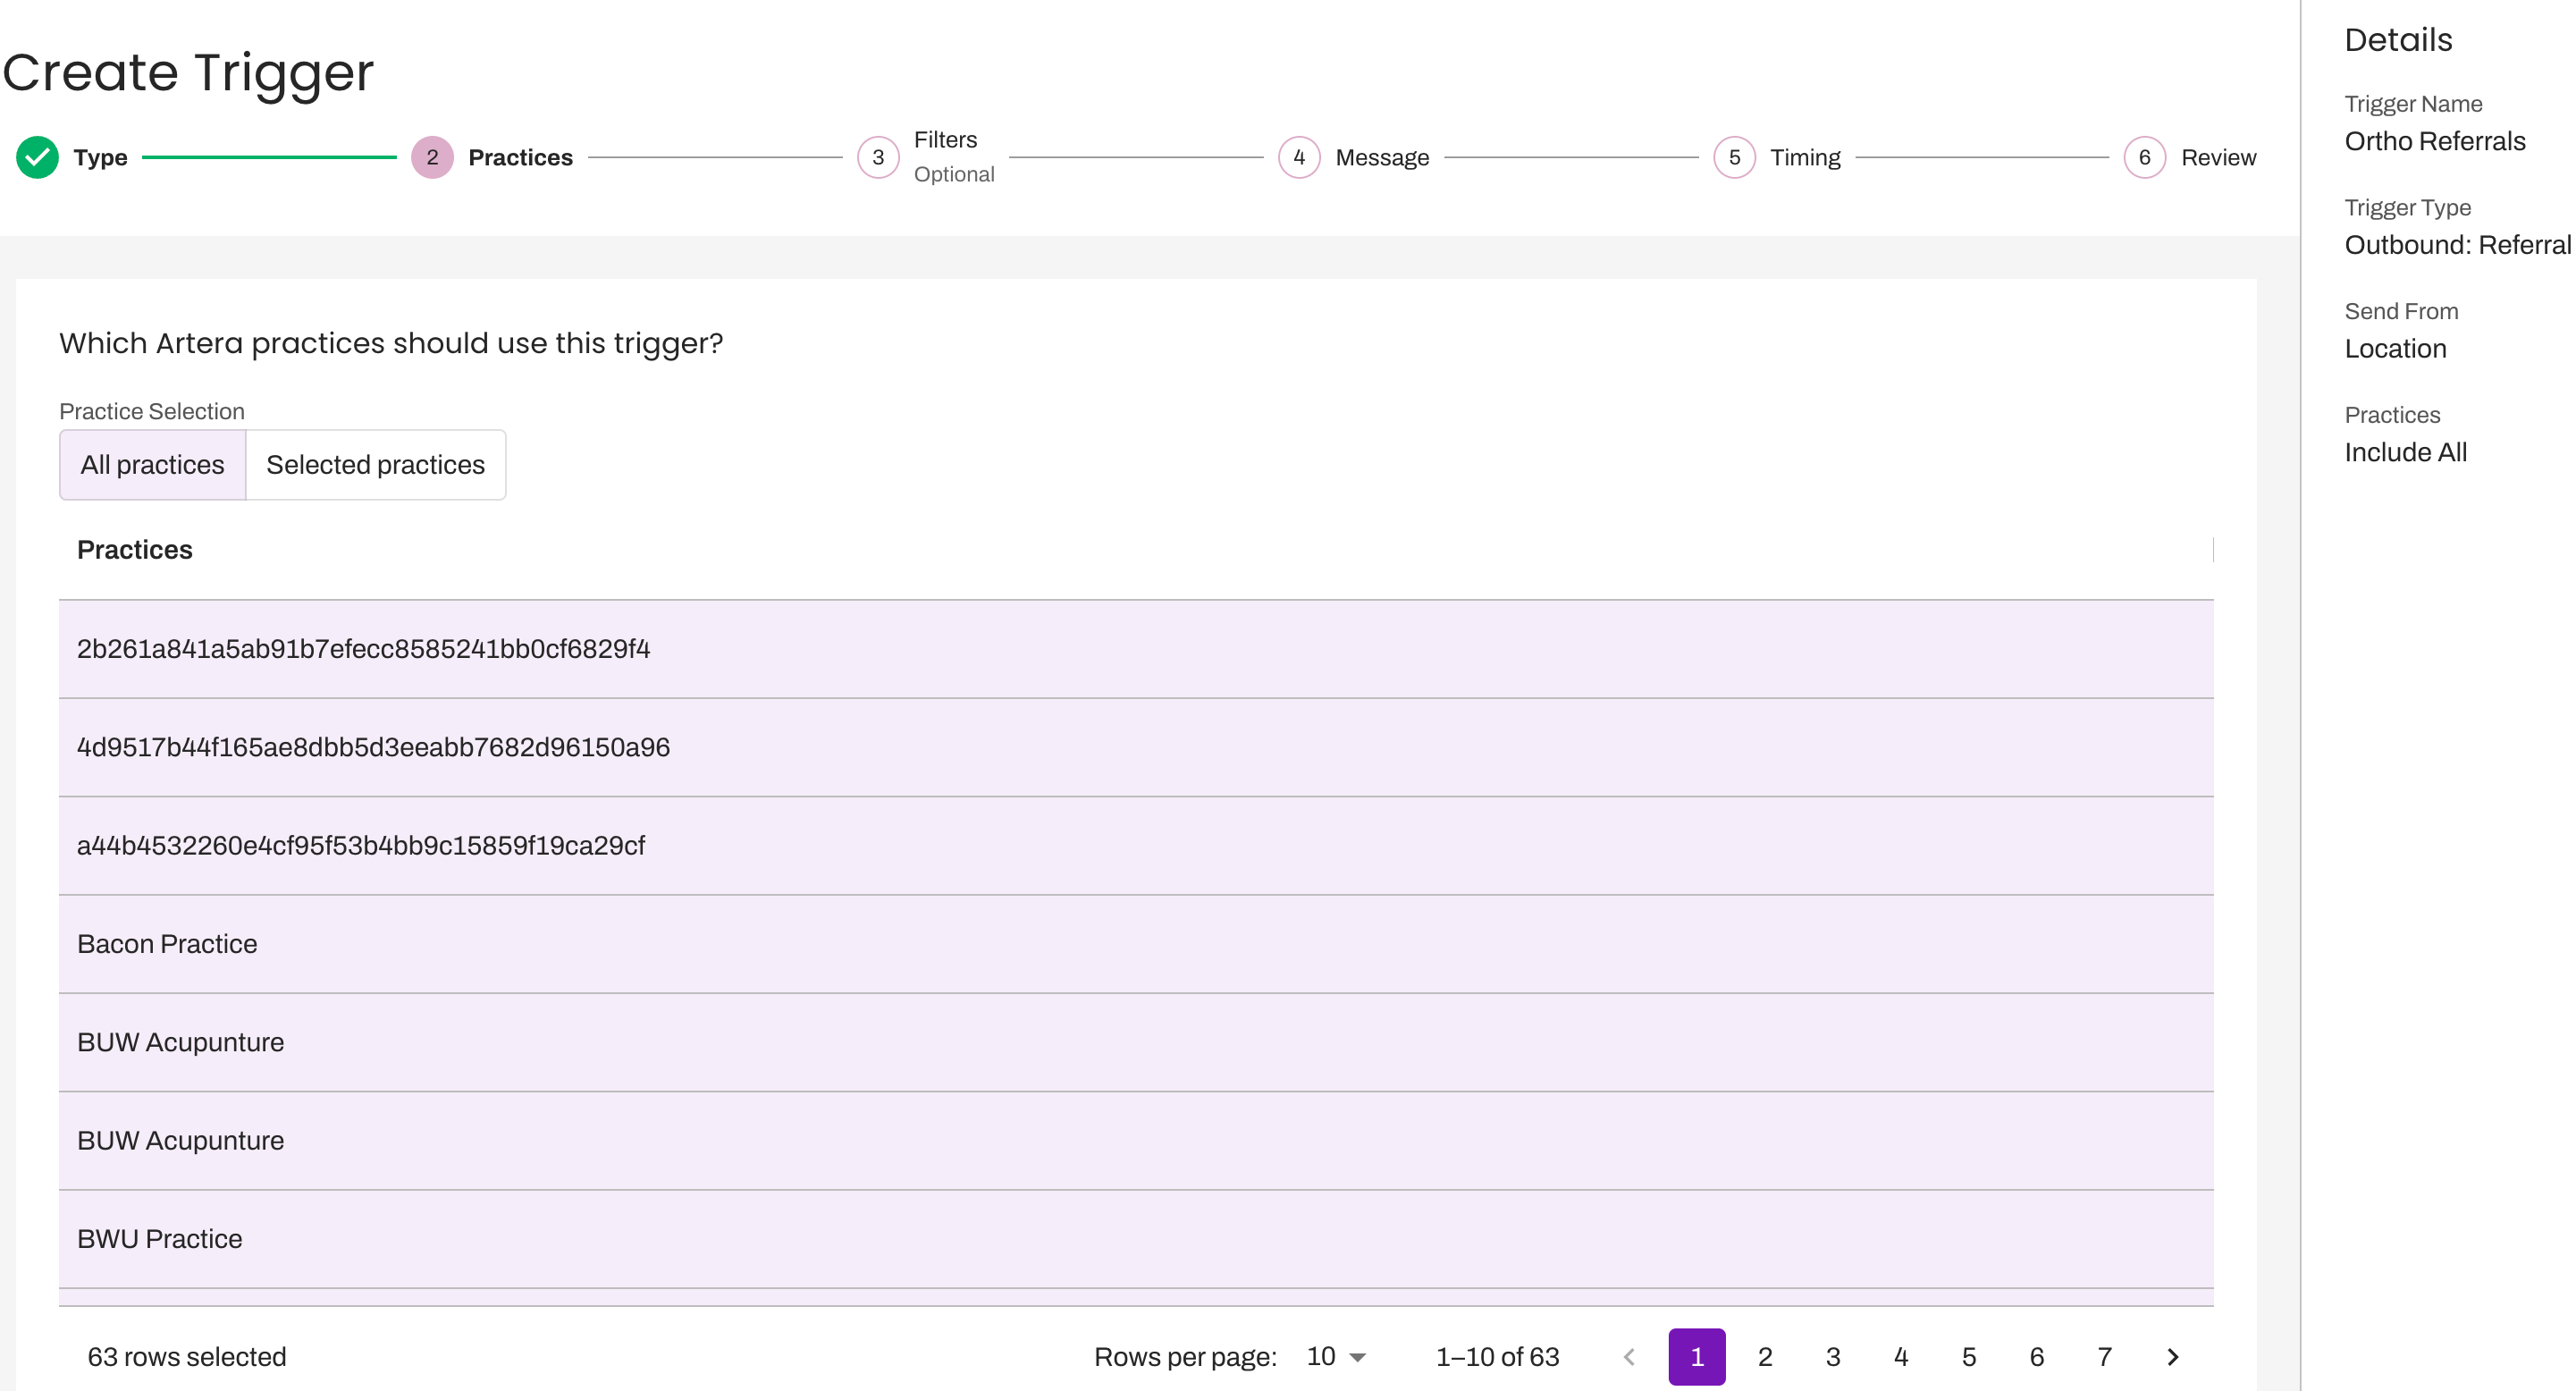
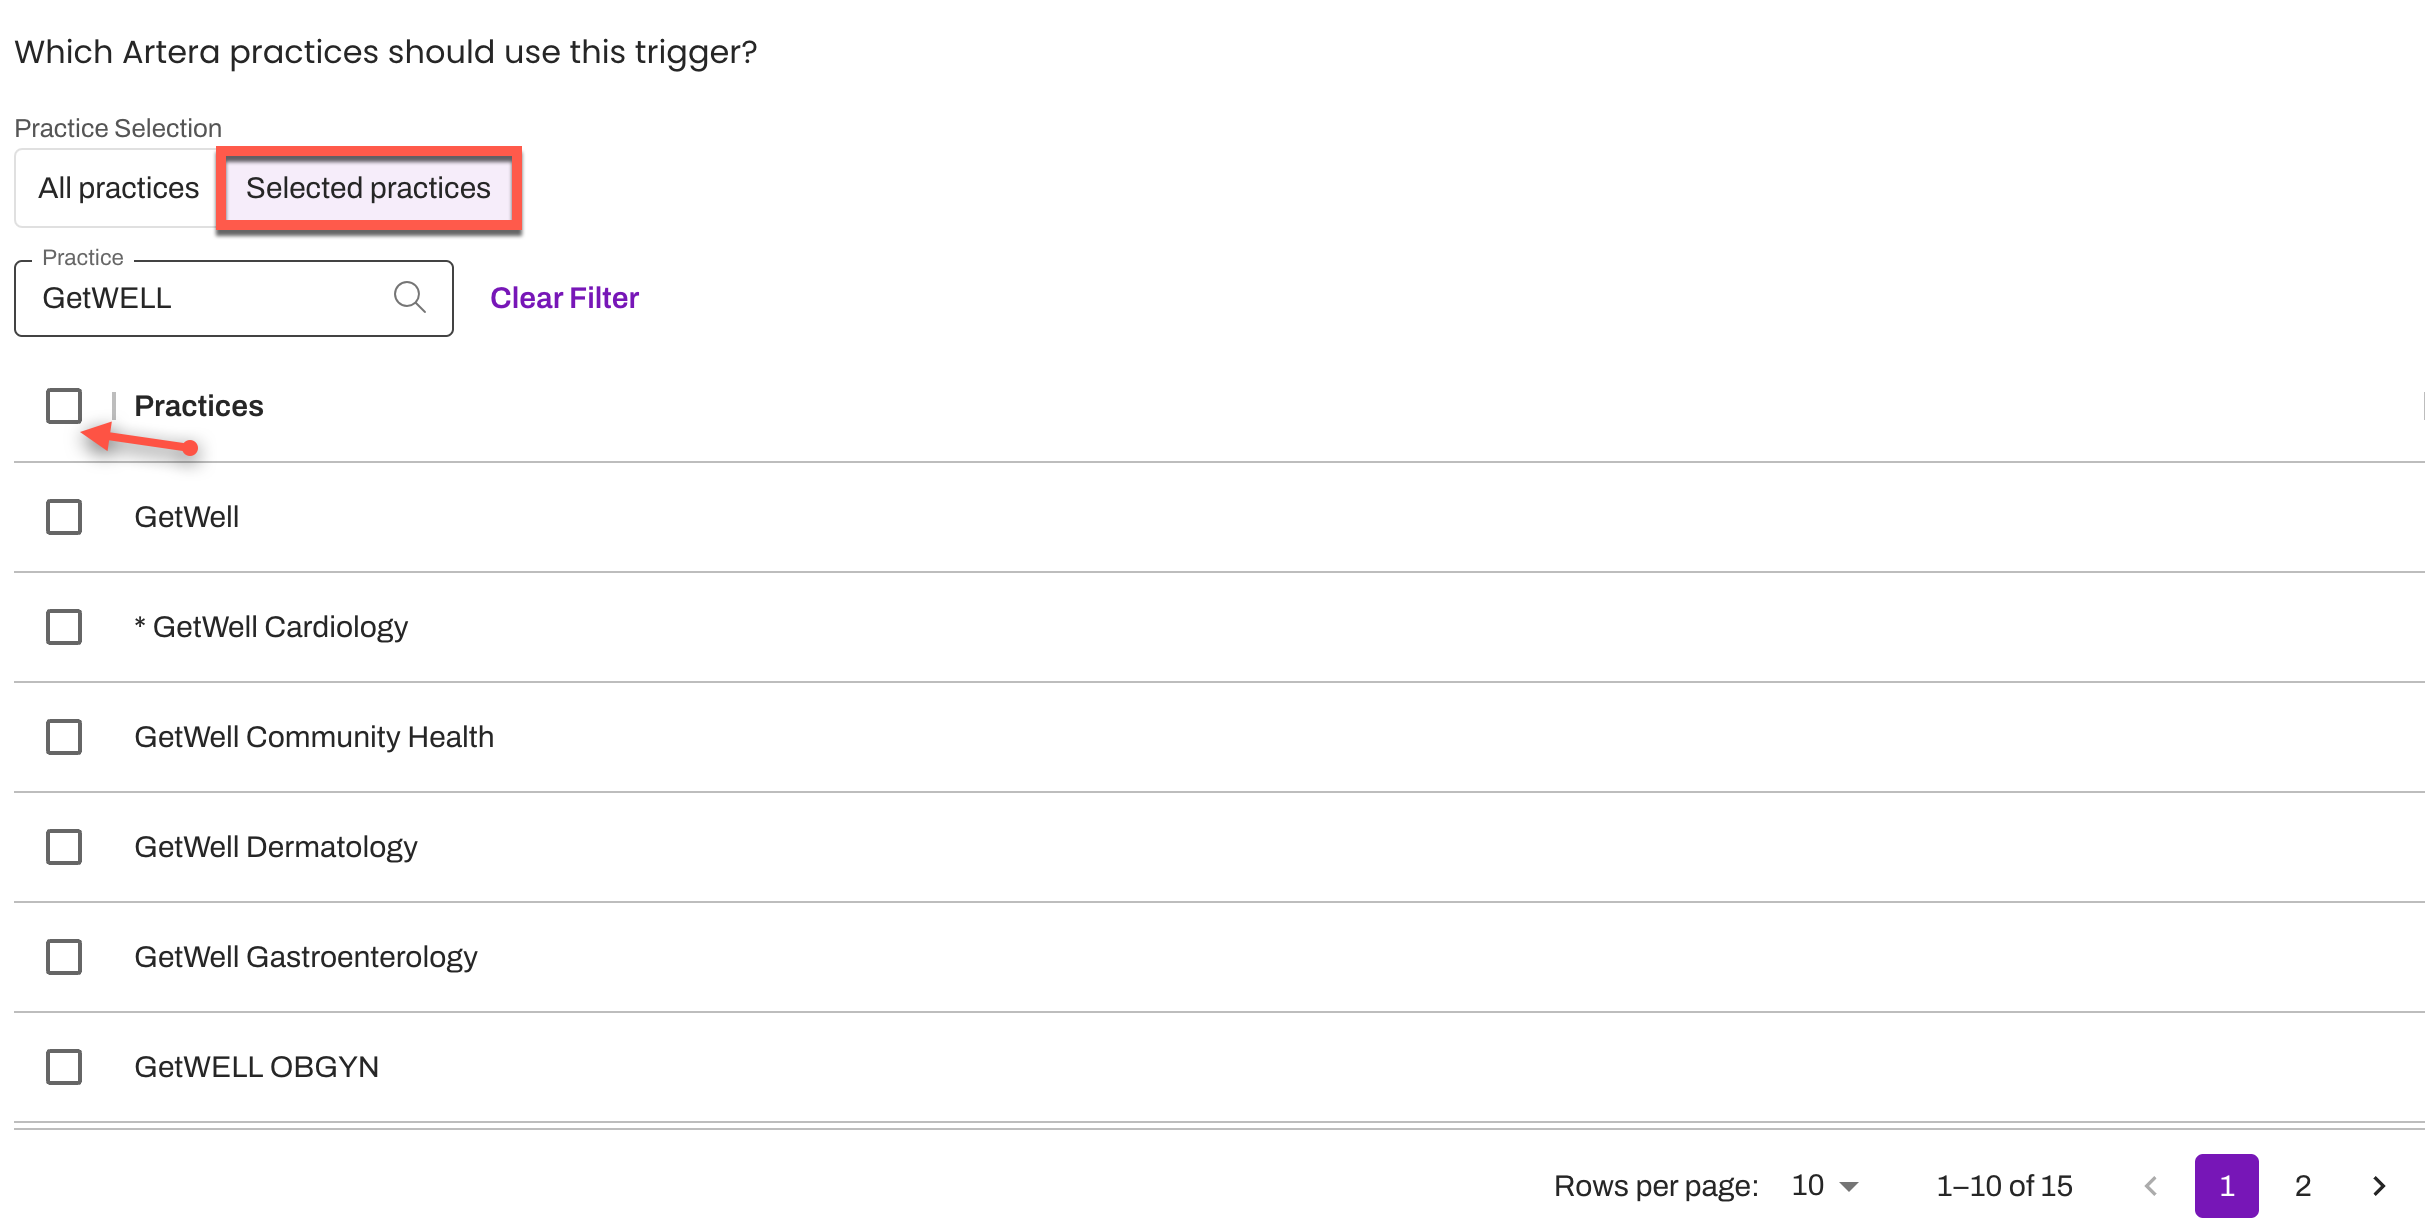
Select the Practices that will send the Referral Trigger. Note: By default, all Practices will be auto-selected.
To locate specific Practices, click the Selected Practices tab and use the search bar to search by Practice name. Include Practices in the Trigger by using the check box near the appropriate Practice. Tip: Update the Rows per page up to 100 for larger Enterprises with many Practices.
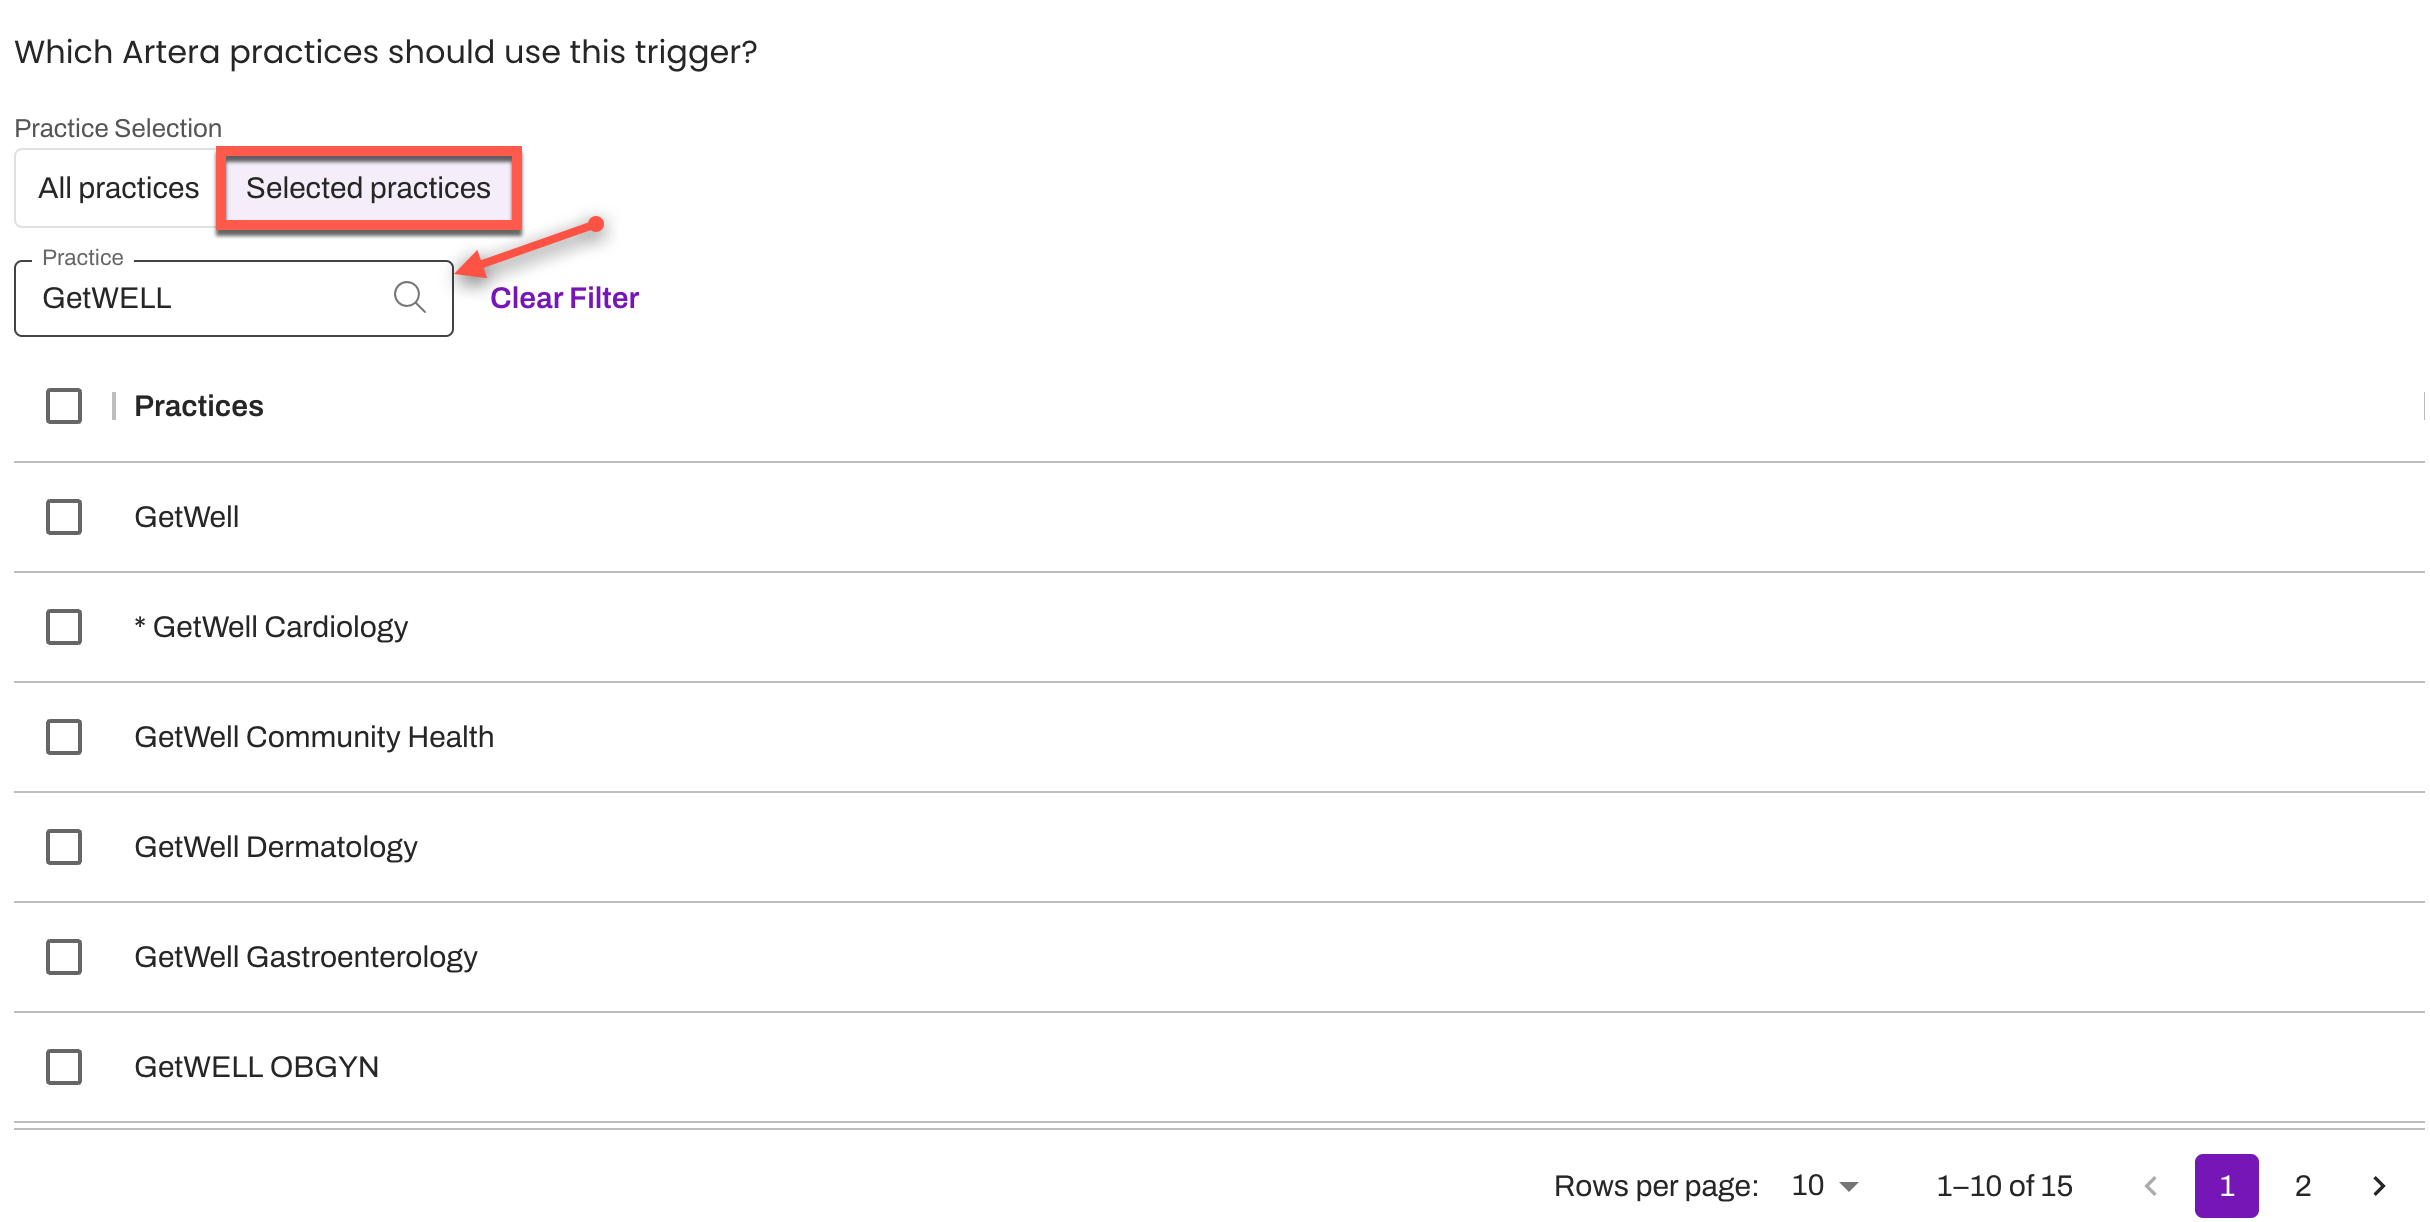
To bulk select your search results, use the check box located to the left of ‘Practices’.
Configure Filters
Audience
-
Configure the Audience filters for the Referral Trigger. This indicates the targeted patient population for the Referral Trigger.
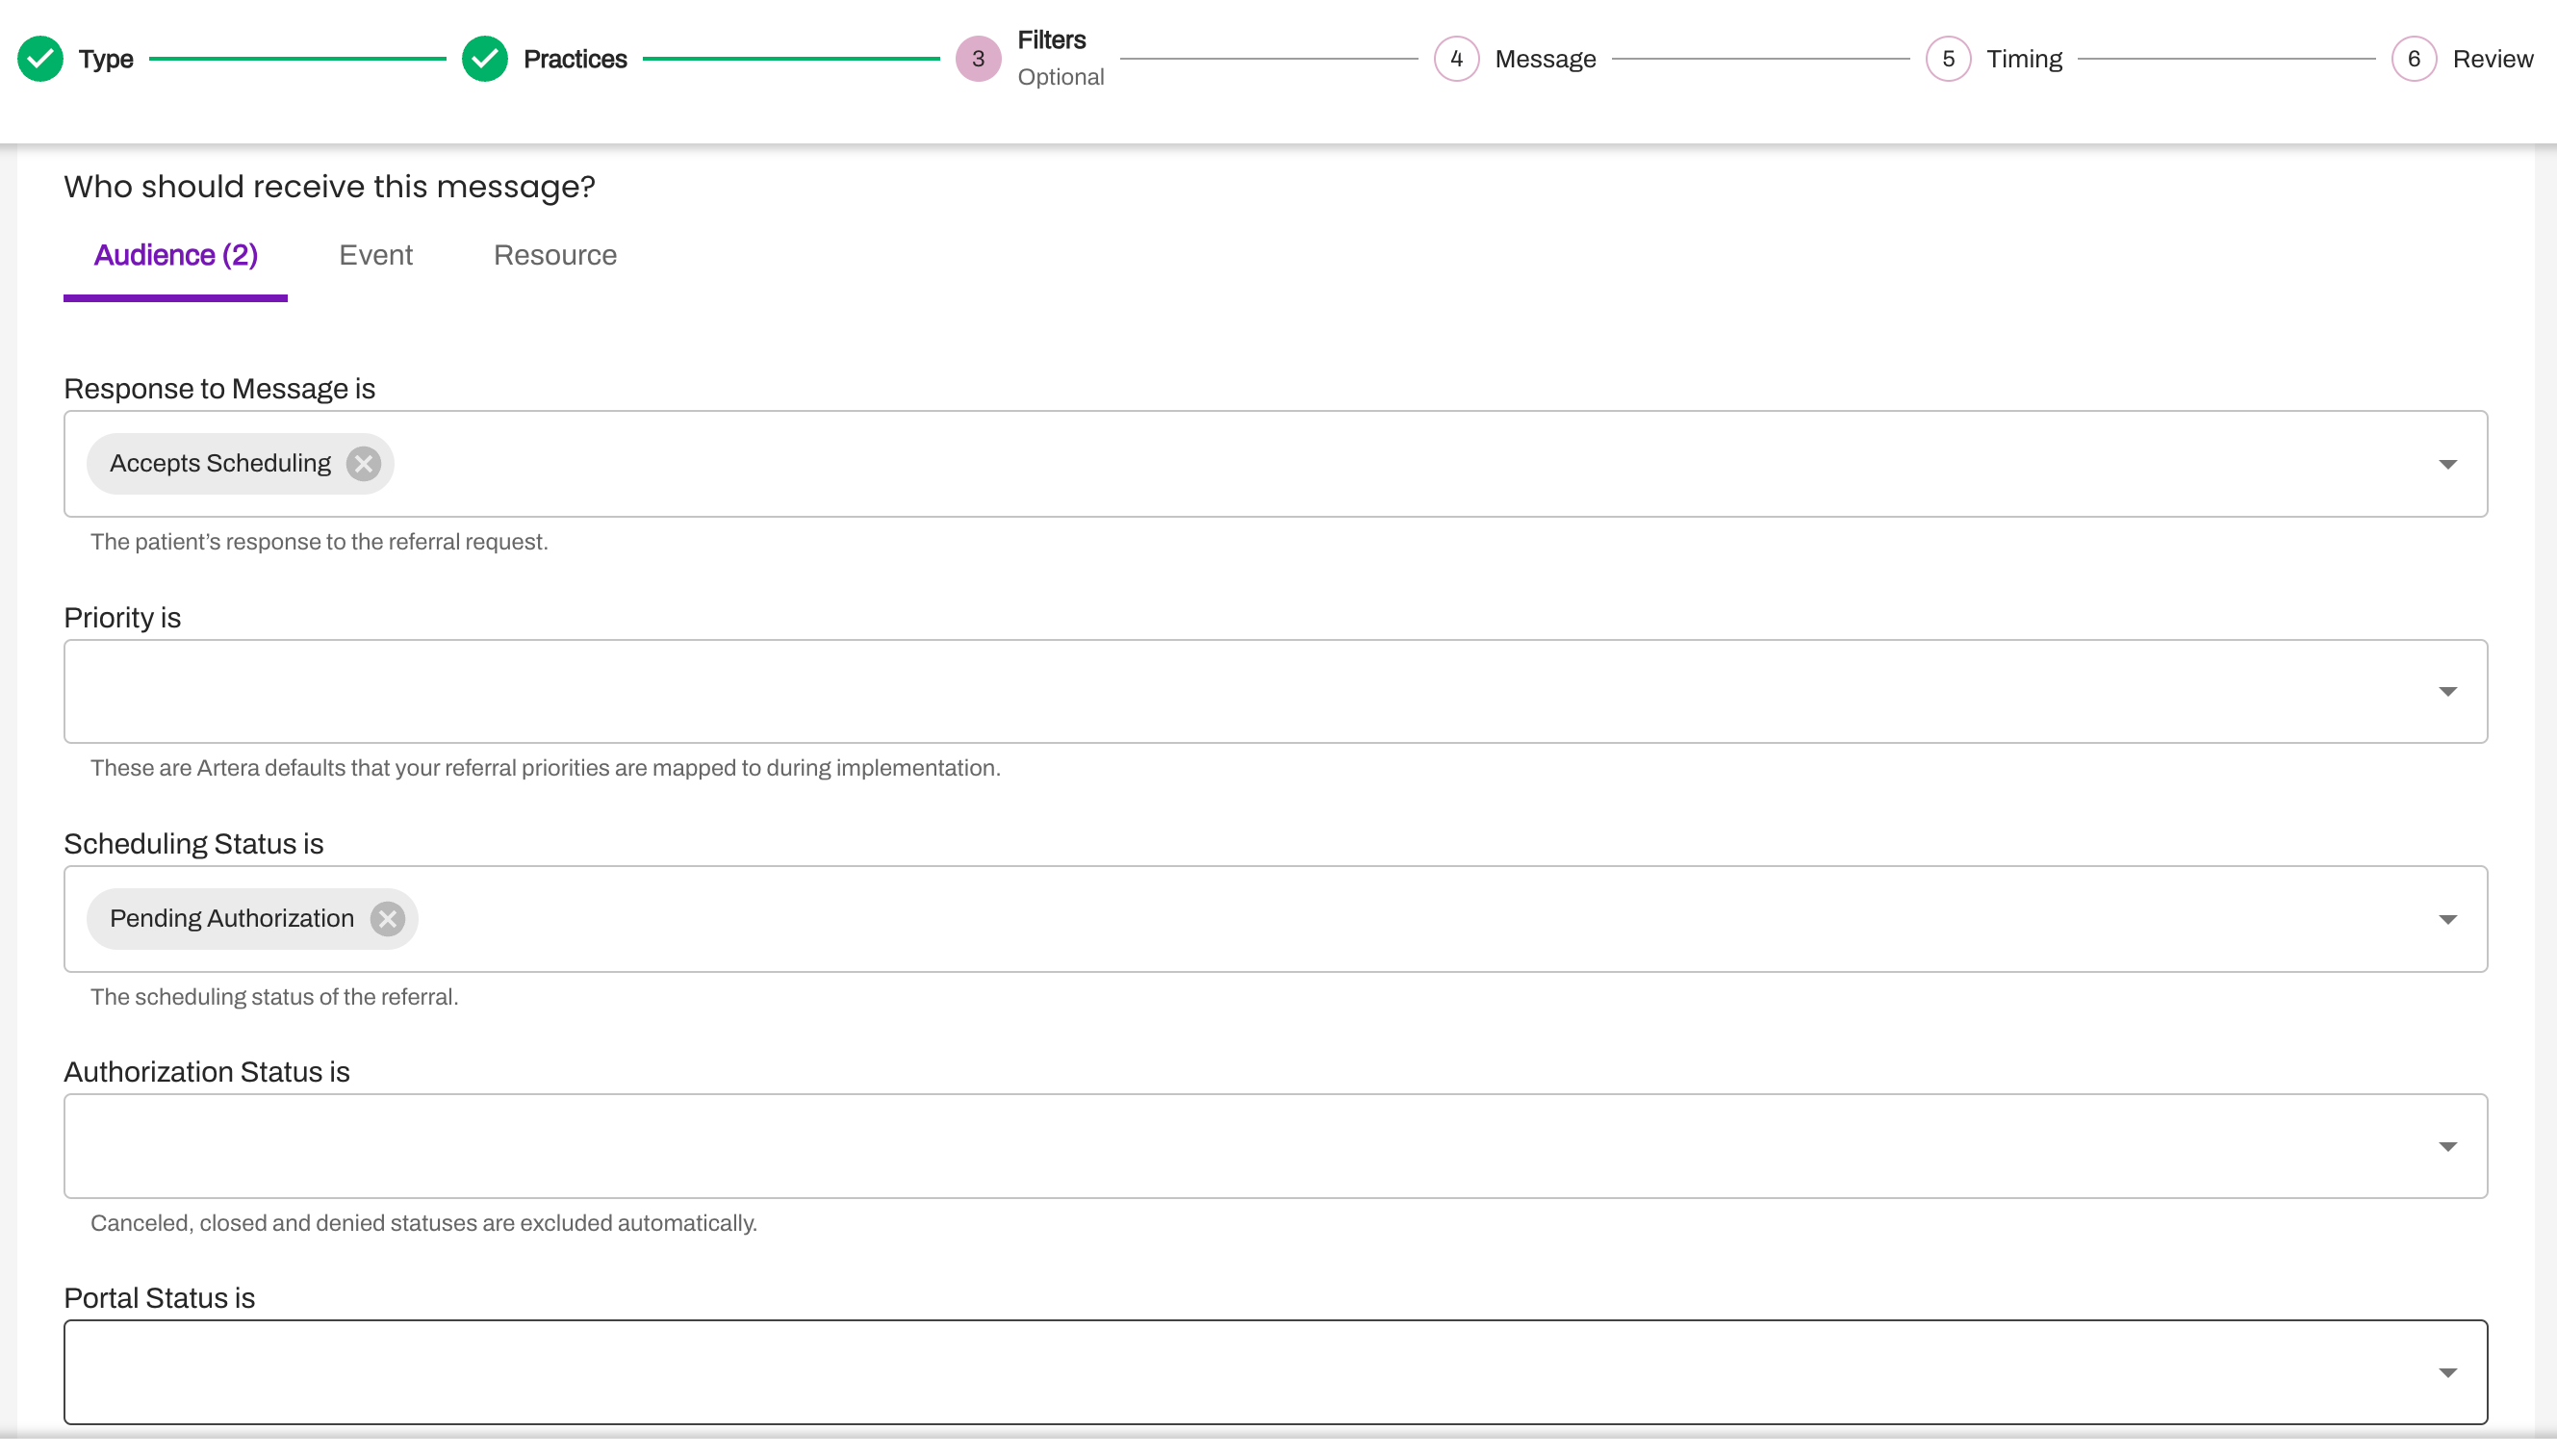
- Response to Message is: You can restrict the delivery of the Trigger based on patients who have not responded by using the No patient response filter, however, Accepts scheduling and Declines scheduling are no longer supported through standard Triggers and can be configured within the Conversation Builder Conversation.
- Priority is: You can restrict the delivery of the Referral Trigger based on the Referral priority status: Elective, Emergency, Routine, or Urgent. These are Artera defaults that your Referral priorities are mapped to during implementation.
-
Scheduling Status is: You can choose to only send Triggers to Referrals with specific referral scheduling statuses (e.g. only message patients in the Ready for Scheduling status). The following Artera default statuses are available:
- Pending Authorization
- Ready For Scheduling
- Some Visits Scheduled
- All Visits Scheduled
- Patient Will Self Schedule
- Do Not Schedule
- Scheduled
- All Visits Complete
- Some Visits Complete
- Appointment Cancelled
-
Authorization Status is: You can also choose to send Triggers based on the Referrals's Authorization status. The following Artera default statuses are available:
- Authorized
- Incomplete
- New Request
- Open
- Pending Review
- Portal Status: These statuses indicate whether or not the patient is enrolled in your Patient Portal. Portal information is set up during implementation and not all EMRs support sending this data.
Event
-
Navigate to the Event tab and select the Referral Procedures eligible for this Trigger. By default, all Referral Procedures will automatically be selected. NOTE: If a Trigger is configured with only one Event (Referral Procedure) and that Event (Referral Procedure) gets disabled, the Trigger will send to all patients. Therefore, it's important to ensure that you stop the Trigger if the Event (Referral Procedure) associated with the Trigger is disabled. Click here to learn about disabling Events.
-
To locate Referral Procedures across all of your Artera Practices, click the Selected procedures tab and use the search bar to search for Referrals.
- Procedure Code: This is the Procedure Code
-
Code Name: This is the name of the Procedure Code
-
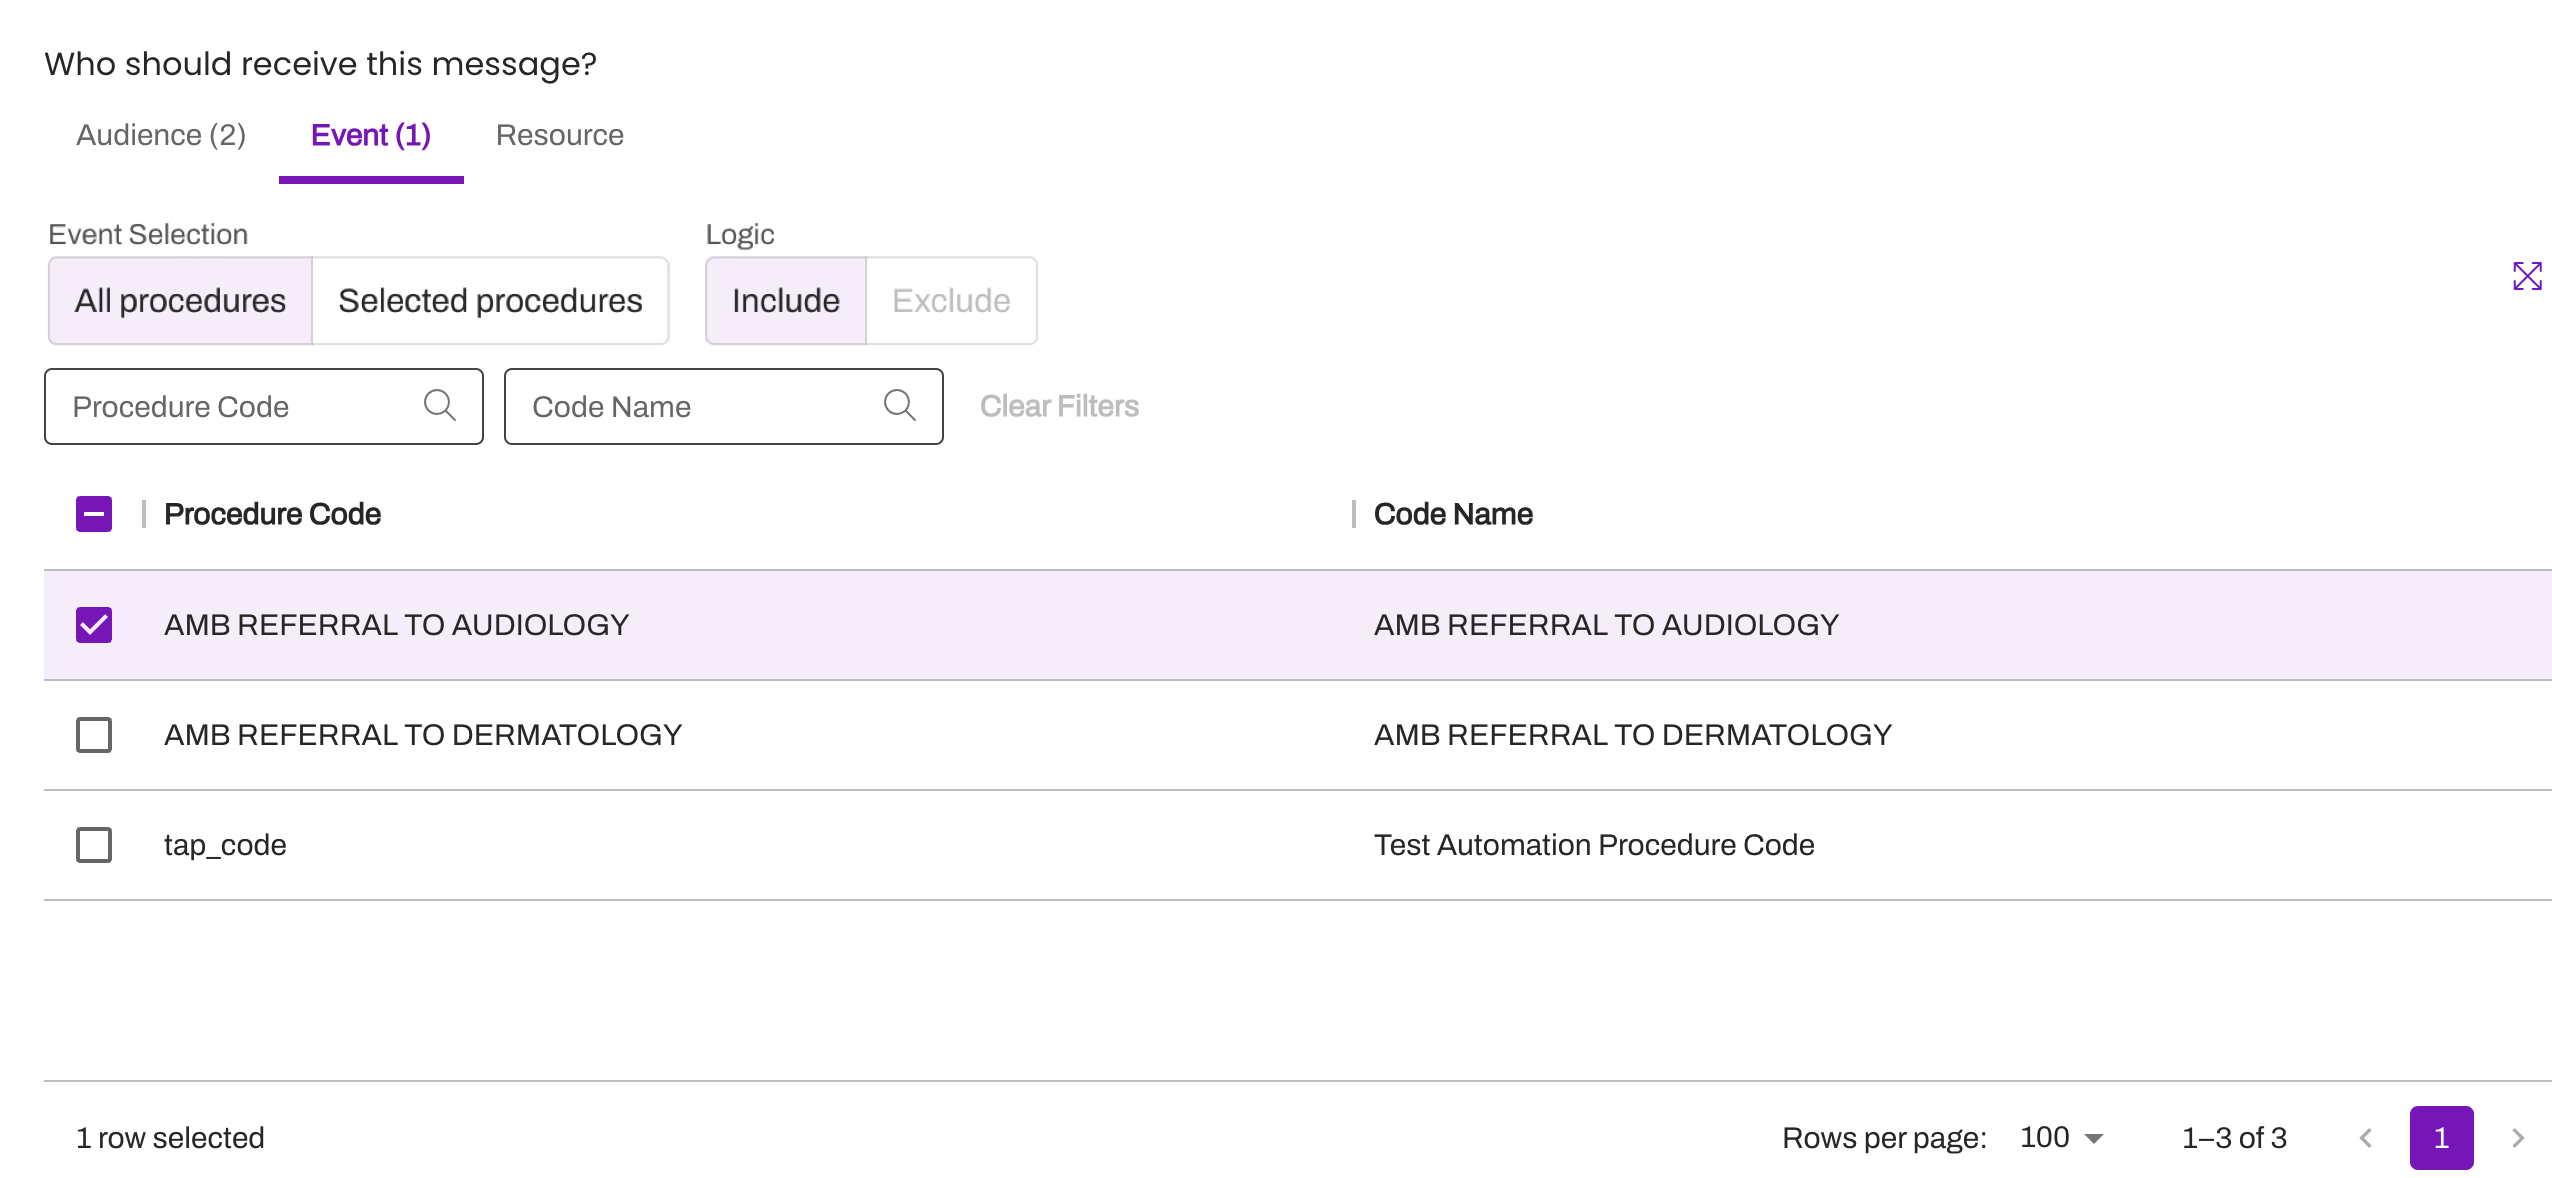
Use the search bar to locate your Procedure Codes. Include Procedure Codes by using the check box next to each Referral.
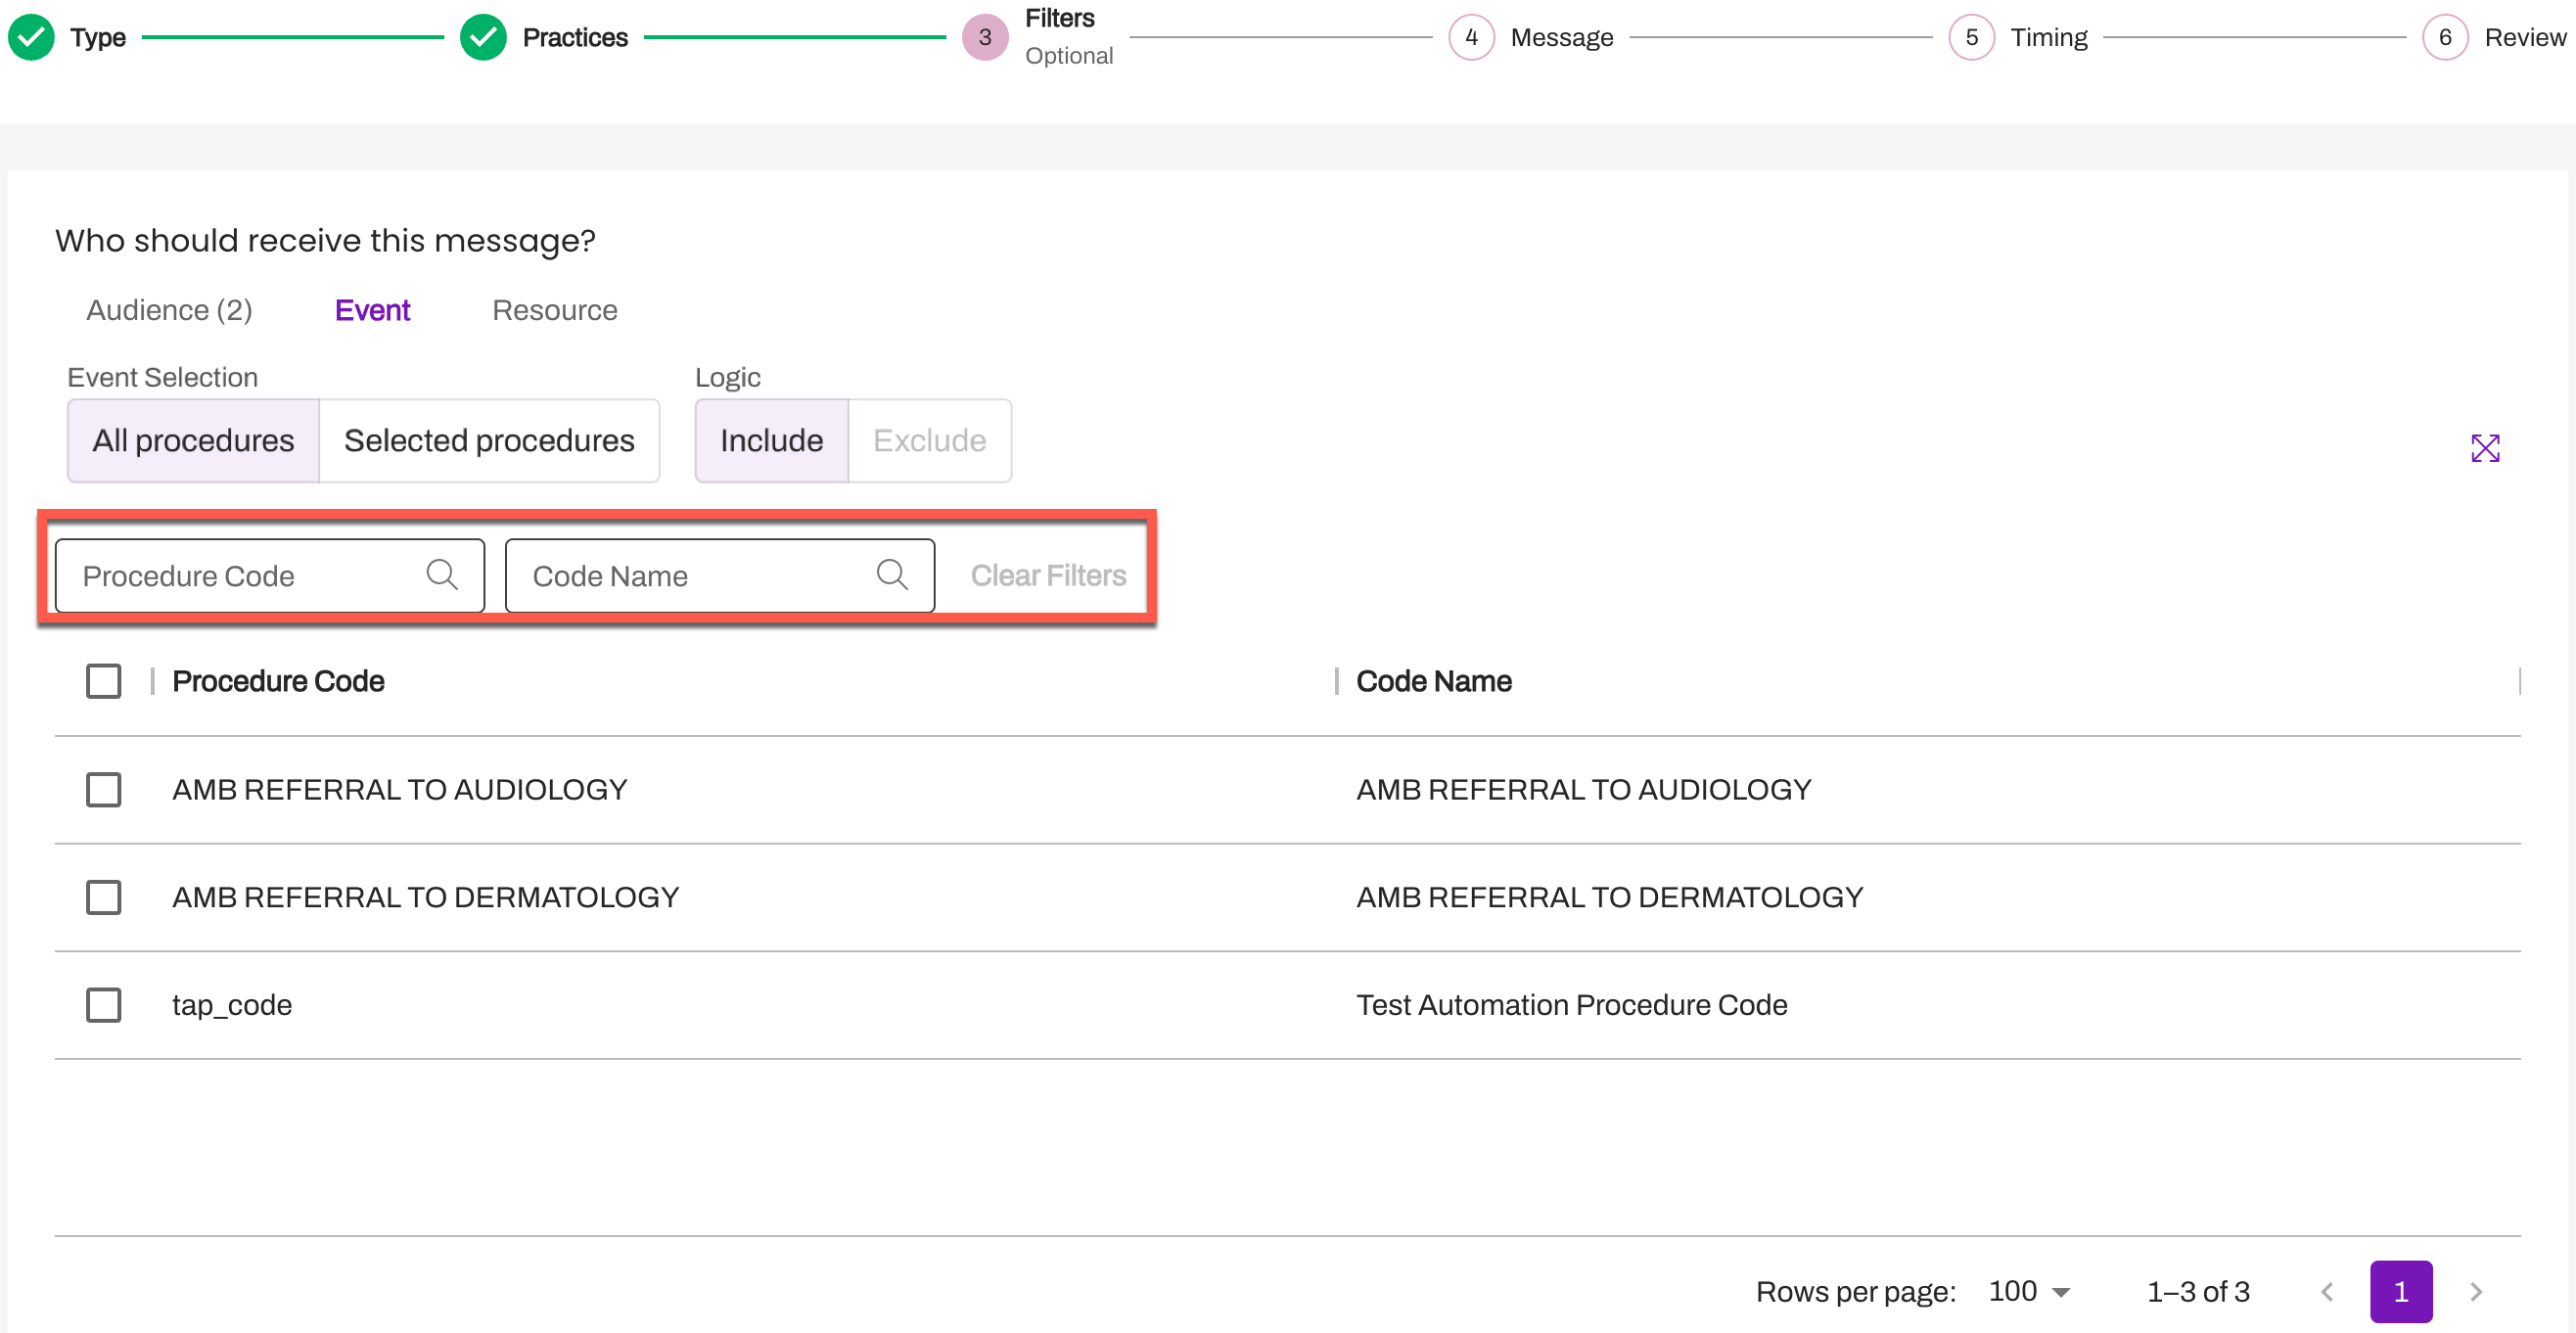
- To bulk select your Procedure Code search results, use the check box located next to Procedure Code.
- To maximize your view, use the Expand icon and a new window will open.
-
Use the search bar to locate your Procedure Codes. Include Procedure Codes by using the check box next to each Referral.
-
Determine if the Referrals selected should follow inclusionary logic by selecting Include or exclusionary logic by selecting Exclude. In some instances, it may be easier to exclude the Procedure Codes that you do not want to send a Trigger to rather than to include all the ones you do.
-
To locate Referral Procedures across all of your Artera Practices, click the Selected procedures tab and use the search bar to search for Referrals.
Resource
- Navigate to the Resource tab and select the Resource filters eligible for this Trigger. NOTE: If a Trigger is configured with only one Resource and that Resource gets disabled, the Trigger will send to all patients. Therefore, it's important to ensure that you stop the Trigger if the Resource associated with the Trigger is disabled. Click here to learn about disabling Resources.
-
Determine if the Resources selected should follow inclusionary or exclusionary logic by selecting "is" or "is not." In some instances, it may be easier to exclude the Resources that you do not want to send a Trigger to rather than to include all the ones you do.
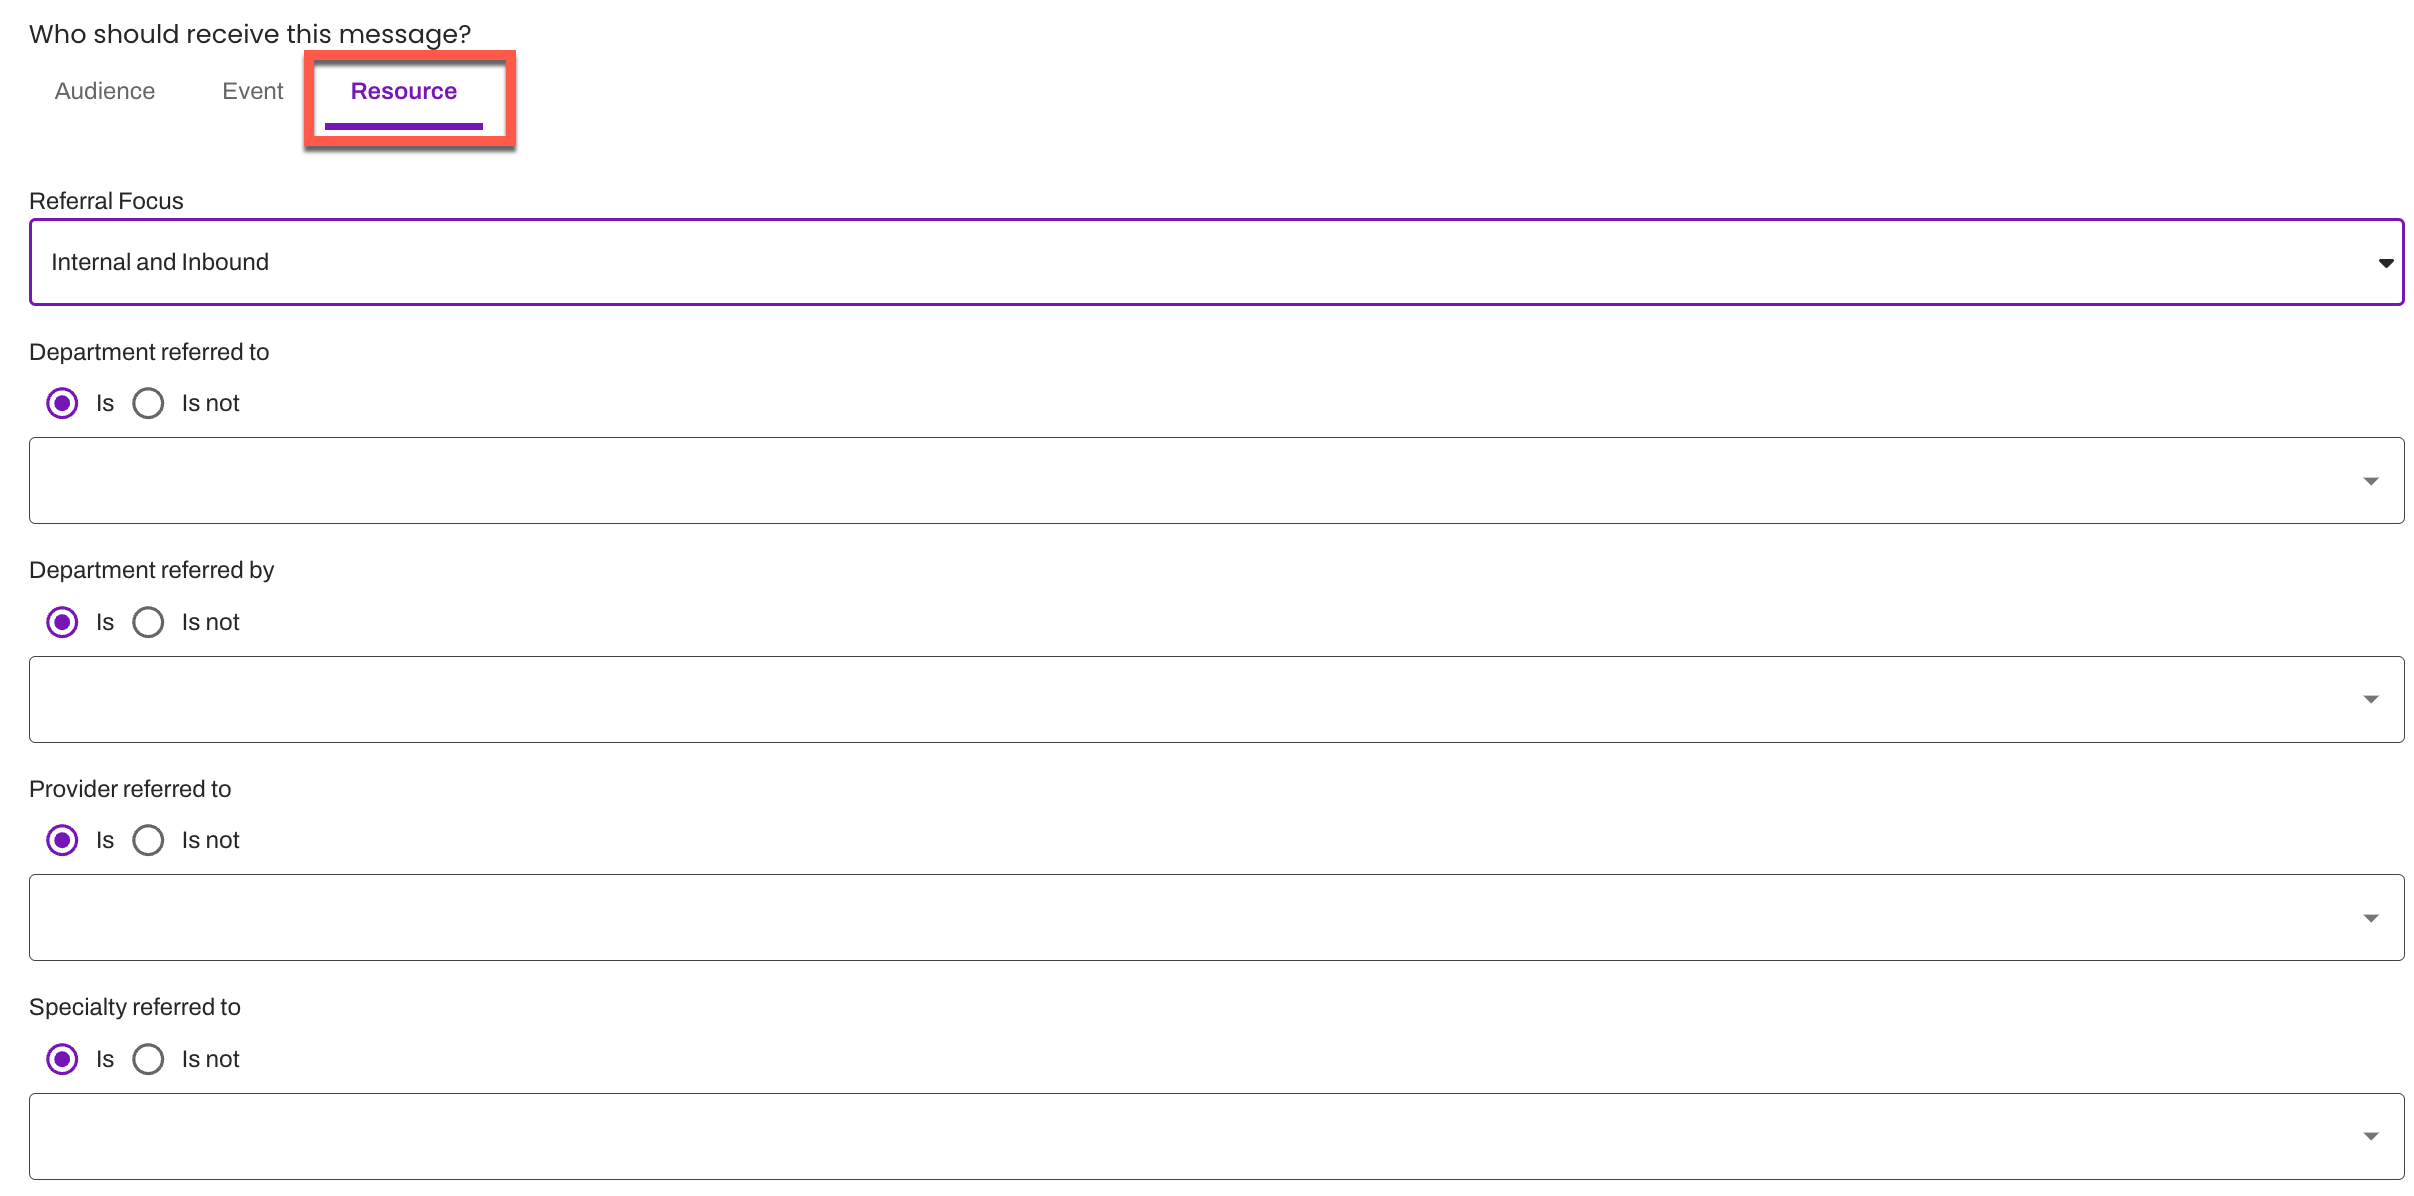
- Referral Focus: Select "Internal and Inbound." If you select "Outbound External," the Trigger will not send. For more information, reach out to your Customer Success Representative.
- Department referred to: Indicate the Referred to departments that will use this Referral trigger.
- Department referred by: Indicate the Referred by department that will use this Referral Trigger. NOTE: This drop-down displays all Locations mapped to the Enterprise.
- Provider referred to: Indicate the Providers that will use this Referral Trigger. NOTE: This drop-down includes an option to select 'unknown/other.' Selecting this option will filter the Trigger to include all 'Providers Referred to' that are not displayed in this drop-down menu because they do not exist in this Artera Practice. This option is beneficial for teams who need to filter a Trigger to either include or exclude patients who are referred to a Provider that does not exist within their Artera Enterprise.
- Specialty referred to: Indicate that specialties that will use this Referral Trigger.
Review Filters
Before you proceed to the next step, review your selected Filters. Do note that if you selected any Practice that does not contain the Event(s) and/or Resource(s) applied when filtering, that Practice's patients will still receive the Trigger's message as Practices override Filters. This could result in patient confusion. Be sure to only select Practices where the Event and Resource filters applied exist. To prevent patients from receiving an incorrect Trigger, remove any selected Practice(s) that do not have these Events and/or Resources.
To identify which Practices should be included:
-
Review the Details side panel and select the "Include #" hyperlink beneath Event Filters and/or Resource Filters.

-
The Practice(s) those items exist in will display in a bulleted list. The order of information displayed in a bullet is: Event or Resource Filter name, Practice name, Event or Resource External ID.
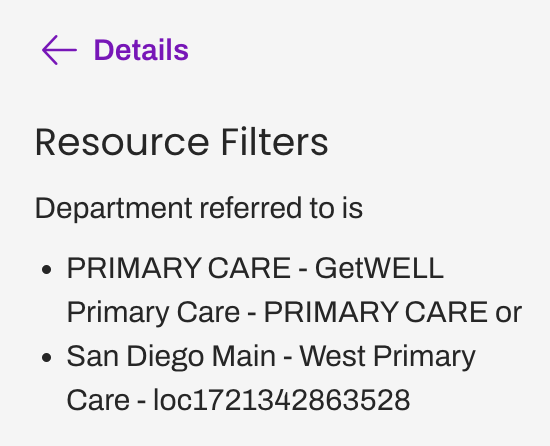 NOTE: If there are 100 or more Filters applied to a Trigger, the Details side panel will not display a complete list of Practices that include those items.
.png)
Configure Trigger Messaging
Next, you will enter the Trigger's message for each of the content types you will support. Available content includes text, call, and email. Messages can be customized for delivery method.
We recommend keeping text content short to optimize the patient experience. Emails can be longer and require a subject line. Calls should be configured to be more conversational. When a patient receives an automated phone call, they must answer with "Hello" or another greeting to prompt the message to begin. NOTE: Artera uses answering machine detection to listen to the answered greeting of the call and determine whether or not to deliver the message as a voicemail. For more information, click here.
Text messages must be under 1,600 characters, otherwise, the message will fail to send to the patient. Learn more about SMS Character Limits and Message Formatting Guidelines.
You can choose to send Referral Triggers by a single delivery method or you can configure these Triggers to be sent via all three delivery methods to increase deliverability. If you select multiple delivery methods for your Trigger, the patient will never receive all three. How the patient receives the message is based on their Patient Communication Settings. Click here for a deep dive into crafting a message to support multiple languages, adding attachments and/or Forms, as needed.
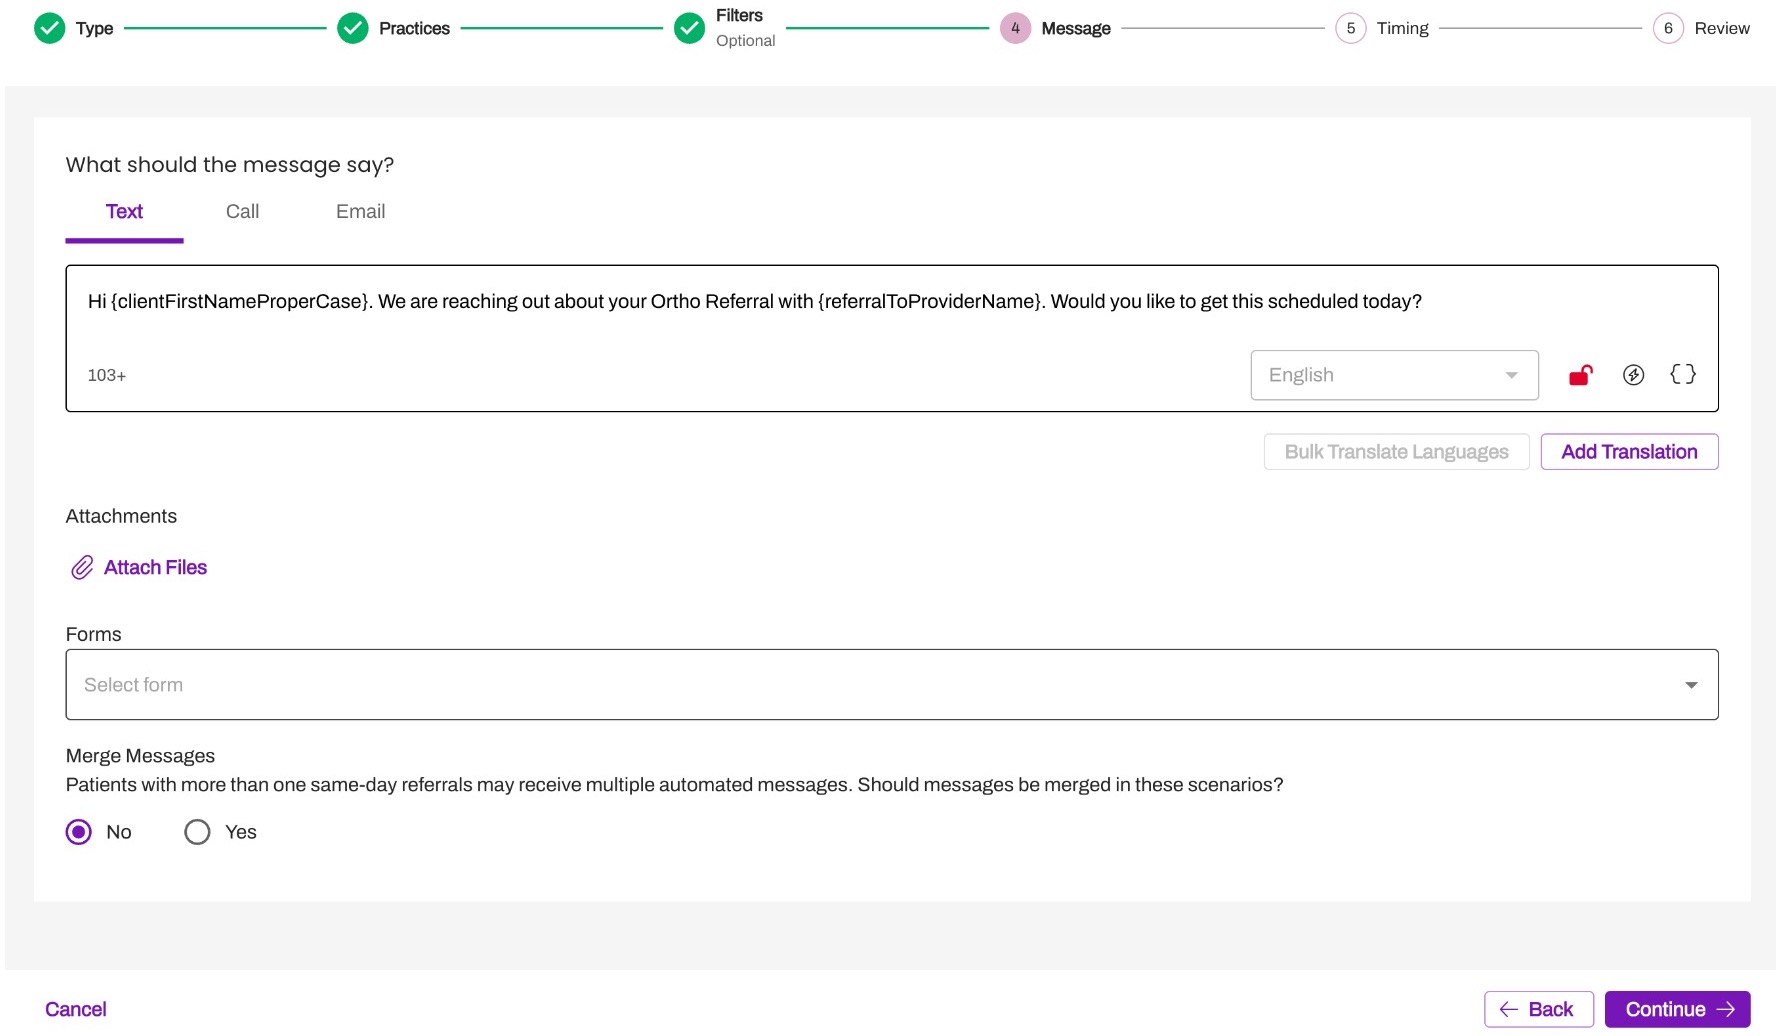
There are Referral-focused Smart Phrases that can be used to customize the message to the recipient, click here to learn more.
Merging Messages
Determine if you would like to merge similar messages for patients who receive multiple referrals on the same day. Click here to learn more about Merged Messages.
Configuring Merged Messaging
Next, determine when the Trigger should be sent (e.g. 15 min after, 4 Days after, etc.) using your chosen Referral Trigger, known as 'Event'. You can send Referral Triggers using the Referral Created, Referral Authorization Status Change, or Referral Scheduling Status Change status. Click here to learn more about these three Referral Trigger Events.
Next, indicate whether qualified patients should receive the automated Referral message - immediately, based on the configured Referral Trigger, or based on a Queue's throttling schedule:
.
-
Immediately: Messages are sent directly to patients based on the configured Referral Trigger, without any throttling. For this option, leave the Queue Assignment field blank.

-
Based on Message Throttling set up in a Referrals Queue: Referral message throttling allows your Enterprise to control the rate at which automated Referral messages are sent. This controls the number of Referral messages sent to patients at any time and in turn, helps manage the volume of inbound patient responses to Referral outreaches so staff is not overwhelmed. For this option, select the appropriate Referral Automations Queue from the Queue Assignment drop-down menu. Click here to learn more about Referral Automations Queues.

Send Rules
Send Only on Business Days?
This rule determines which days the Trigger can be sent. Business Days are determined by your Practice and Line Hours. Any day that your Practice/line is open for any duration of time counts as a Business Day in Artera. NOTE: This setting will be grayed out unless the message is set to sent at least 15 minutes after an event. Additionally, for Practices set up for one-way messaging, all days are business days so this toggle will not be relevant.
TCPA (Telephone Consumer Protection Act) Guidelines
Artera enables you to send or suppress automated reminders based on TCPA guidelines. Choose between sending the message immediately, scheduling the message within the TCPA guidelines, or not sending the message at all. Click here for a full breakdown of TCPA Hours and how it impacts messaging.

When considering Appointment Triggers, we typically recommend choosing to Adjust Delivery Time when available, which will respect TCPA hours.
Review Trigger
Review the details of the Referral Trigger, ensuring all of the information is correct. To make changes, use Back to navigate through the Trigger steps.
Tip: To review the Trigger in different languages, use the drop-down menu located under Message.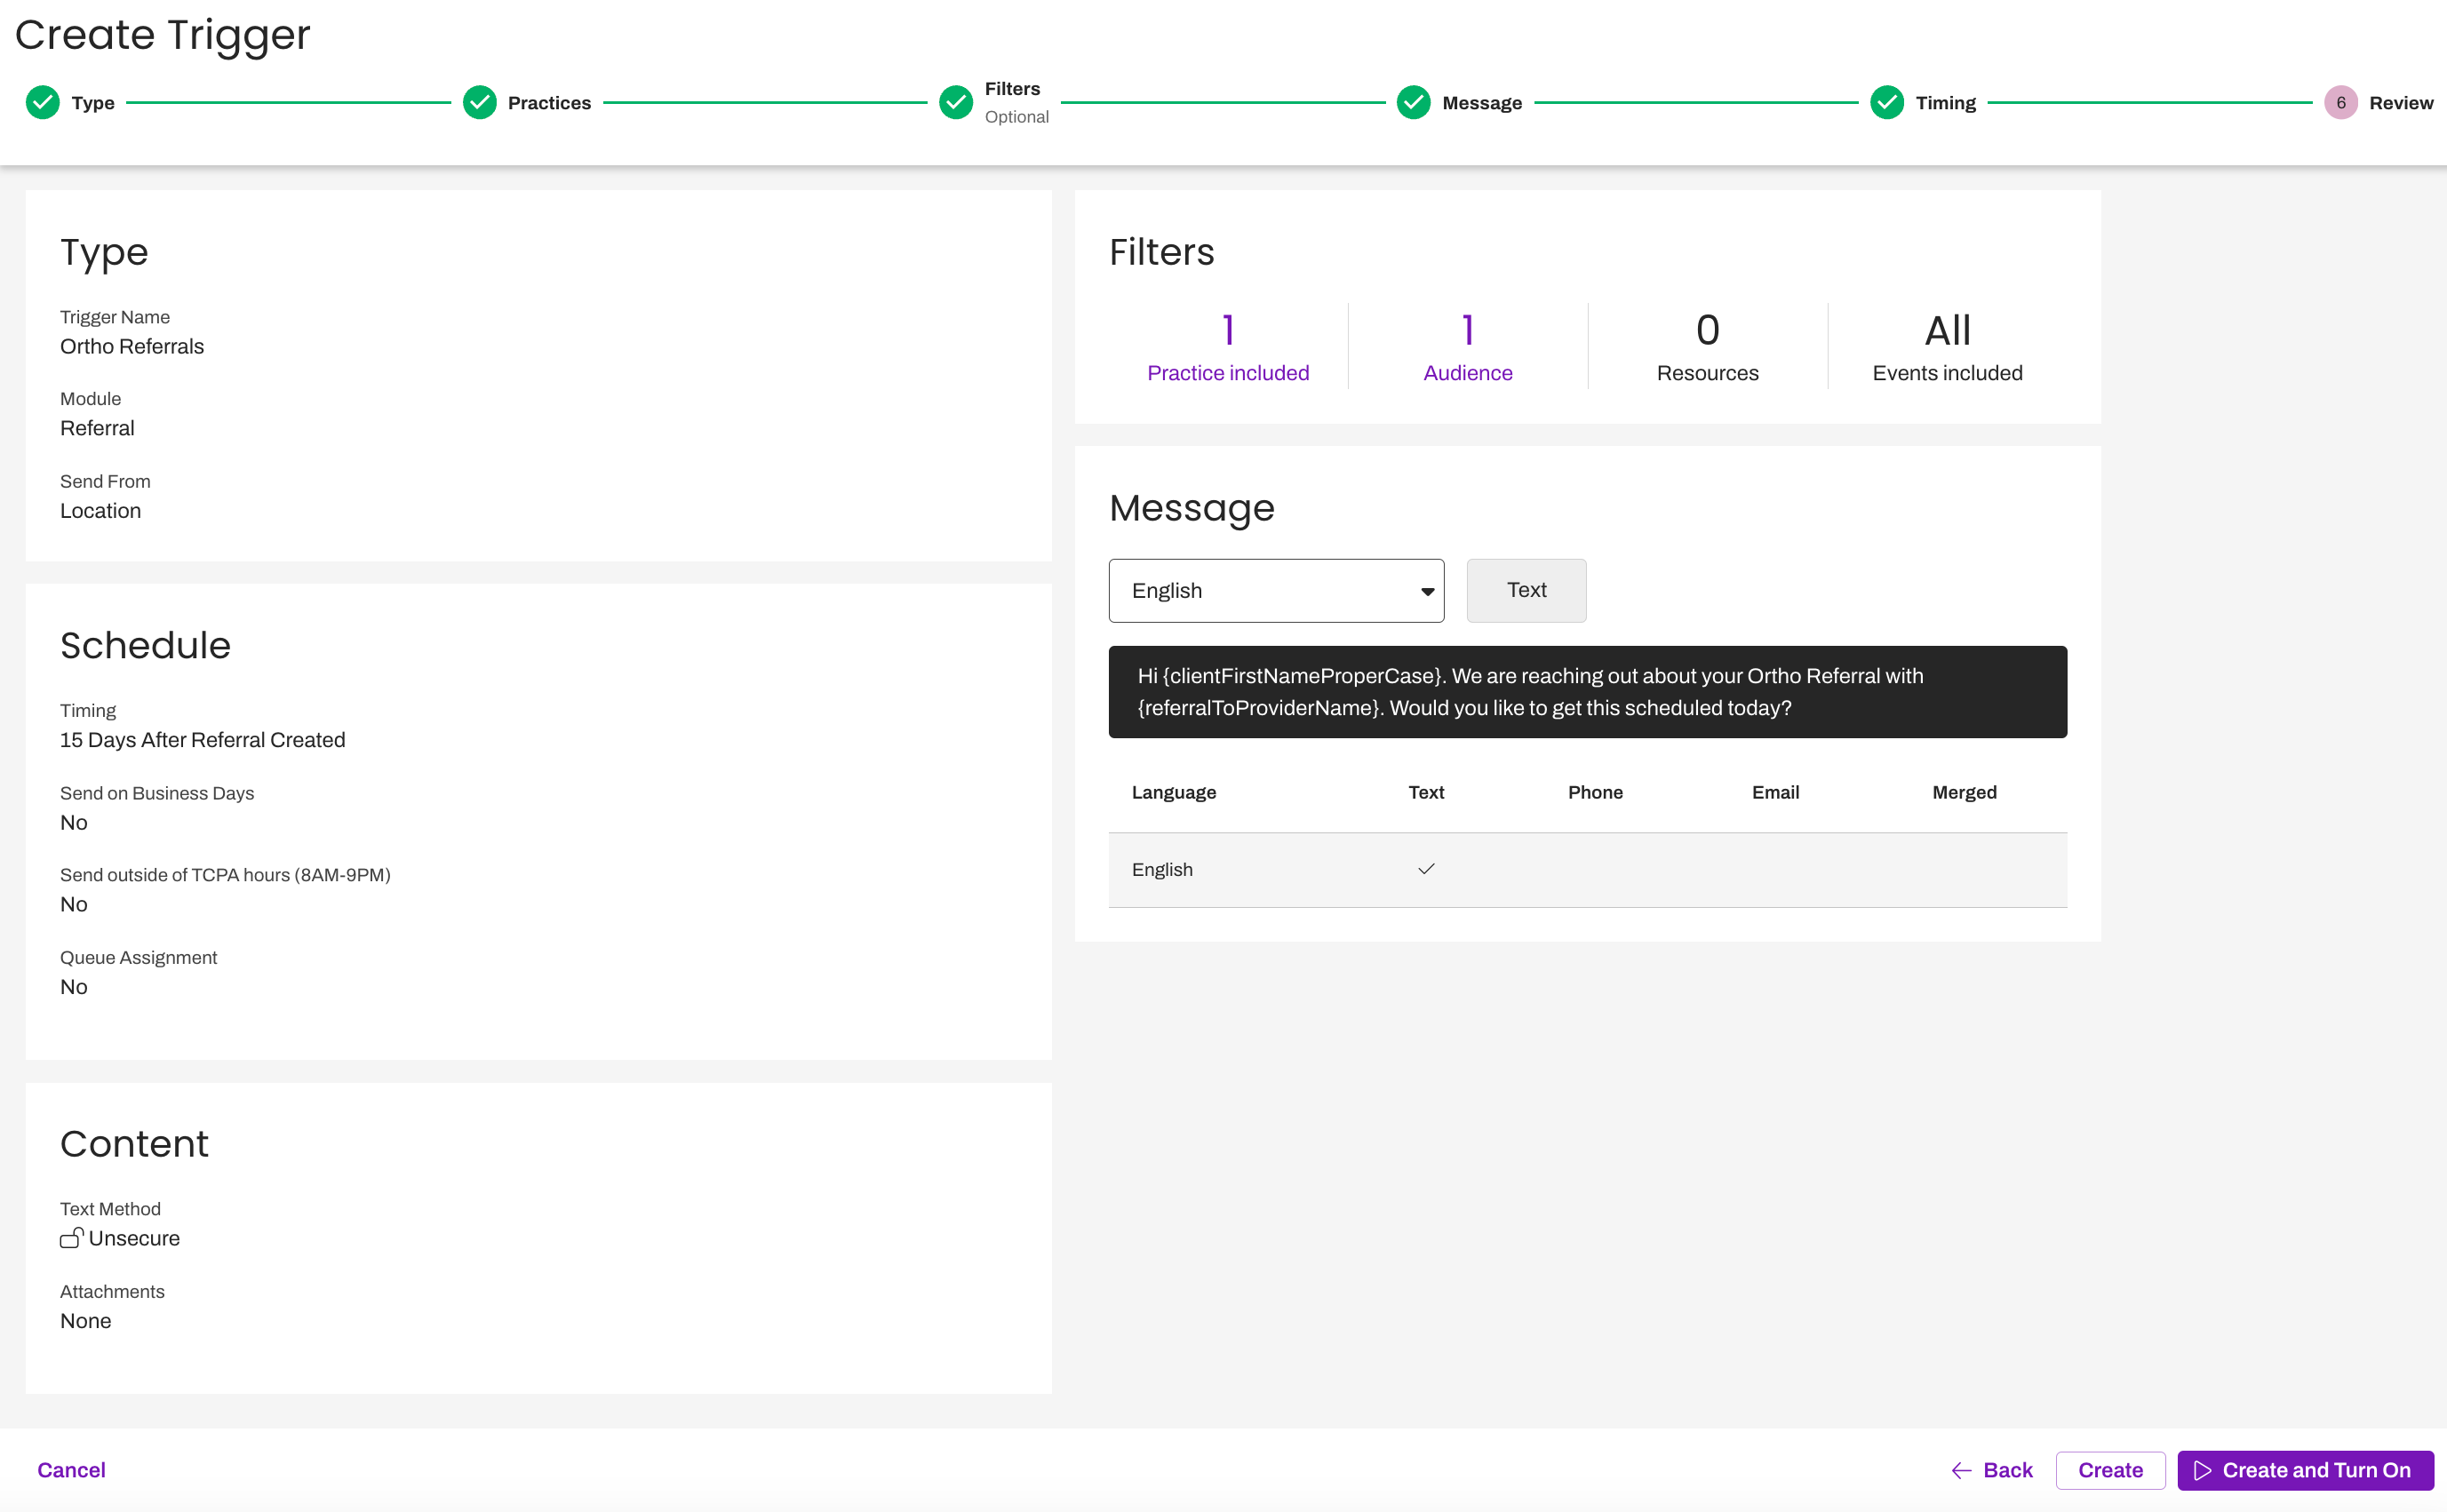
Click Create to finish creating the Referral Trigger or Create and Turn On to finish creating the Referral Trigger and allow it to start sending messages to patients.
FAQs
Which type of reporting is available for Referrals Management?
Referral reporting is generated exclusively through Artera Analytics Plus. The Referral Message Performance Dashboard and the Referral Performance Report are available for analyzing your Referral outreach metrics. Click here to learn more.
How do we ensure that our Scheduling and Authorization statuses are mapped to Artera?
This step should be completed during your Referrals implementation. If you would like to confirm which of your statuses have been mapped to which statuses of Artera, please connect with your Customer Success Representative.
What Time Offset Intervals can be used to configure Referral Triggers to send based on minutes?
Minutes offset can either be 0 or a minimum of 10 minutes. Then, you can offset the delivery of these messages in 5-minute increments. Referral Created and Scheduling Status Change can all be configured with a time offset.


