Practice Automations - Referrals
- Get Started
- Release Notes
- Triggers
- Patient Channel
- Troubleshooting and FAQ
- Patient Facesheet
- Technical Specifications
- Insights & Analytics
- Inbox
- Conversation Flows
- Campaigns
- Lines & Resources Requests
- Lines, Events, Resources
- SMS Basics
- Automations
- Referrals
- AI Agents
- Add-Ons
- Users and Groups
- Platform Settings and Configuration
- Self-Rescheduling
- Recalls
- Marketplace
- Artera Harmony Federal Edition
Table of Contents
Configure Default AutomationIdentify Send ResourceAdd RestrictionsRestriction LogicExclusionsAttachmentsSet Automations to RunningCreate Practice-Specific AutomationUse Referral Automations to automatically reach out to patients to schedule referred visits. These Automations are designed to reduce scheduling friction, create scheduling efficiency, and increase referral conversion rates.
Appointment Automations are generally created at the Enterprise and configured for each Practice within the Practice Automation section. This allows you to use the same reminder cadence and messaging throughout multiple Practices, allowing for easier message management and preventing duplicates.
Automations can also be created just at the Practice-level, typically when a specific reminder cadence or unique messaging is needed. These Automations will only be available for use within the Practice they are created in.
Configure Default Automation
This section focuses on configuring Default Automations at the Practice-level. Click here to learn how to build a Default Referral Automation.
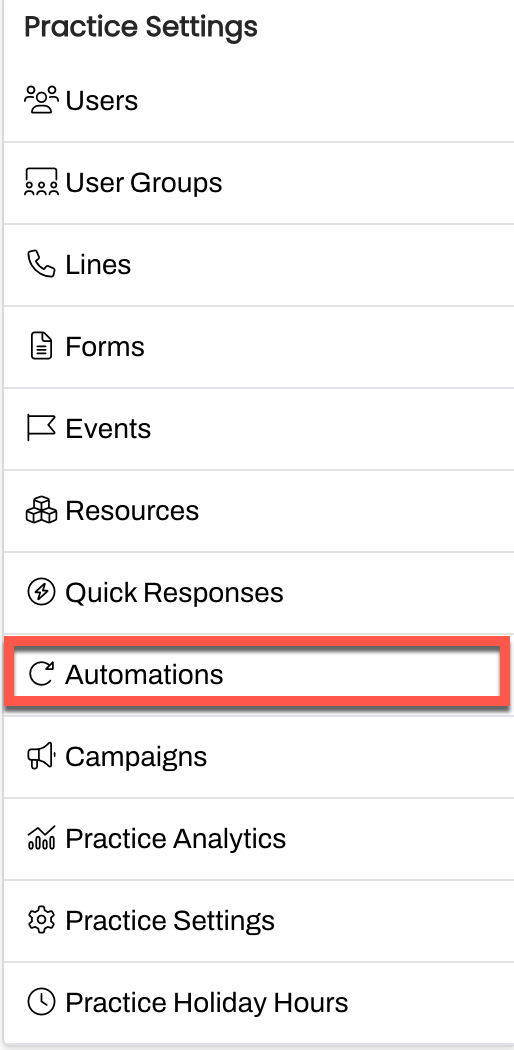
Navigate to Practice Settings > Automations.
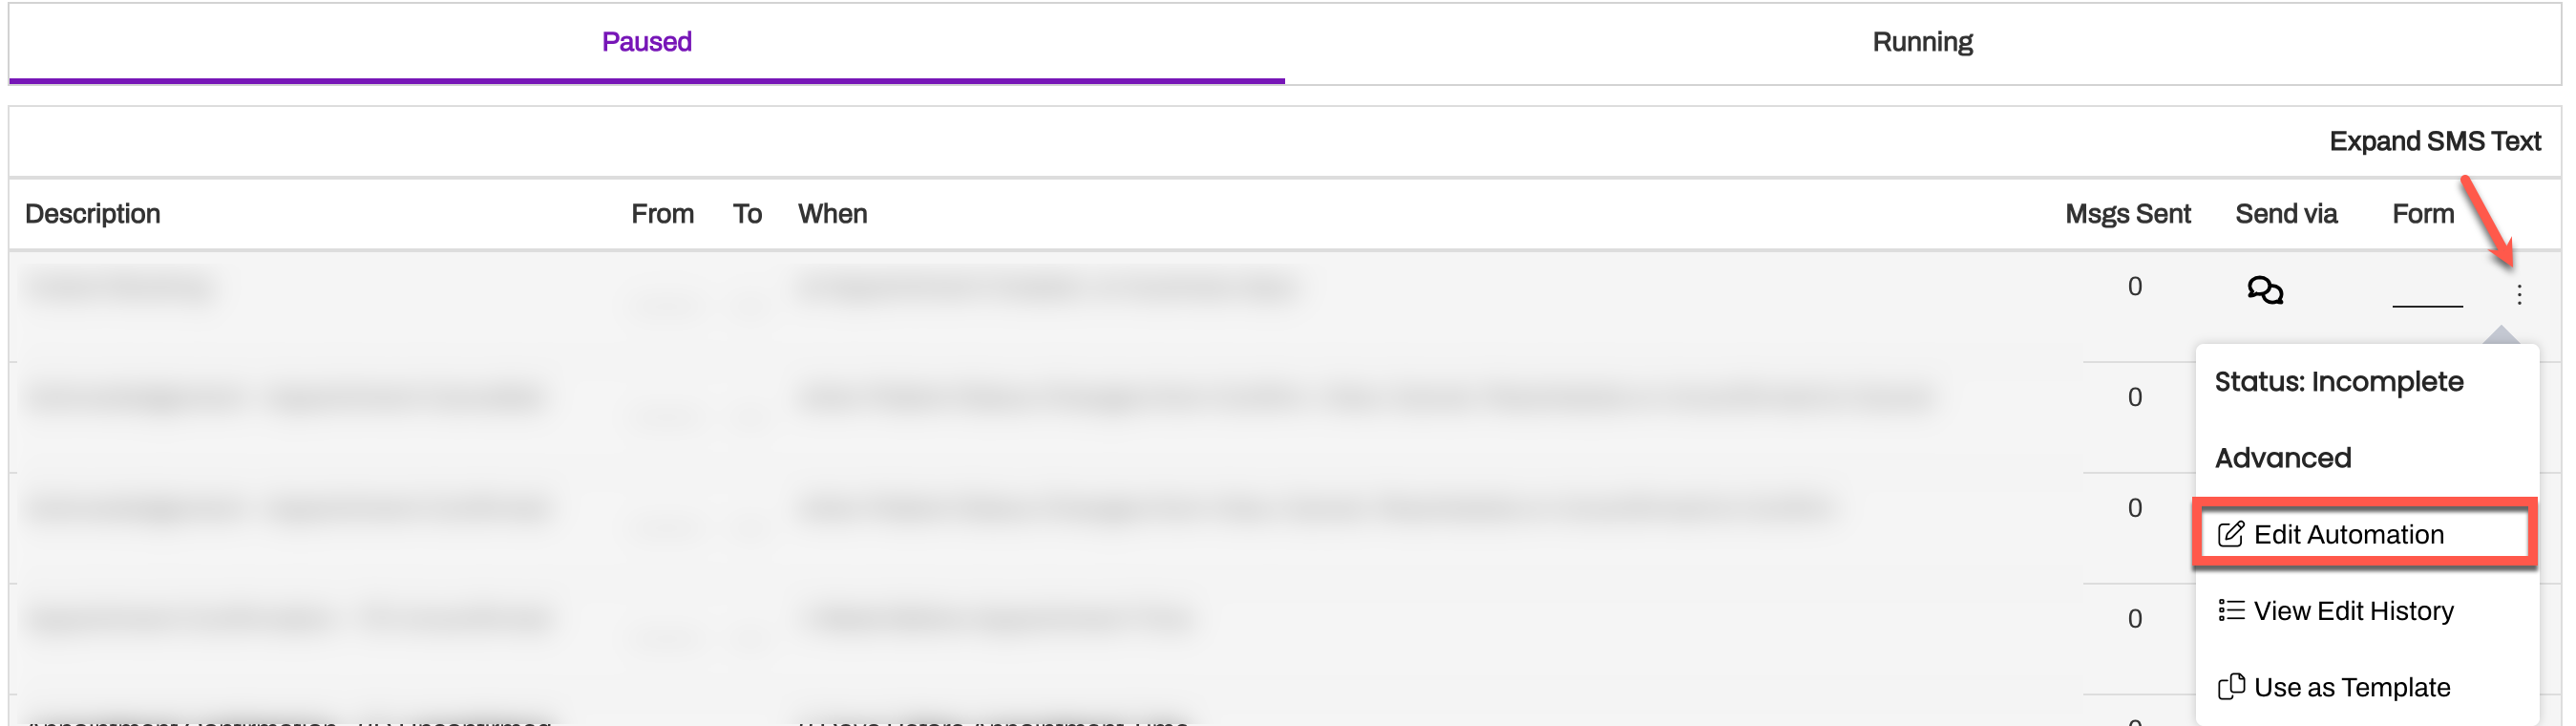
Open the Paused tab.
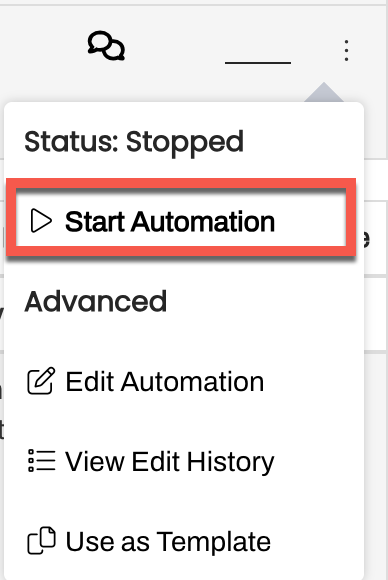
Click the (...) menu for the Automation you want to enable. You will notice that the Automation has a status of Incomplete. Until the Automation has been configured, you will not be able to start it.
Click Edit Automation.
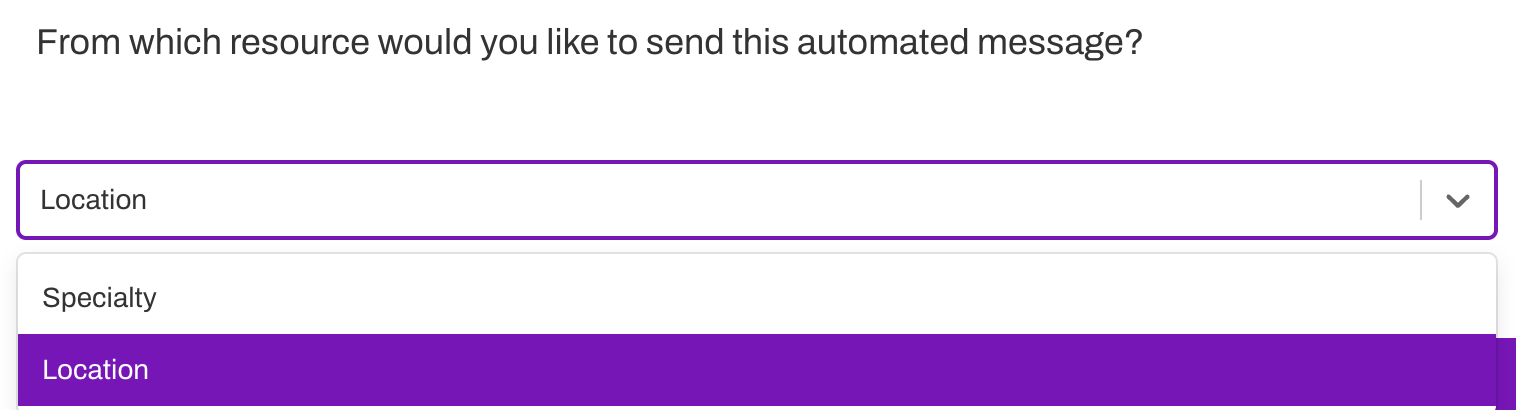
Identify Send Resource
Select which Resource should send the Automation. The option you choose will be determined by how you have decided to manage Referral routing, e.g. by Specialty or Location.

Make sure the Resource type you have selected is connected with a Line. If you choose a Resource that has not been added to a Line, the Automation will not be sent. Tip: Not sure how your Lines are configured? Navigate to Practice Settings > Lines and review the Resources added to the Line.
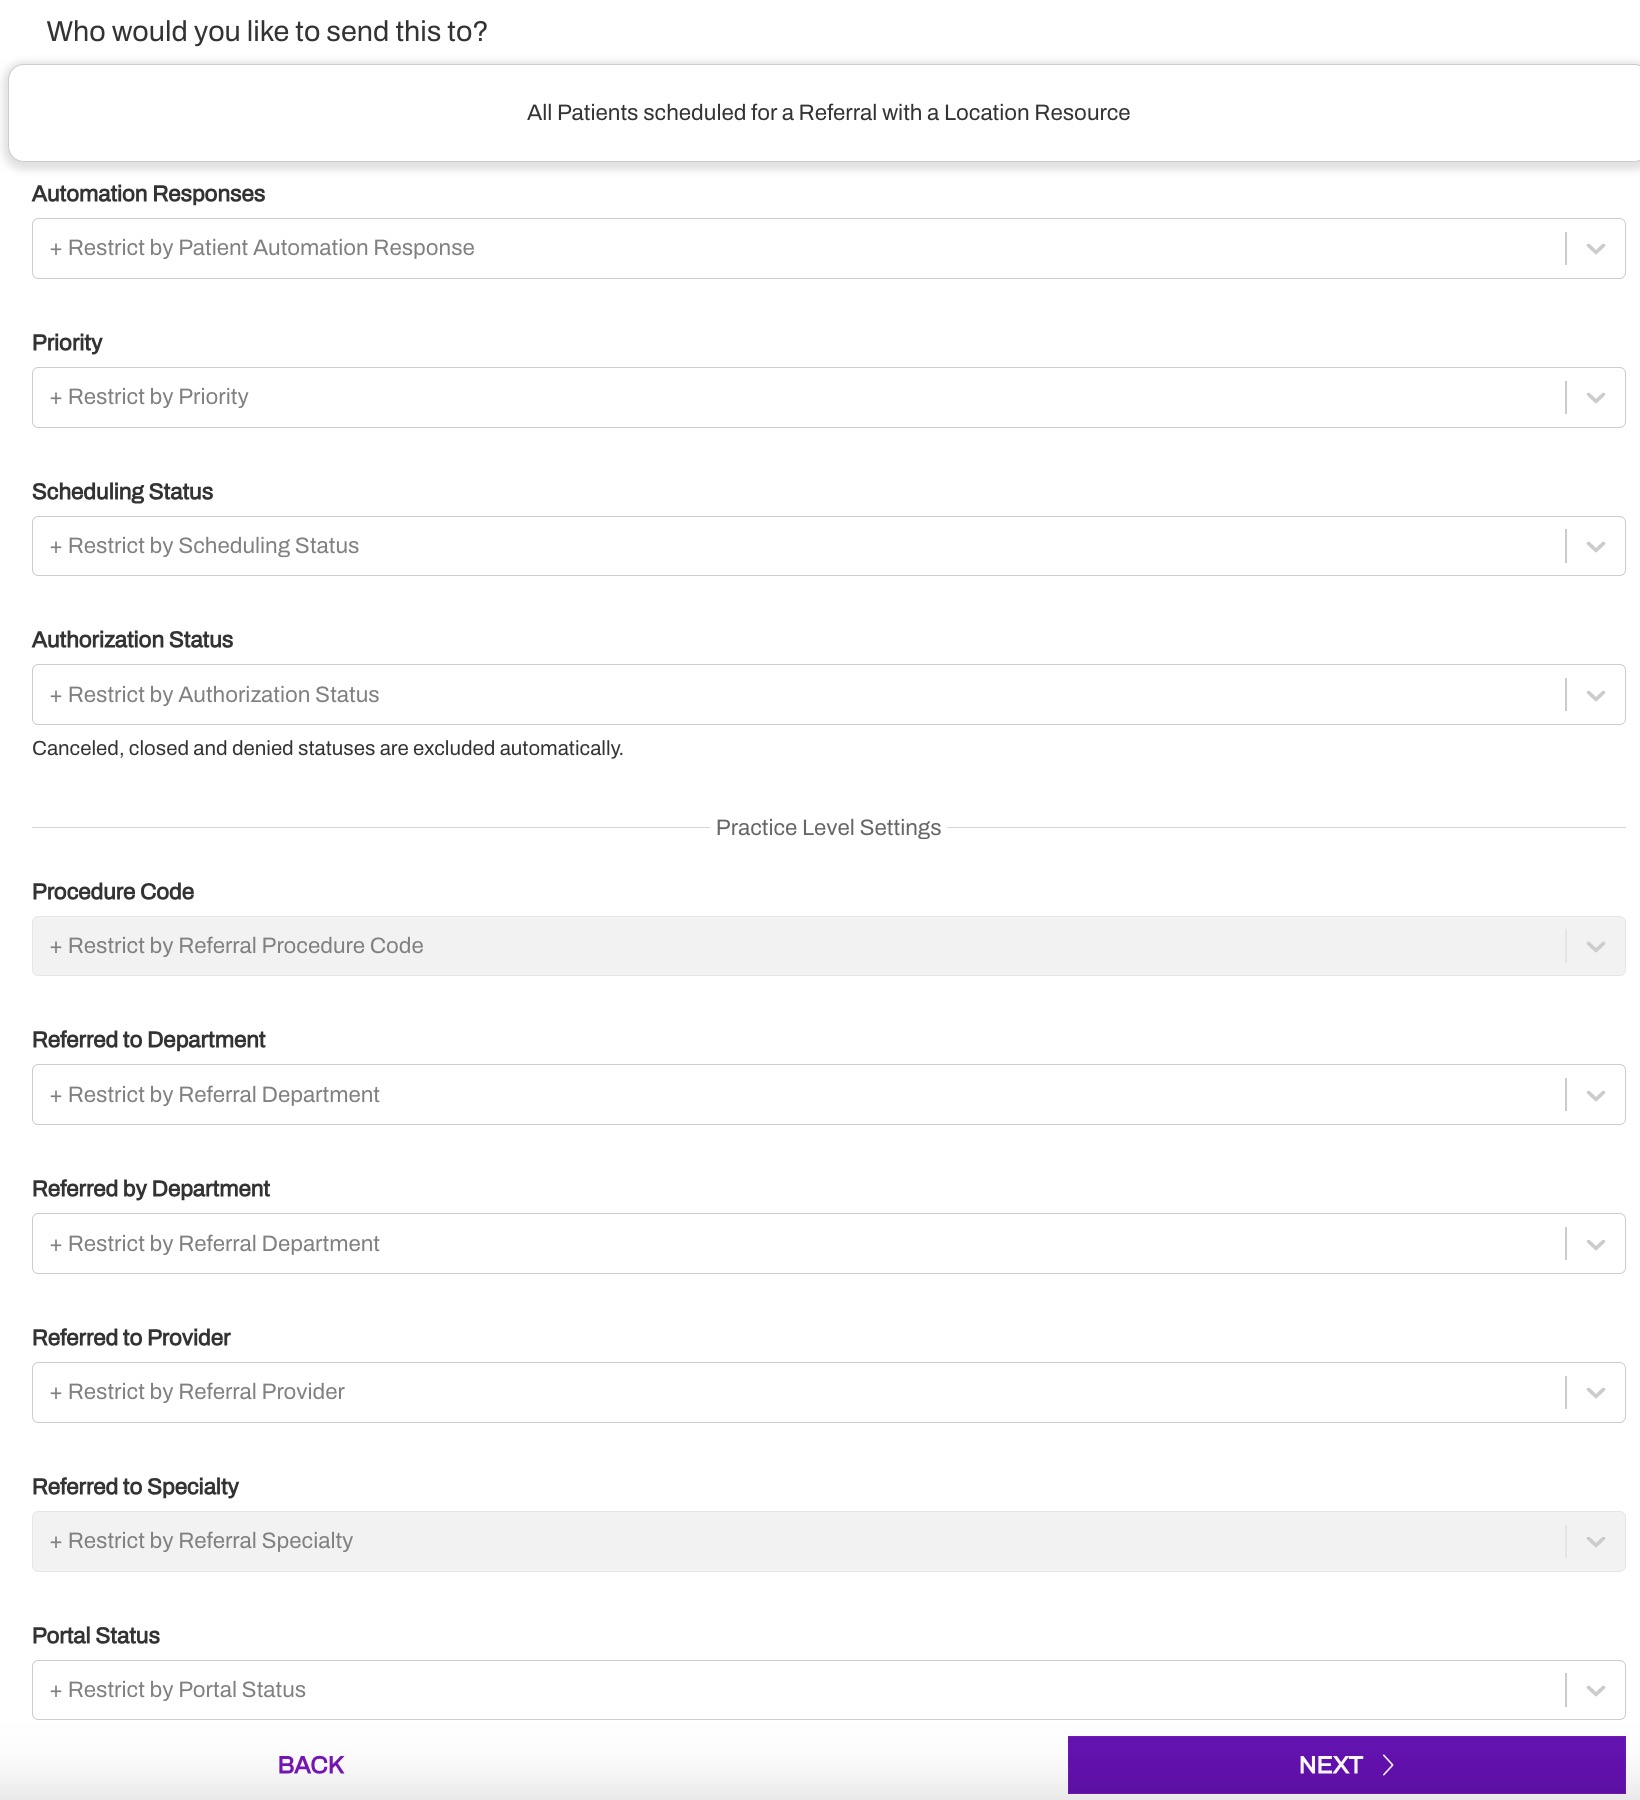
Add Restrictions
Restrictions specify who should receive this Automation. Use the following Restriction filters to ensure the message is sent to the right audience.
Remember, Automation Responses, Priority, Scheduling Status, and Authorization Status restrictions can be set at the Default-level by Enterprise Users.

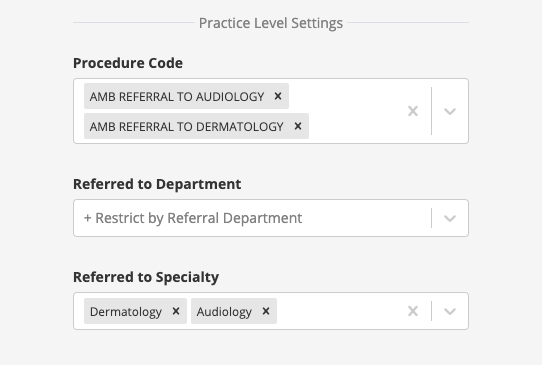
Procedure Code: Select the desired Procedures associated with this Automation. For example, you can choose to only send the Automation to Referrals with a specific procedure code.
Referred to Department: Indicate the Referred to Departments that will use this Automation.
Referred by Department: Indicate the Referred by Department that will use this Automation. NOTE: This drop-down displays all Locations mapped to the Enterprise.
Referred to Provider: Indicate the Providers that will use this Automation. NOTE: This drop-down includes an option to select 'Unknown/Other'. Selecting this option will filter the Automation to include all 'Providers Referred to' that are not displayed in this drop-down menu because they do not exist in this Artera Practice. This option is beneficial for teams who need to filter an Automation to either include or exclude patients who are referred to a Provider that does not exist within their Artera Practice.
Referred to Specialty: Indicate the Specialties that will use this Automation.
Portal Status: These statuses indicate whether or not the patient is enrolled in a Patient Portal. Portal information is set up during implementation and not all EMRs support sending this data.
NOTE: If any of the Practice-Level Settings are grayed out, there are no values mapped to those fields within Artera.
Restriction Logic
The Restriction filters apply default logic. The logic between Restriction sections (i.e. Procedure Code and Referred to Specialty) apply And logic. Meaning that the Referral must qualify for both the Procedure Code and Specialty restriction in order to receive the message. The logic within Restriction sections (i.e. all Specialities selected) apply Or logic. Meaning that the Referral must be one of the Specialities listed in order to receive the message.
In the following example, the patient must have a Referral for Dermatology OR Audiology AND the Referral must have the indicated Procedure Code.
Restriction Statement
The Restriction Statement at the top of the page helps you conceptualize who the Automation will be sent to.

Exclusions
In some instances, it may be easier to exclude the Referred by Locations, Referred to Locations, Procedures, or Specialties that you do not want to send an Automation to rather than to include all the ones you do. Text within the purple boxes in the Restriction Statement can be clicked on and changed from an inclusive to an exclusive.
For the following example, we want the Referral Automation to send to all Referred to Departments except those who are referred to Behavioral Health because we have a special message going out to those patients: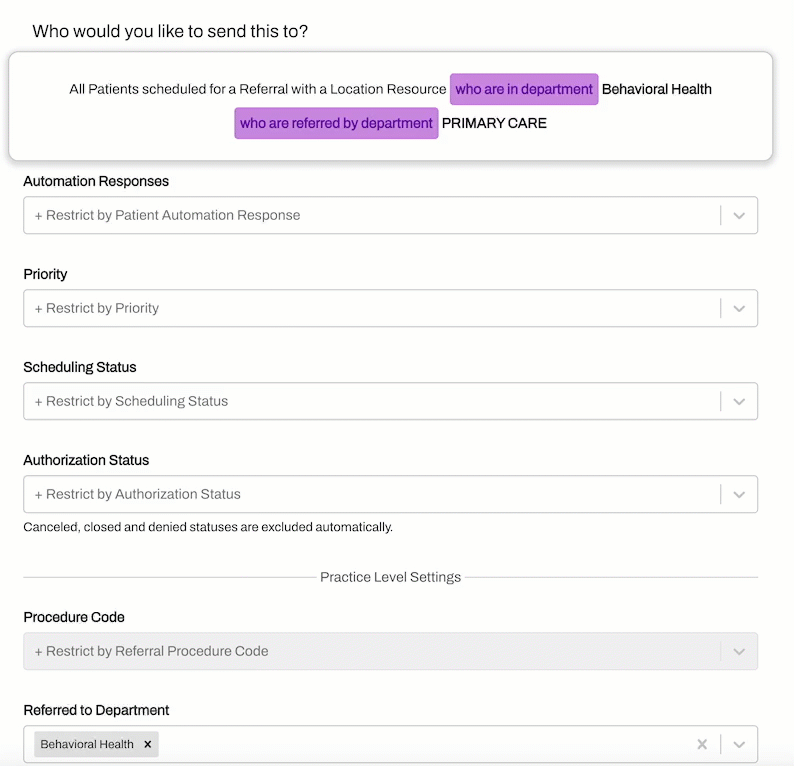
NOTE: Exclusions can only be set for the restriction filters configured at the Practice-level.
Attachments
The Automation's message language is established in the Default build. However, you can add Attachments specific to your Practice, as needed.
Note: Merged Messages cannot support Attachments. If the message indicates it can be merged (check out the “Would you like to merge similar messages?” section), do not include Attachments.
Media Attachments
You can include rich media along with automated messages to your patients. Attach campus maps, PDF files with instructions, and more. We recommend all attached media be under 500KB in size to preserve performance. Click here to learn more.
Review Automation
Your last configuration step is to review the Automation setup and click Update.

Set Automations to Running
When the Automation setup is complete, the Automation is automatically Paused, meaning the Automation is not sending any messages. To enable the Automation, go to the Paused tab on the Automations, click on the (...) menu and select Start Automation. The Automation will move into the Running tab and begin sending messages to patients who meet the Automation criteria.
 Create Practice-specific Automation
- Navigate to Practice Settings > Automations.
- Click + Create Automation.
-
Select Referral from the Module drop-down and add a short Description. This is how you will identify the Automation going forward so be sure to use consistent naming conventions.

-
Select which Resource should send the Automation. The option you choose will be determined by how you have decided to manage Referral routing, e.g. by Specialty or Location.
- Make sure the Resource type you have selected is connected with a Line. If you choose a Resource that has not been added to a Line, the Automation will not be sent. Tip: Not sure how your Lines are configured? Navigate to Practice Settings > Lines and review the Resources added to the Line.
-
Determine who should receive these Automations by leveraging Restrictions
- Automation Responses, Priority, Scheduling Status, and Authorization Status are Artera defaults mapped to values from your system of record (EMR). Procedure Code, Referred to Department, Referred by Department, Referred to Provider, Referred to Specialty, and Portal Status are your chosen values that are mapped into Artera.
-
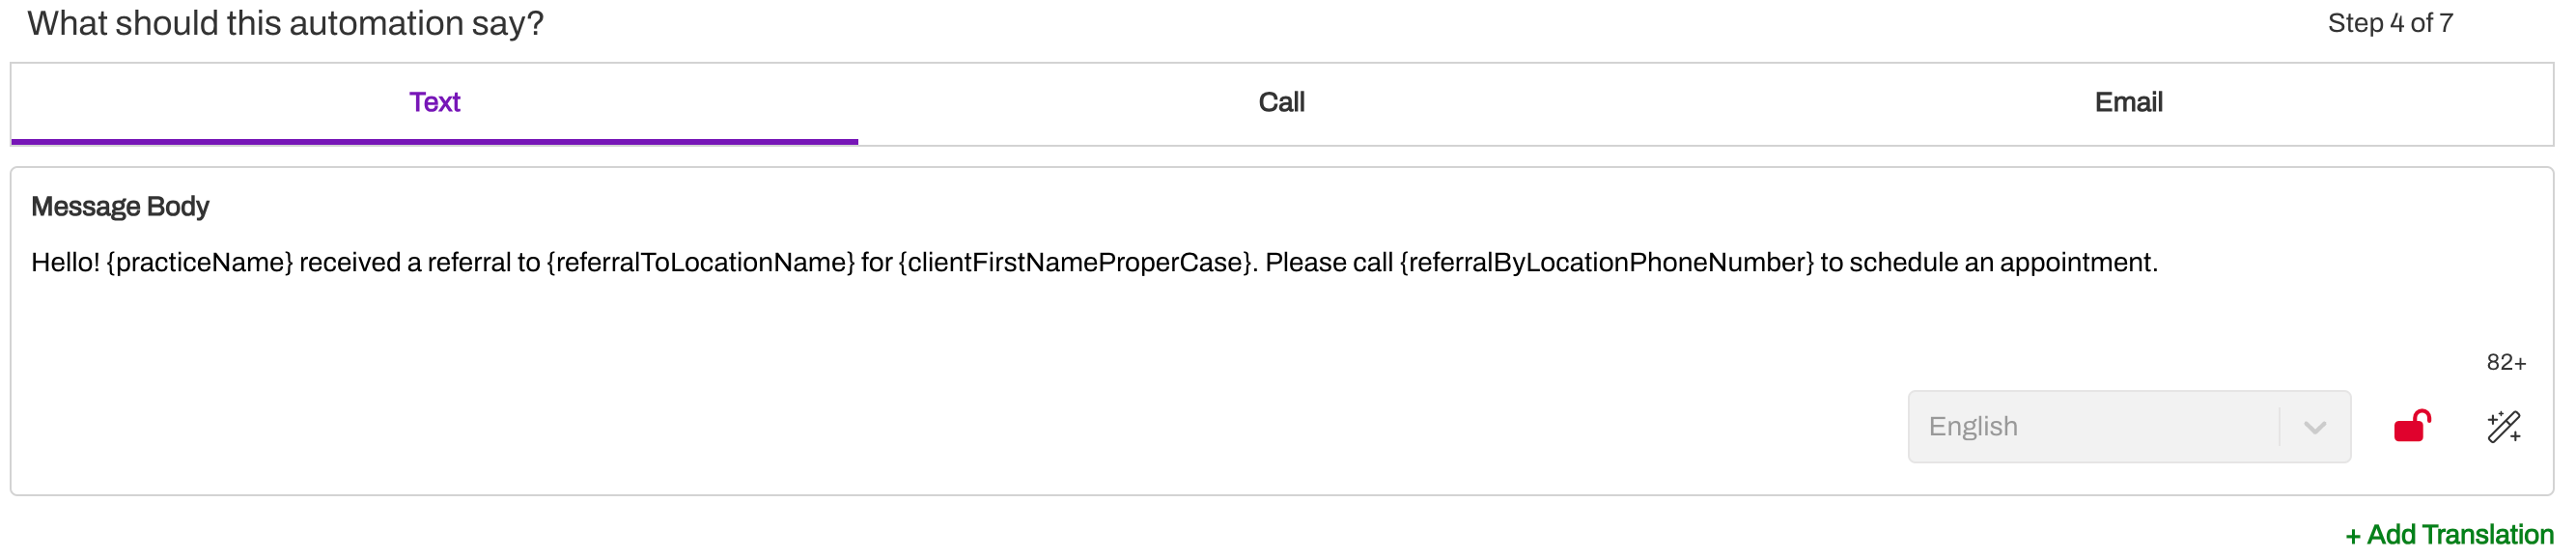
Add your messaging. Click here for a deep dive into crafting the perfect message. Add Translations and Attachments, as needed.
-
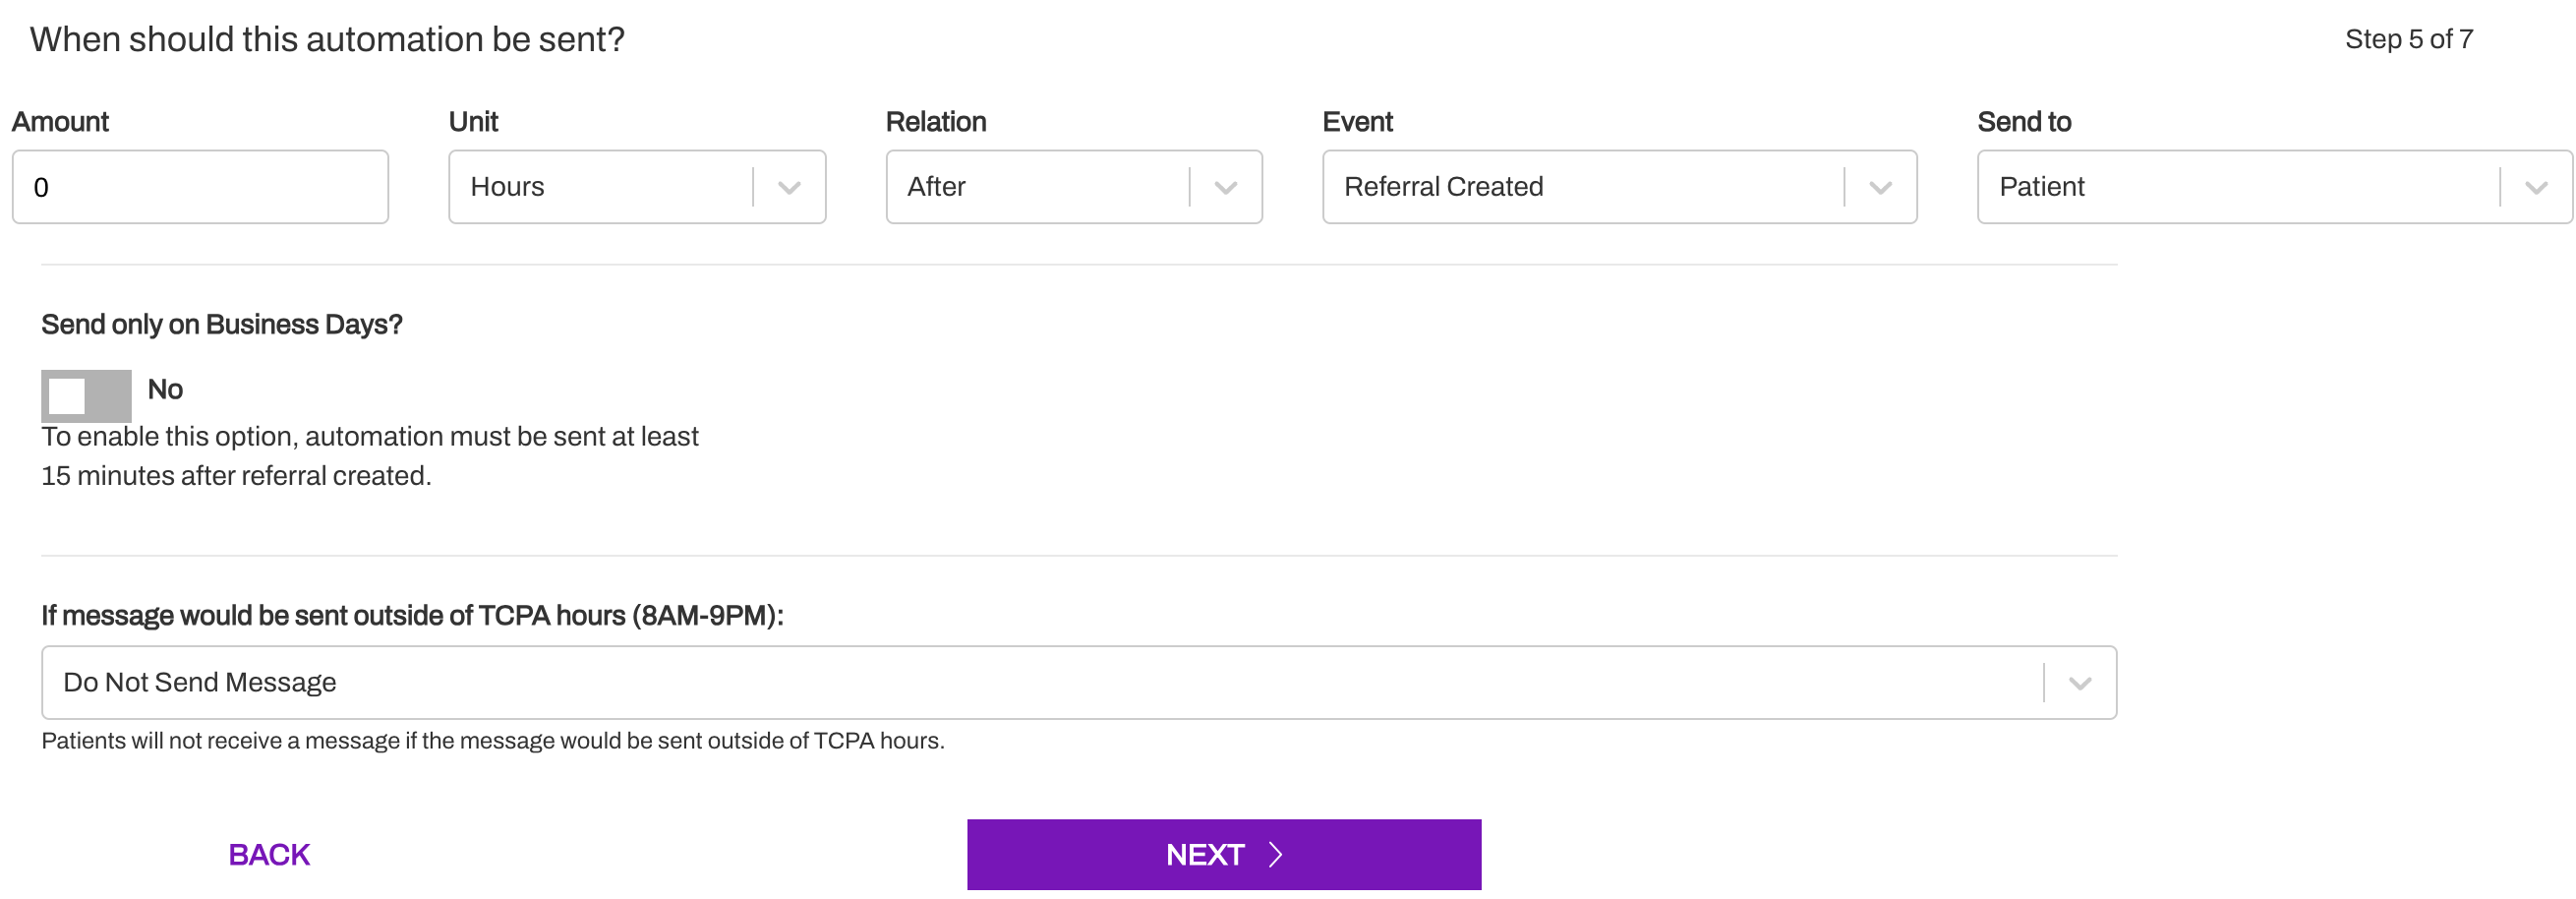
Determine when this Automation should be sent. This includes selecting the appropriate Referral Trigger and Send To option.
-
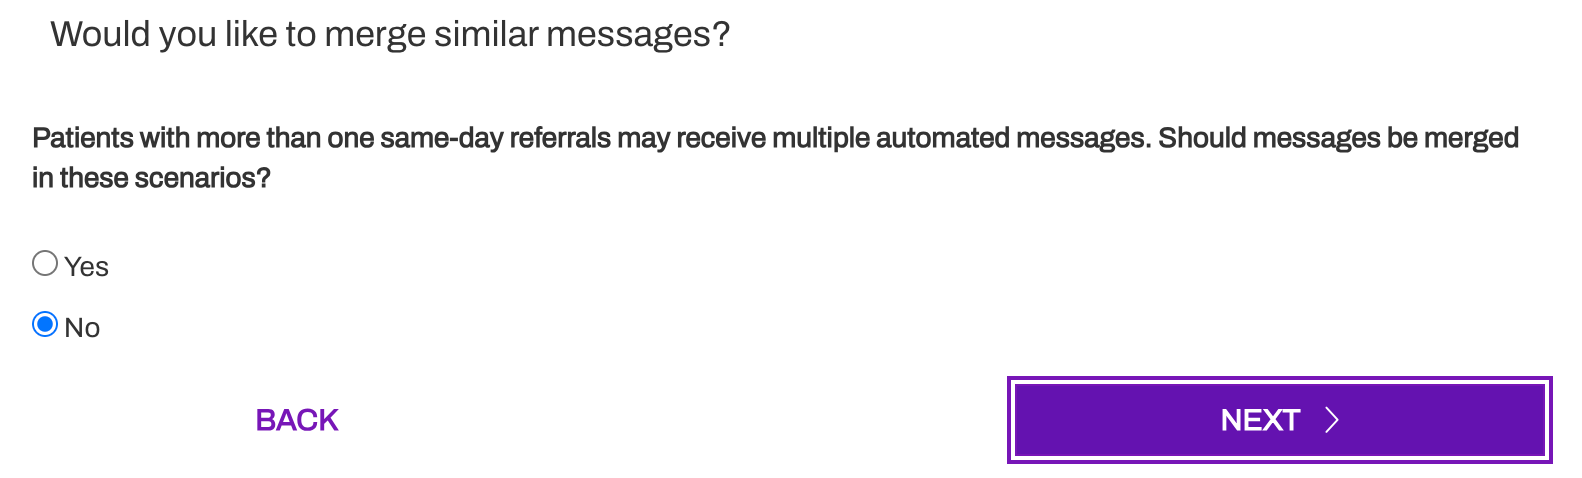
Determine if you would like to merge similar messages for patients who receive multiple referrals on the same day. Click here to learn more about Merged Messaging.
-
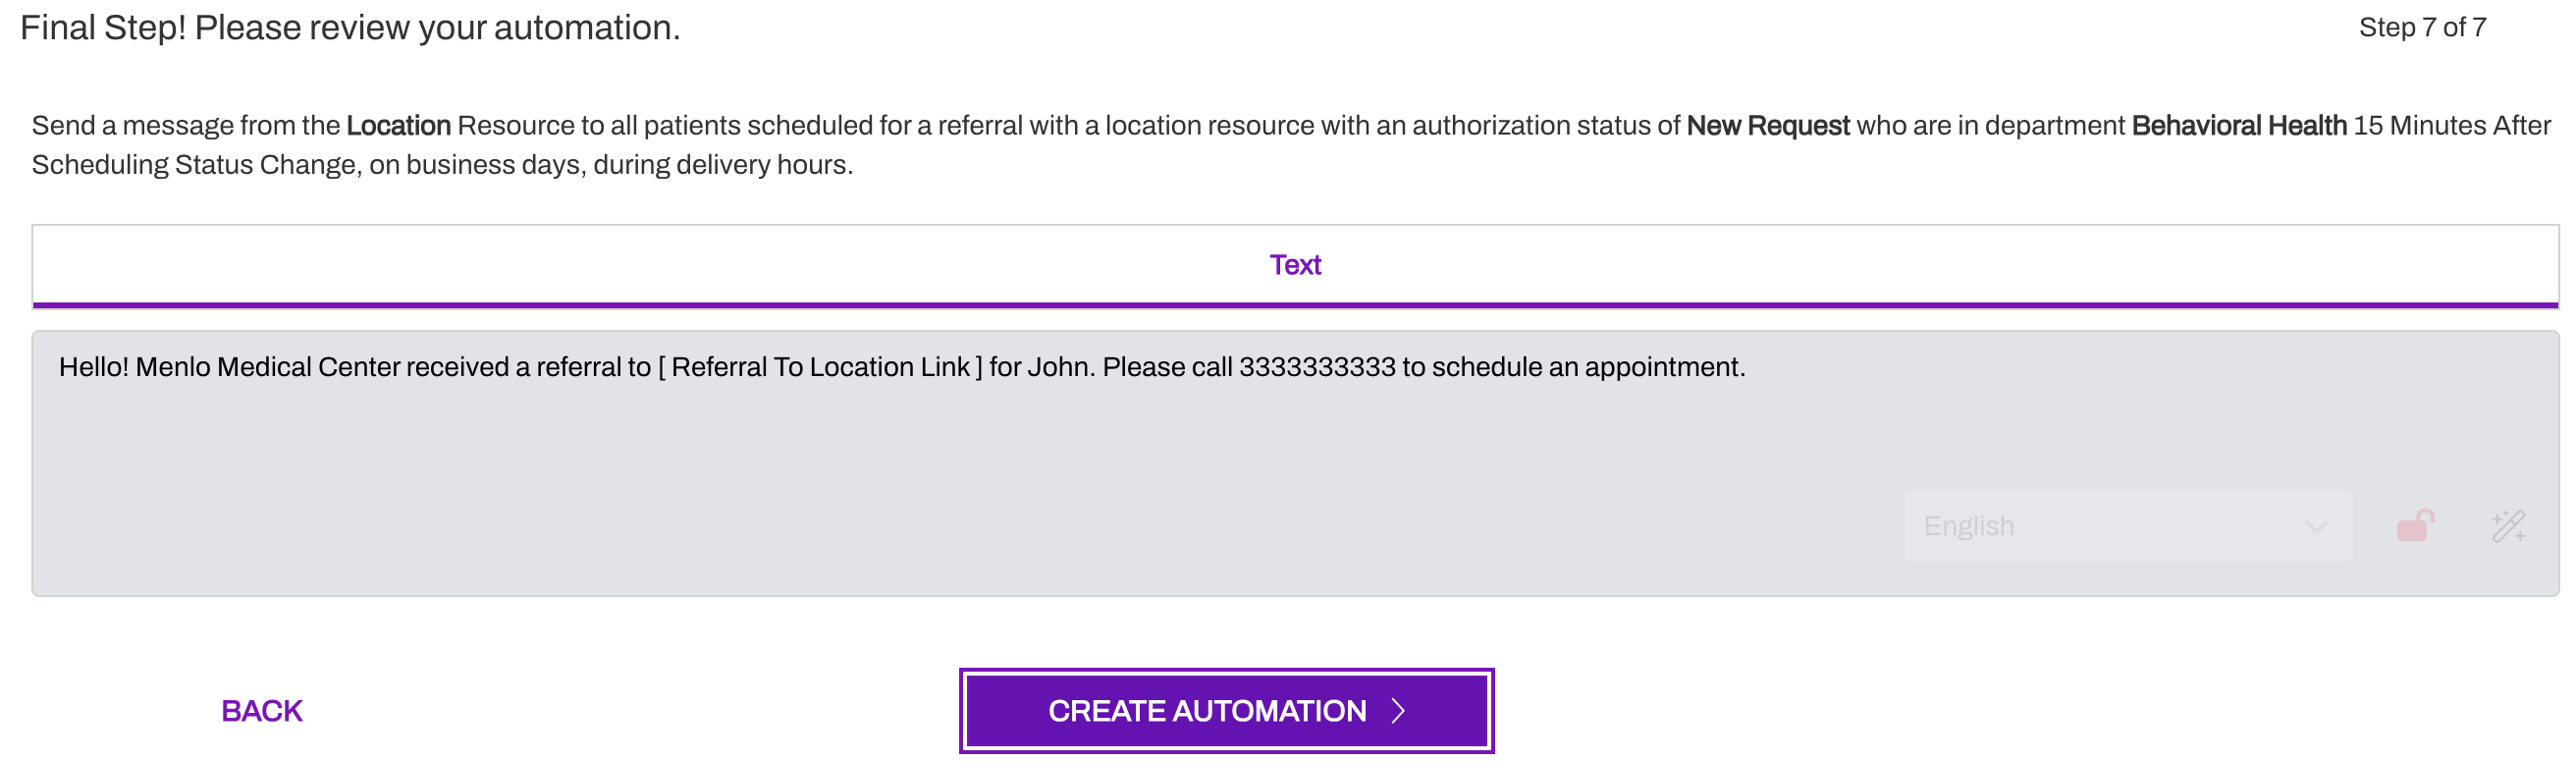
Review your Referral Automation. Click Create Automation to save.
- Finally, navigate to the Paused tab on the Automations, locate the newly created Automation, click the (...) menu and select Start Automation. The Automation moves to the Running tab and will send messages to patients who meet the Automation criteria.
