Default Automations - Appointment
- Get Started
- Release Notes
- Triggers
- Patient Channel
- Troubleshooting and FAQ
- Patient Facesheet
- Technical Specifications
- Insights & Analytics
- Inbox
- Conversation Flows
- Campaigns
- Lines & Resources Requests
- Lines, Events, Resources
- SMS Basics
- Automations
- Referrals
- AI Agents
- Add-Ons
- Users and Groups
- Platform Settings and Configuration
- Self-Rescheduling
- Recalls
- Marketplace
- Artera Harmony Federal Edition
Table of Contents
Default Automations Create a New Appointment Automation Configure Automation MessagingSet Automation TimingSend RulesMerging MessagesManaging AutomationsAppointment Automations allow you to build automatic appointment reminders, appointment confirmations, and no-show/cancellation workflows. These Automations are designed to reduce appointment management overhead, decrease no-shows, and increase patient preparedness.
As an Enterprise User, you can set up Automations that can be used across your Practices—these are called Default Automations. This functionality allows you to set a standard for your organization controlling both message timing and brand voice. Additionally, creating Automations at the Enterprise and enabling at each Practice drives efficiency and consistency.
This article focuses on how to build Default Automations for the Appointment Module. Click here to learn how to configure Appointment Automations at the Practice level. We also have information on how to build Inbound Message, Recall, and Referral Automations.
Default Automations
Automations created for the Enterprise are called Default Automations. Default Automations are then filtered within the Practice Automations section. This allows Appointment Automations to be sent based on Practice specifications like Events, Providers, Locations, and Phone Lines, while preserving an Enterprise-wide cadence and message content.
Page Overview

- Create Automations: Click this button to build a new Default Automation.
- Expand SMS Text: Click this link to preview the text message content. This does not display any translations added to Automations.
- Description: This is established when creating the Automation and serves as the Automation title.
- When: This indicates when the Automation will be sent.
-
Send Via: The icons display which message types the Automation can be sent by Text, Call, and Email.
-
The color of the message icon indicates the Automation's SMS message length:
- Green: less than 160 characters
- Black: 161+ characters
-
The color of the message icon indicates the Automation's SMS message length:
Create a New Appointment Automation
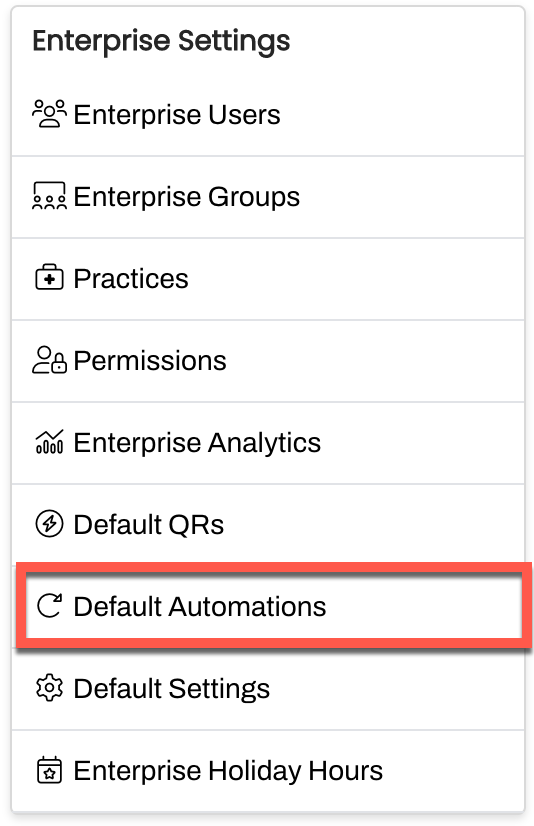
- Navigate to Enterprise Settings and select Default Automations.
- Select Create Automations in the top-right corner.
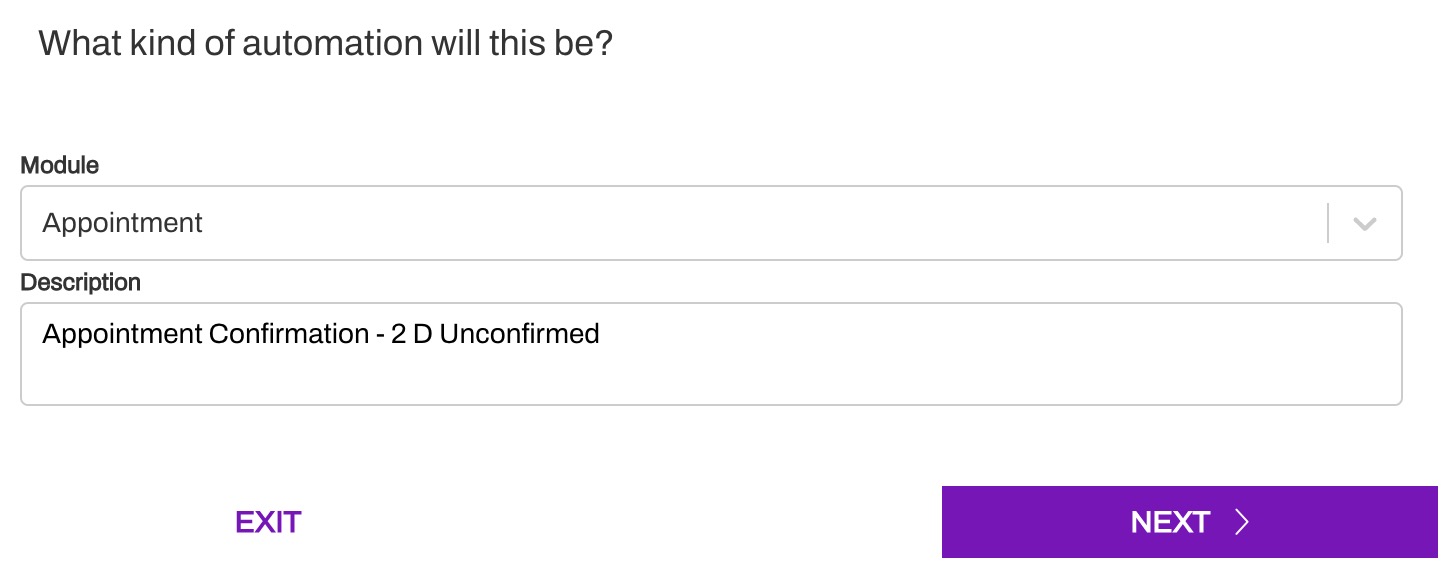
- Leave Appointment selected from the Module drop-down and add a short Description. This will serve as the Automation's title, so be sure to use consistent naming conventions.
-
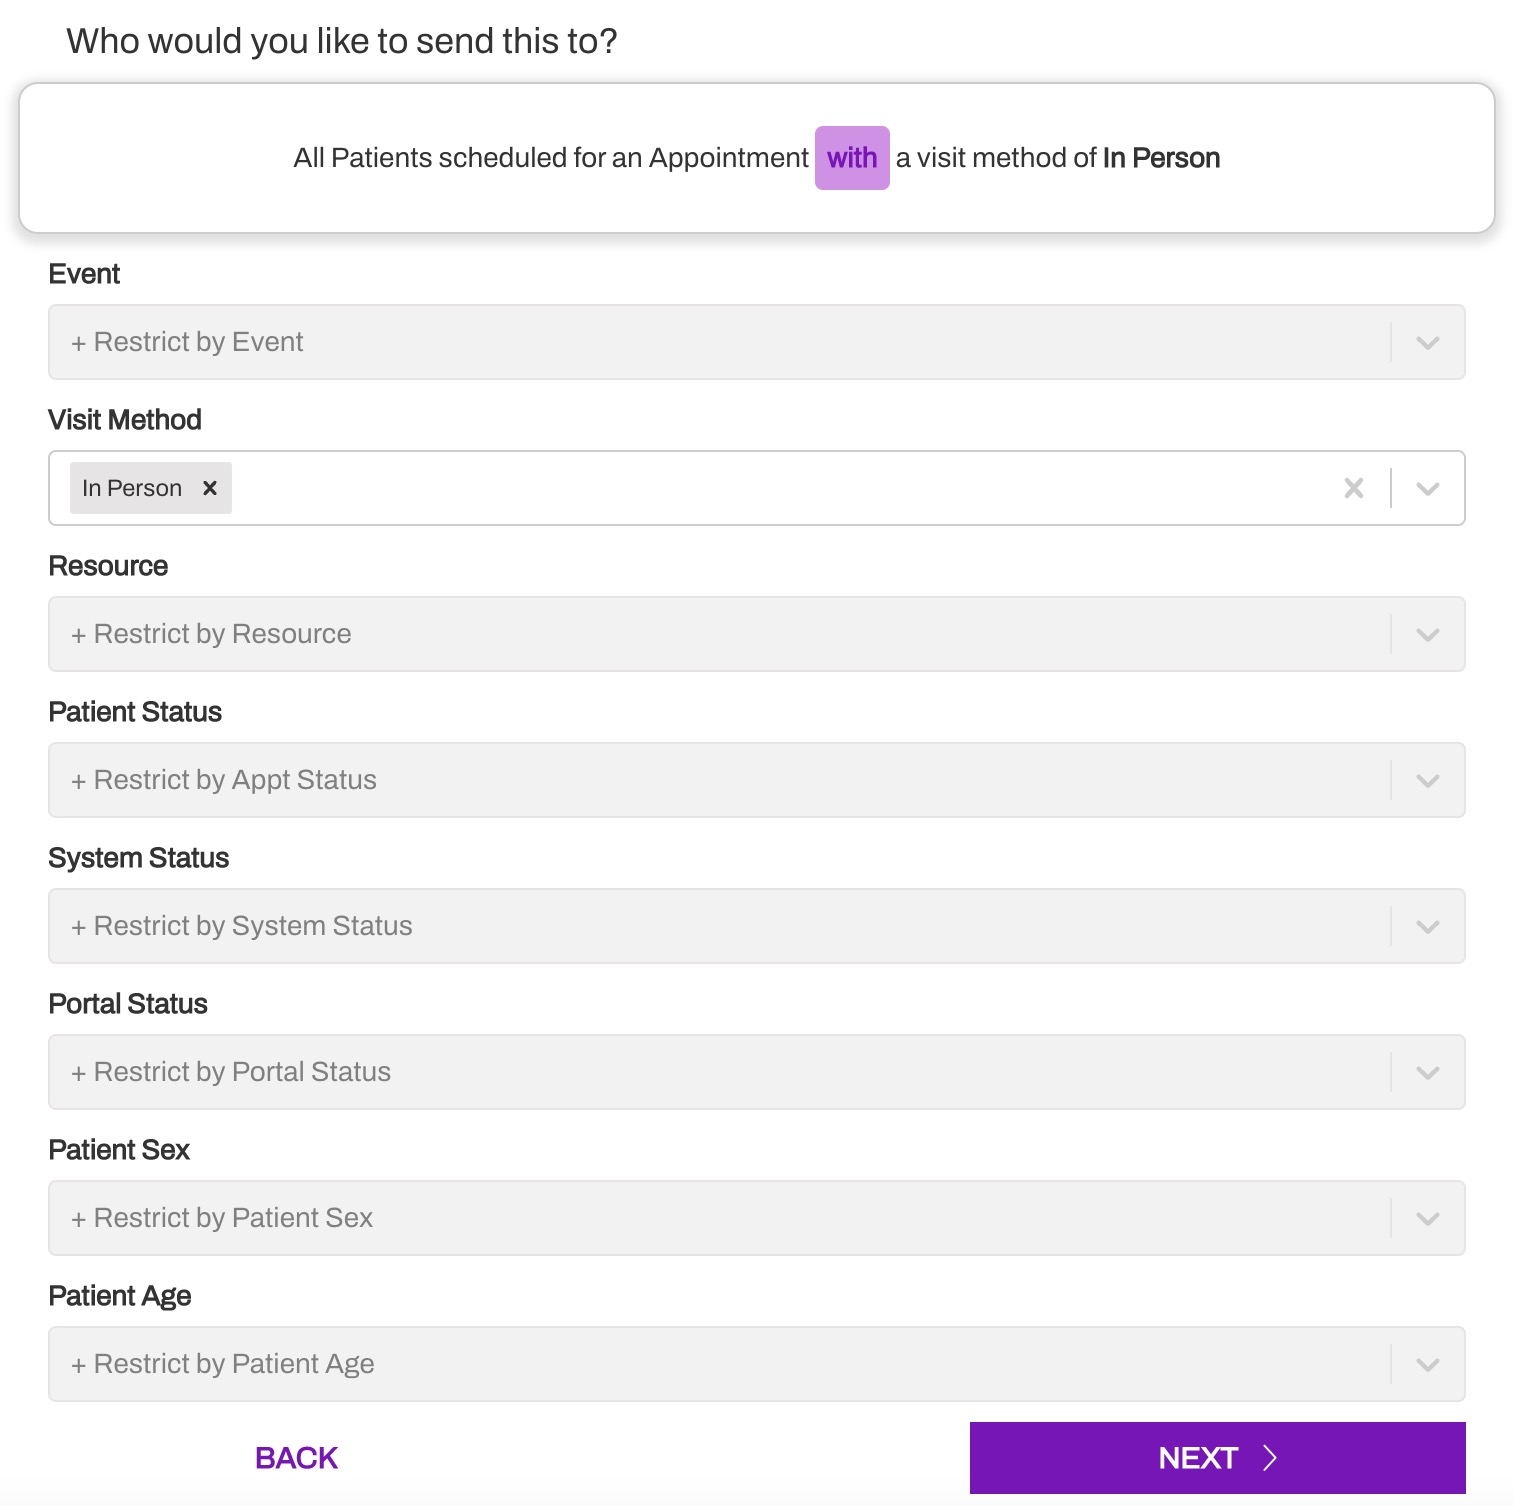
The majority of this section is uneditable as most Restrictions (Filters) are established during the Practice configuration of the Automation. The exception is the Visit Method. Use this option to identify which Visit Method (In Person, Telehealth, or Video) this Automation is designed for. Tip: You can also click "with" changing it to "without," allowing you to use exclusionary logic.
Configure Automation Messaging
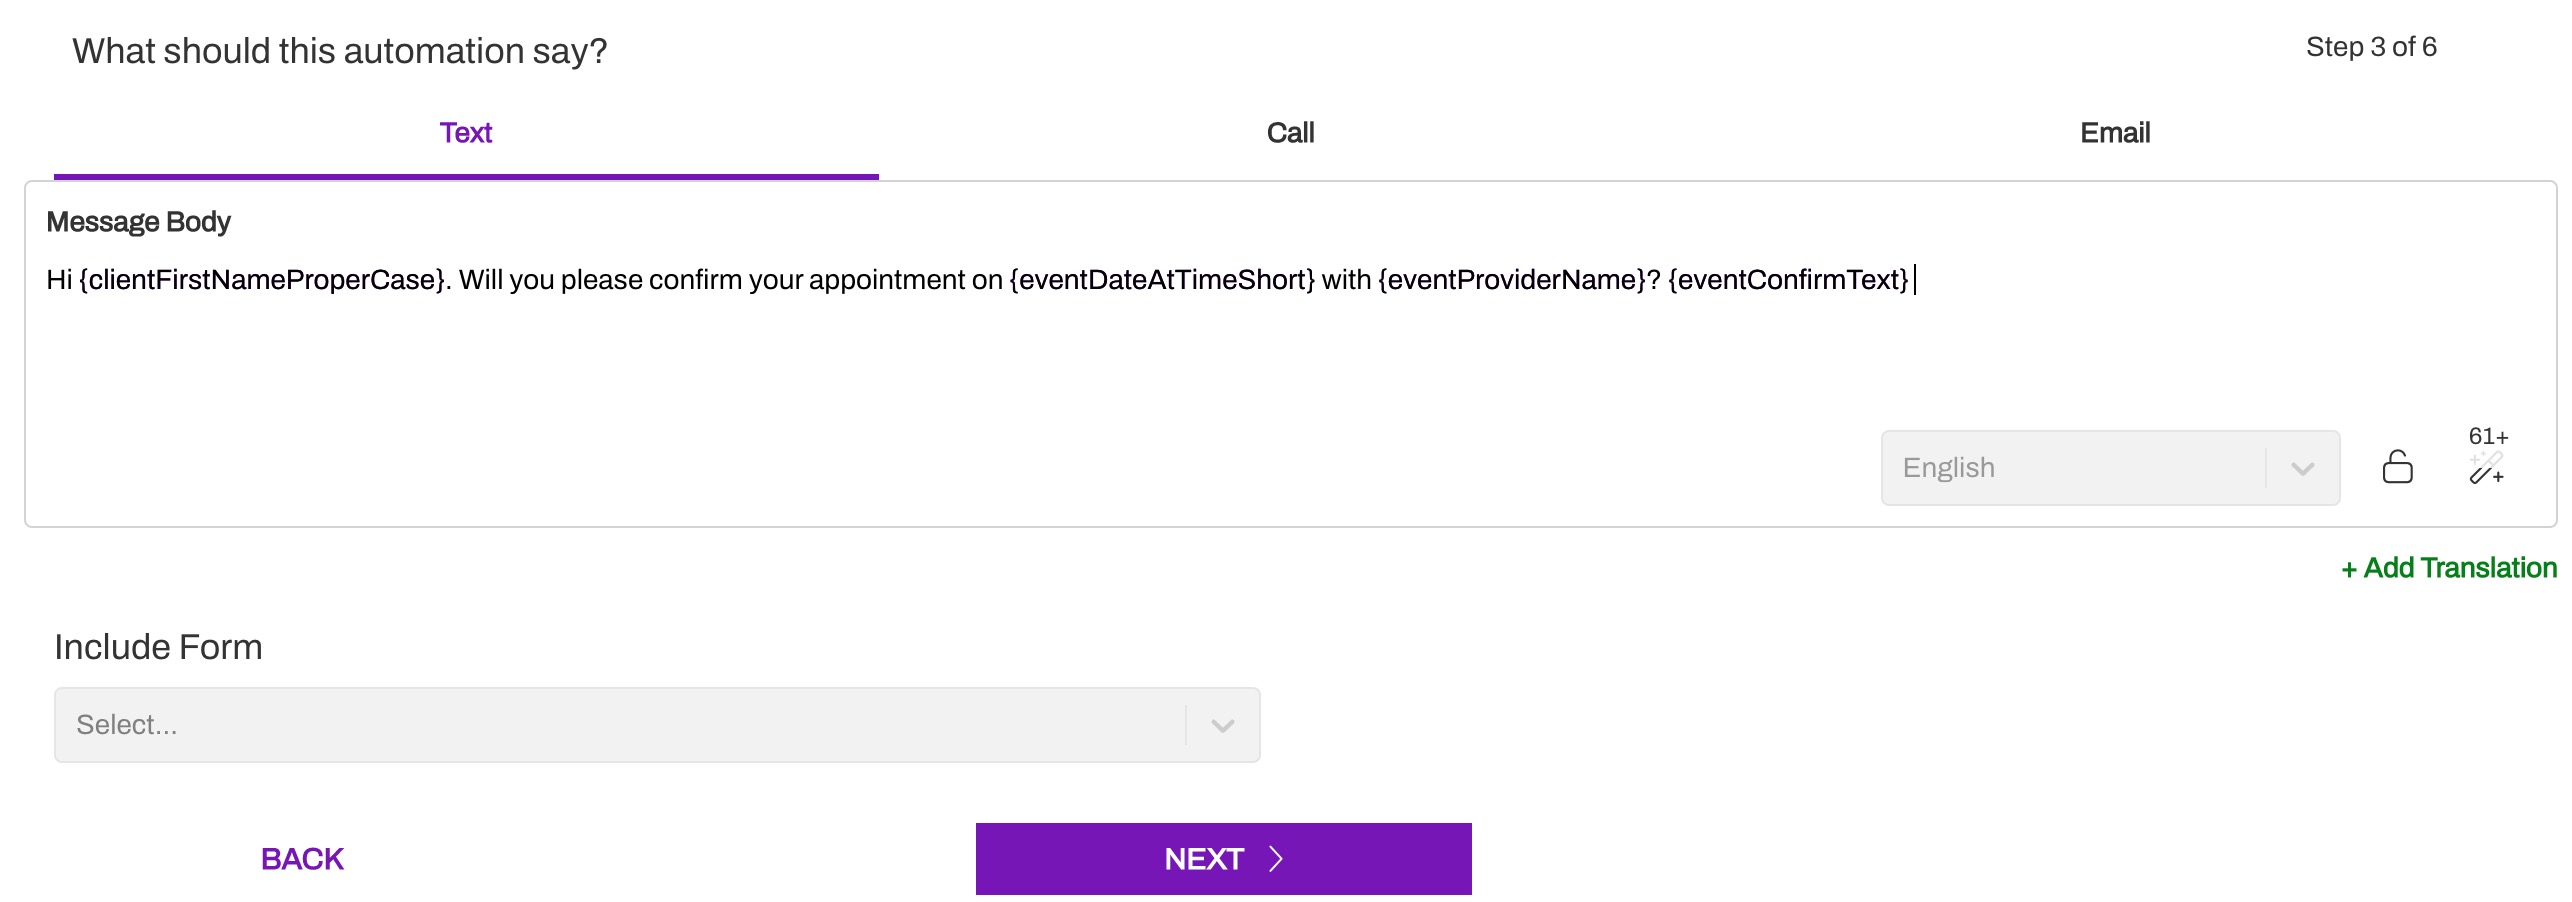
Next, you will enter the Automations message for each of the content types you will support. Available content includes Text, Call, and Email. Messages can be customized by delivery method.
We recommend keeping text content short to optimize the patient experience; emails can be longer and require a subject line, and voice calls should be more conversational. Text messages must be under 1,600 characters, otherwise, the message will fail to send to the patient. You can check this by ensuring the denominator of the fraction of the character count in the bottom right corner of the message is equal to 10 or less. Learn more about SMS Character Limits and Message Formatting Guidelines.
You can choose to send Appointment Automations by a single delivery method or you can configure these Automations to be sent via all three delivery methods to increase deliverability. If you select multiple delivery methods for your Automation, the patient will never receive all three. How the patient receives the message is based on their Patient Communication Settings.
Tip: Check out our recommended message scripts in the Appointment Automation Leading Practices article.
Set Automation Timing
Next, determine when the Automation should be sent (e.g. 2 Days Before, 4 Hours After the appointment, etc.). For Appointment Automations, there are six message triggers (see below) and associated send rules. You can indicate a specific amount of time to offset the Automation for two of the six message triggers, Appointment Time and Appointment Created. Check out this article for our leading practice recommendation on Appointment Automation timing.
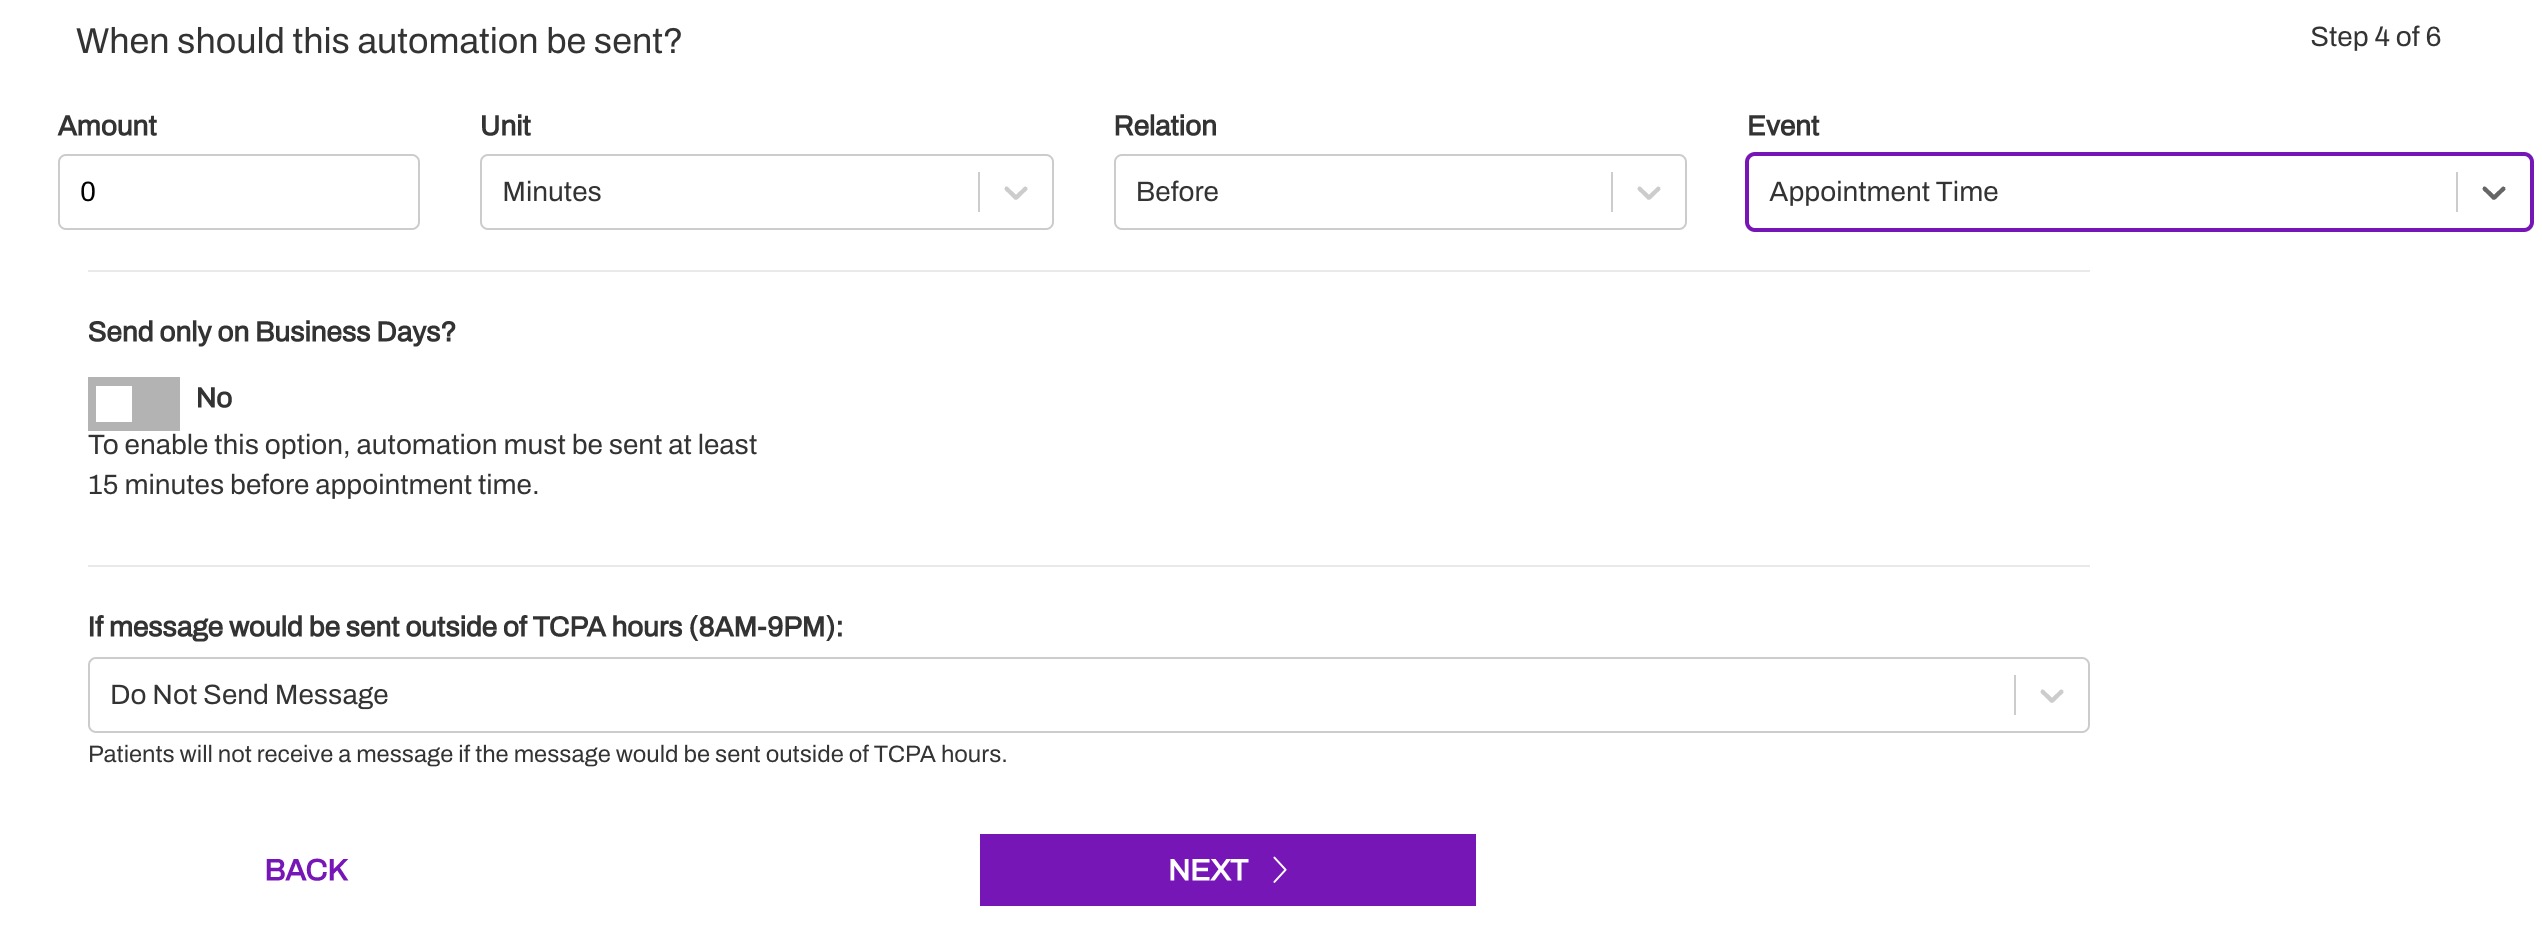
Appointment Triggers
- Appointment Time: Send the Automation based on the patient's scheduled appointment time (e.g. Send reminder 1 Day Before Appointment Time). So, if the patient has a 2:30 pm appointment, the 1 Day Reminder will go out at 2:30 PM the day prior to the appointment.
- Appointment Created: Send the Automation based on the appointment being created in your EMR. The Automation will send once the integration message is received in Artera (e.g.: send Instant Booking 15 minutes after Appointment Created).
- System Status Change: Send the Automation based on the status of the appointment being updated in the EMR (e.g. send a message when the status changes from Booked to No Show). During Implementation, your EMR statuses are mapped to the corresponding default Artera statuses. The available statuses are Booked, Started, No Show, Abandoned, and Completed, however, because your EMR may not be able to send all of these statuses to Artera, only the supported status will be mapped.
- Date or Time Change: Send the Automation if the date or time of the appointment is changed (e.g. appointment was rescheduled to a different day). This will only be sent if your integration can send these values to Artera and if the original appointment was updated. If you cancel the appointment in your EMR and schedule a new one, Automations with these triggers will not send. Learn more here.
- Location Change: Send the Automation if the Location of the appointment is changed (e.g. appointment was moved to a different facility due to renovation). This will only be sent if your integration can send these values to Artera and if the original appointment was updated. If you cancel the appointment in your EMR and schedule a new one, Automations with these triggers will not send. Learn more here.
-
Patient Status Change: Send the Automation when the patient's appointment status changes in Artera (e.g. send a message when the status changes from unconfirmed to confirmed). This change can occur when the patient responds to a confirmation message or when staff updates the appointment status in the patient's Facesheet.
-
Tip: When using Patient Status Change, we recommend selecting all statuses available in the 'From' column. So, If you want the Automation to trigger immediately any time an appointment's patient status moves to confirmed, you will need to include all available 'From' statuses (View, Cancel, Reschedule, Unconfirmed). Otherwise, if an appointment moves from unconfirmed > view > confirmed, it would inadvertently be excluded from the Automation.
Note: At this time, there is no trigger to send an Automation when a Provider is changed on the patient's appointment.
Send Rules
Send Only on Business Days?
This rule is only available for Appointment Time or Appointment Created triggers. Note: This setting will be grayed out and cannot be enabled unless the Automated message is set to send at least 15 minutes after the chosen trigger.

Business Days are determined by your Practice and Line Hours. Any day that your Practice or Line is open for any duration of time counts as a Business Day in Artera.
Impact
If you restrict an Automation to send only on Business Days and the message is set up to send 1 Day Before the Appointment, appointments that fall directly after the weekend will receive their reminders during your last business day. For example, if your Practice is closed on Saturday and Sunday, reminders for Monday's appointments will send the Friday before the appointment rather than on Sunday.
Note: In Practices set up for One-Way messaging, all days are Business Days, so this toggle does not impact your Automations.
Patient Status or System Status Change Ignores Business Hours
If you set the Automation to occur upon Patient Status Change or System Status Change (e.g. Appointment Confirmed), the Automation will go out regardless of Business Hours. Instead, the timing of the message depends on when your system of record sends status updates to Artera.
For EMRs that send information in real-time, the message will go out when the patient responds to the Automation, changing the status. For systems that complete a batch update once per day (typically overnight), we recommend avoiding using the System Status Change trigger when building Automations. For example: If Artera does not receive a No Show status until after midnight, instead of creating a No Show Automation that uses System Status Change from Booked to No Show, we would set it up to send 1 Day After Appointment Time. Then, when filtering at the Practice, we would add a System Status Restriction of No Show.
Suppress automation for same-day appointments?
When using the Appointment Created trigger, you can choose to not send the patient an Instant Booking message for their appointment.

TCPA (Telephone Consumer Protection Act) Guidelines
Artera enables you to send or suppress automated reminders based on TCPA guidelines. Choose between sending the message immediately, scheduling the message within the TCPA guidelines, or not sending the message at all. Click here for a full breakdown of TCPA Hours and how it impacts messaging.
When considering Appointment Automations, we typically recommend choosing to Adjust the Delivery when available, which will respect TCPA hours. Generally, most appointments fall within standard business hours, so that adjustment is typically minimal. For example, if the patient is receiving a reminder for their 7:30 AM appointment on Tuesday, the 1-Day Reminder will send around 8:00 AM on Monday.
Merging Messages
When a patient has multiple appointments on the same day within the same Practice, you can use Merge Messages to prevent the patient from receiving duplicates. For example, a Follow-Up Thank You Automation sends for all appointments across providers. If a patient has two appointments on the same day (e.g. a consultation and a biopsy), you can use this setting to ensure the patient only receives one thank you message.
Click here to learn more about Merged Messages.
Merge Messages Considerations
- You cannot merge multiple distinct Automations. For instance, if one Automation is set up to send a reminder for Dr. Jacobson and a second Automation sends reminders for a separate provider (Dr. Smith) at a separate Location, the patient would still receive two messages: one for Dr. Jacobson and one for Dr. Smith.
- Automations that are configured to send from different Phone Lines can be merged as long as they are in the same Practice.
- You cannot attach a Form to a Merged Message.
- Merged Messages respect patients, not phone numbers. So, even if two patients that share a phone number have the same type of appointment on the same day, the messages will not be merged.
Managing Automations
It is important to have an Automation strategy to ensure that your Automations stay up to date over time. Click here to learn more.
Editing an Enterprise Automation
As an Enterprise user, you can edit the Default Automations so that the Automations are updated for all Practices that use them:
- Navigate to Default Automations.
- Select the Automation you wish to edit by clicking the three vertical dots on the right side and choose Edit Automation.
- Change desired section: Automation Type, Automation Content, Automation Timing, or Automation Aggregation.
- Select Update when done to save your changes
Creating Automations From Template
You can create Default Automations and then use them as a template for new Automations that have similar functionality. This is especially helpful when creating Event-specific Automations, e.g., copying the Appointment Confirmation - 7D Unconfirmed to use for the Virtual Visit Confirmation - 7D Unconfirmed.
-
Go to the Action Menu of the Automation you would like to copy by clicking the (...) menu. Select Use as Template.

- Edit the appropriate sections.
- Once you have reviewed your Automation, click Create Automation.