Default Automations - Inbound Message
- Get Started
- Release Notes
- Triggers
- Patient Channel
- Troubleshooting and FAQ
- Patient Facesheet
- Technical Specifications
- Insights & Analytics
- Inbox
- Conversation Flows
- Campaigns
- Lines & Resources Requests
- Lines, Events, Resources
- SMS Basics
- Automations
- Referrals
- AI Agents
- Add-Ons
- Users and Groups
- Platform Settings and Configuration
- Self-Rescheduling
- Recalls
- Marketplace
- Artera Harmony Federal Edition
Table of Contents
Default AutomationCreate a new Inbound Message AutomationConfigure Automation Trigger and KeywordsSelect Automation ActionMultiple Action SupportManaging AutomationsEditing an Enterprise AutomationCreating Automations from TemplateAs an Enterprise User, you can set up Automations that can be used across your Practices. This functionality allows you to set a standard for your organization controlling keywords, brand voice, and standardizing actions. Additionally, creating Automations at the Enterprise and enabling at each Practice drives efficiency and consistency.
This article focuses on how to build Default Automations for the Inbound Message Module. Click here to learn how to configure Inbound Message Automations at the Practice level. We also have information on how to build Appointment and Recall Automations.
Default Automations
Automations created for the Enterprise are called Default Automations. Default Automations are then filtered within the Practice Automations section. This allows Appointment Automations to be sent based on Practice specifications like Events, Providers, Locations, and Phone Lines, while preserving an Enterprise-wide cadence and message content.
Page Overview
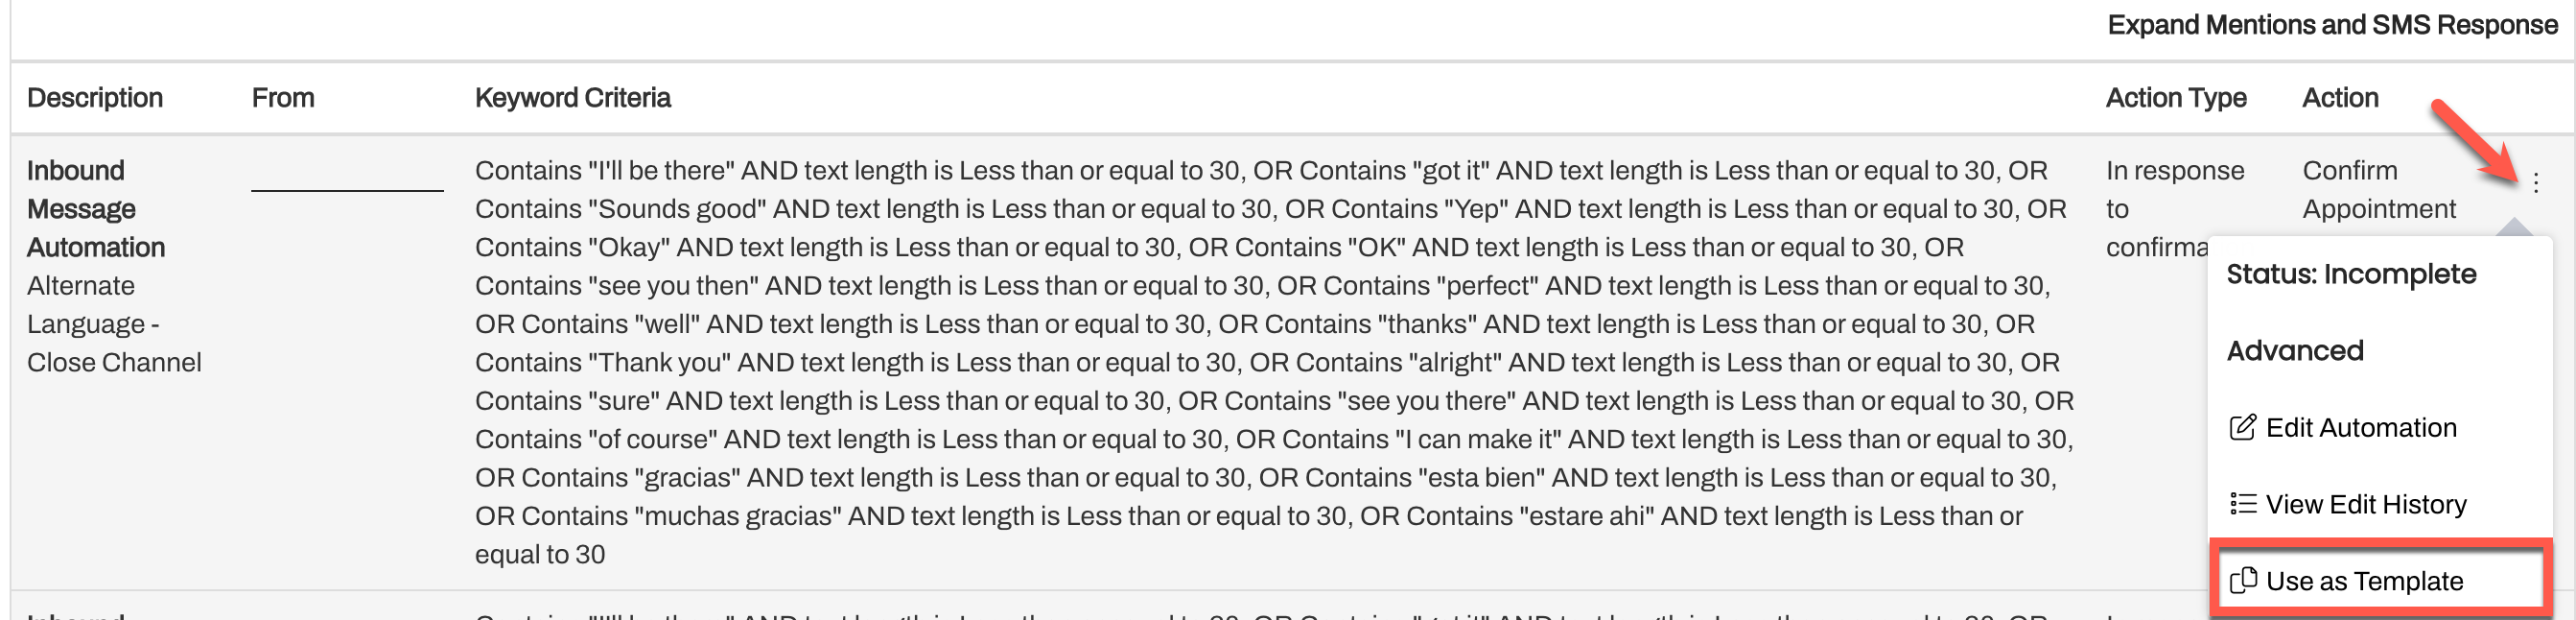
Inbound Automations are displayed at the bottom of the Default Automations page.
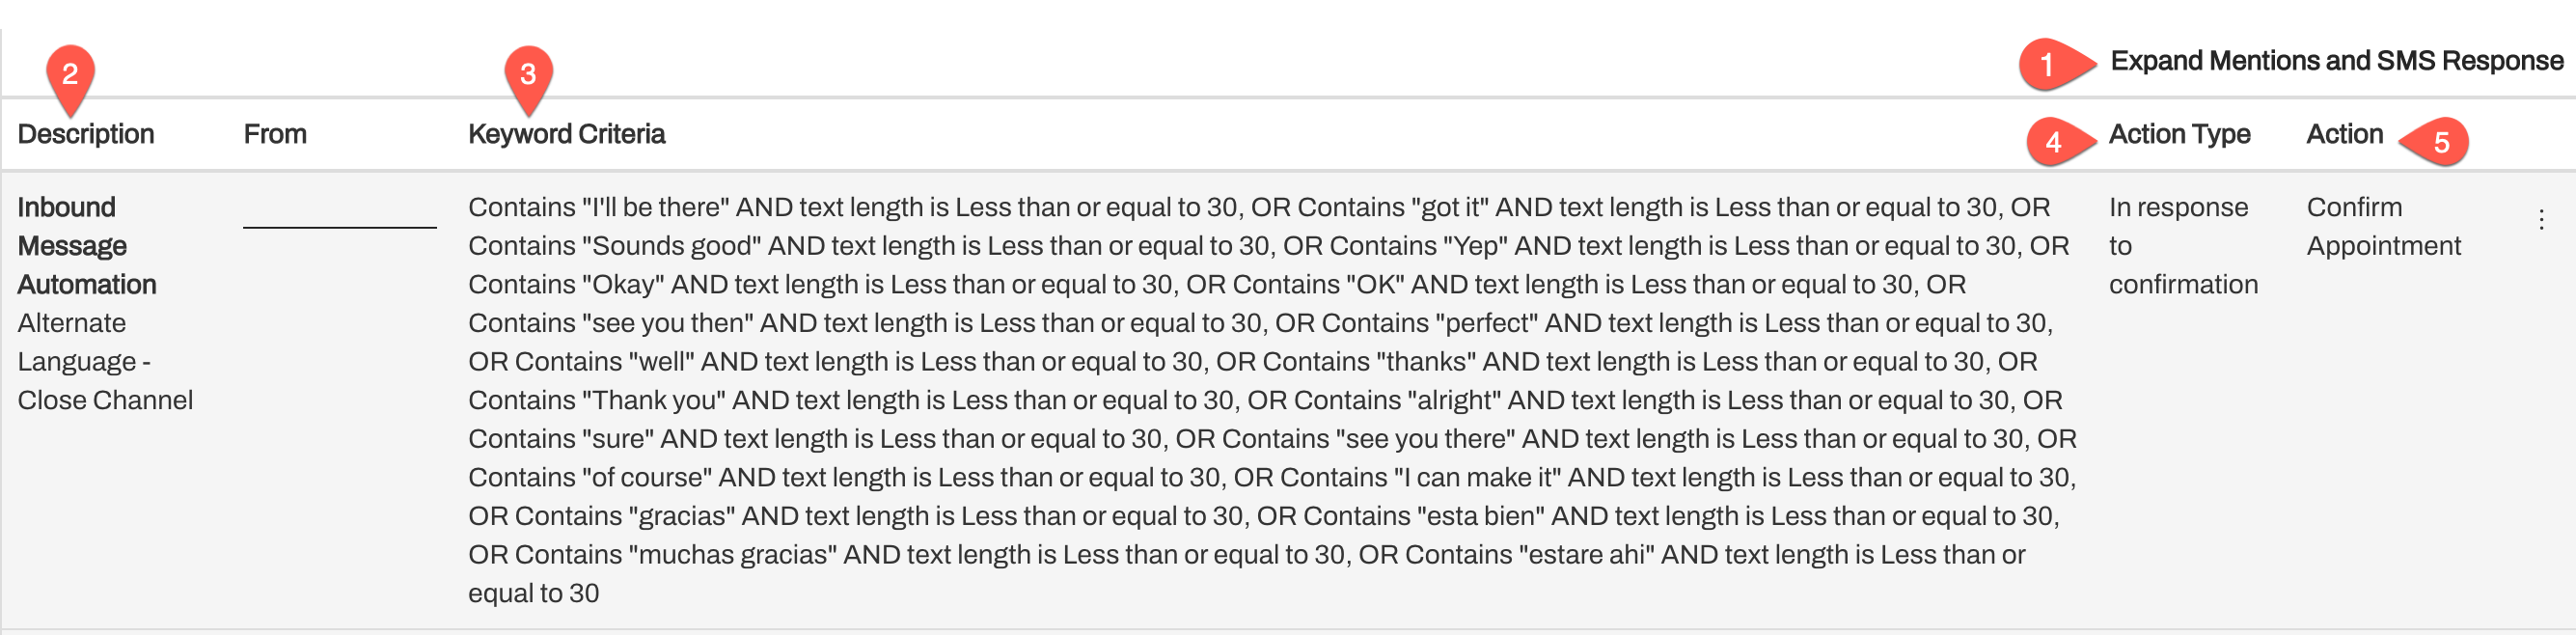
- Expand Mentions and SMS Responses: Click this link to view any SMS messages set up to send when the Action is Send Response to Patient.
- Description: This field displays the Inbound Message Automation and the related title of the Automation established during creation.
- Keyword Criteria: This is a list of all words and phrases set up as keywords, including how the keyword is configured (i.e. exact match or contains and text length limits). These items will trigger the Automation action when received from the patient.
- Action Type: This identifies whether the keyword needs to be received in response to a confirmation message (in response to confirmation) or not (In response to any message).
- Action: This indicates the associated action the keyword will trigger.
Create a New Inbound Message Automation
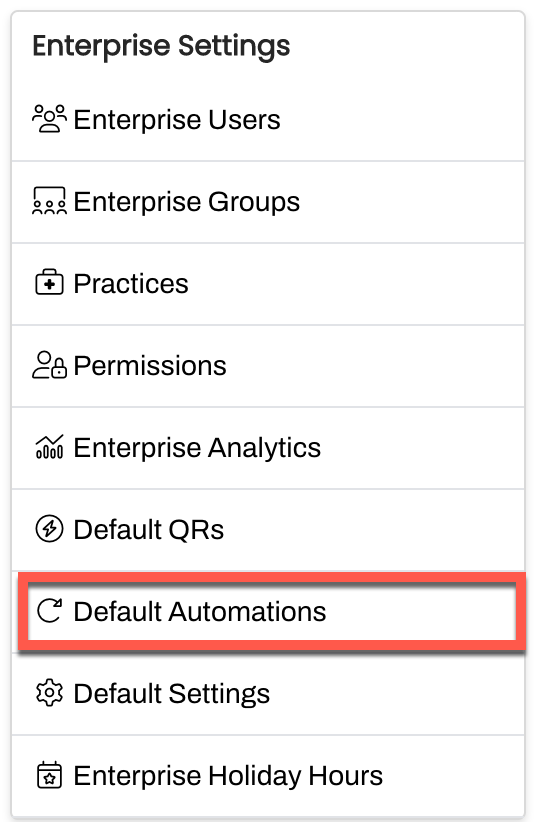
- Navigate to Enterprise Settings and select Default Automations.
- Select Create Automations in the upper-right corner.
- Select Inbound Message from the Module drop-down and add a short Description. This is how you will identify the Automation going forward so use consistent naming conventions.
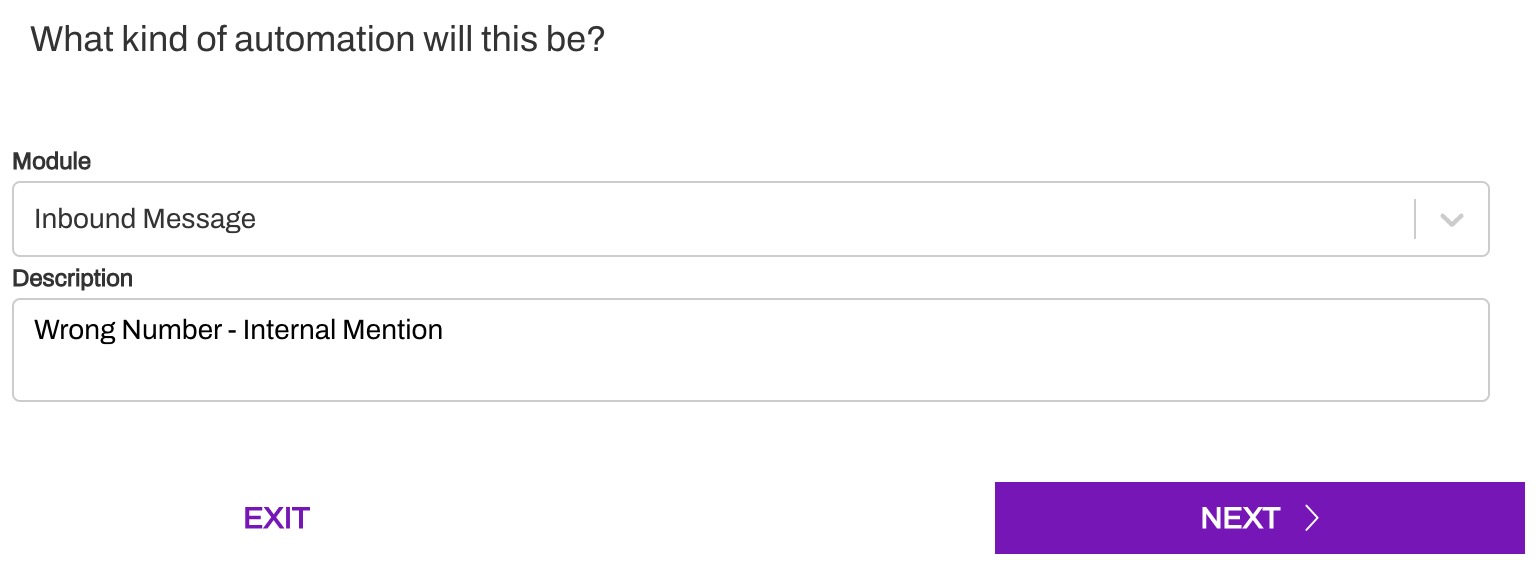
-
You will set the Phone Line(s) for this Inbound when configuring the Automation for the Practice.
Configure Automation Trigger and Keywords
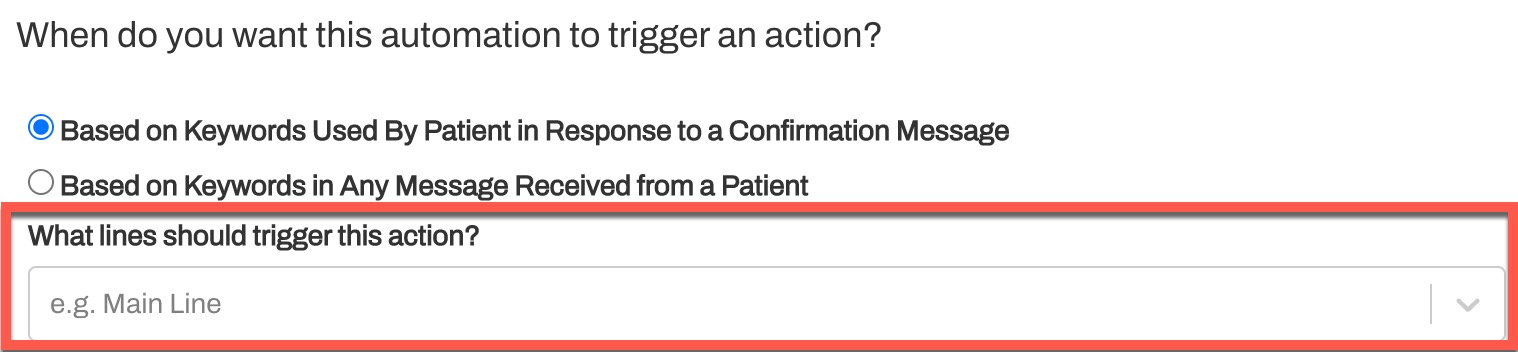
Automation Trigger
Use the radio button to select the type of message that will trigger the Automation.

Inbound Message Automations can be set up to send:
-
Based on Keywords Used By Patient in Response to a Confirmation Message
-
This option allows the automation to trigger only in response to a message containing one of the following Smart Phrases:
- {eventConfirmText}
- {eventConfirmLink}
-
This option allows the automation to trigger only in response to a message containing one of the following Smart Phrases:
-
Based on Keywords in Any Message Received from a Patient
- This is a broader option that will trigger the Automation based on any patient Inbound Message that matches a keyword. Important: The Automation will only trigger once every 10 minutes even if the same keyword is sent in by the patient multiple times within that period.
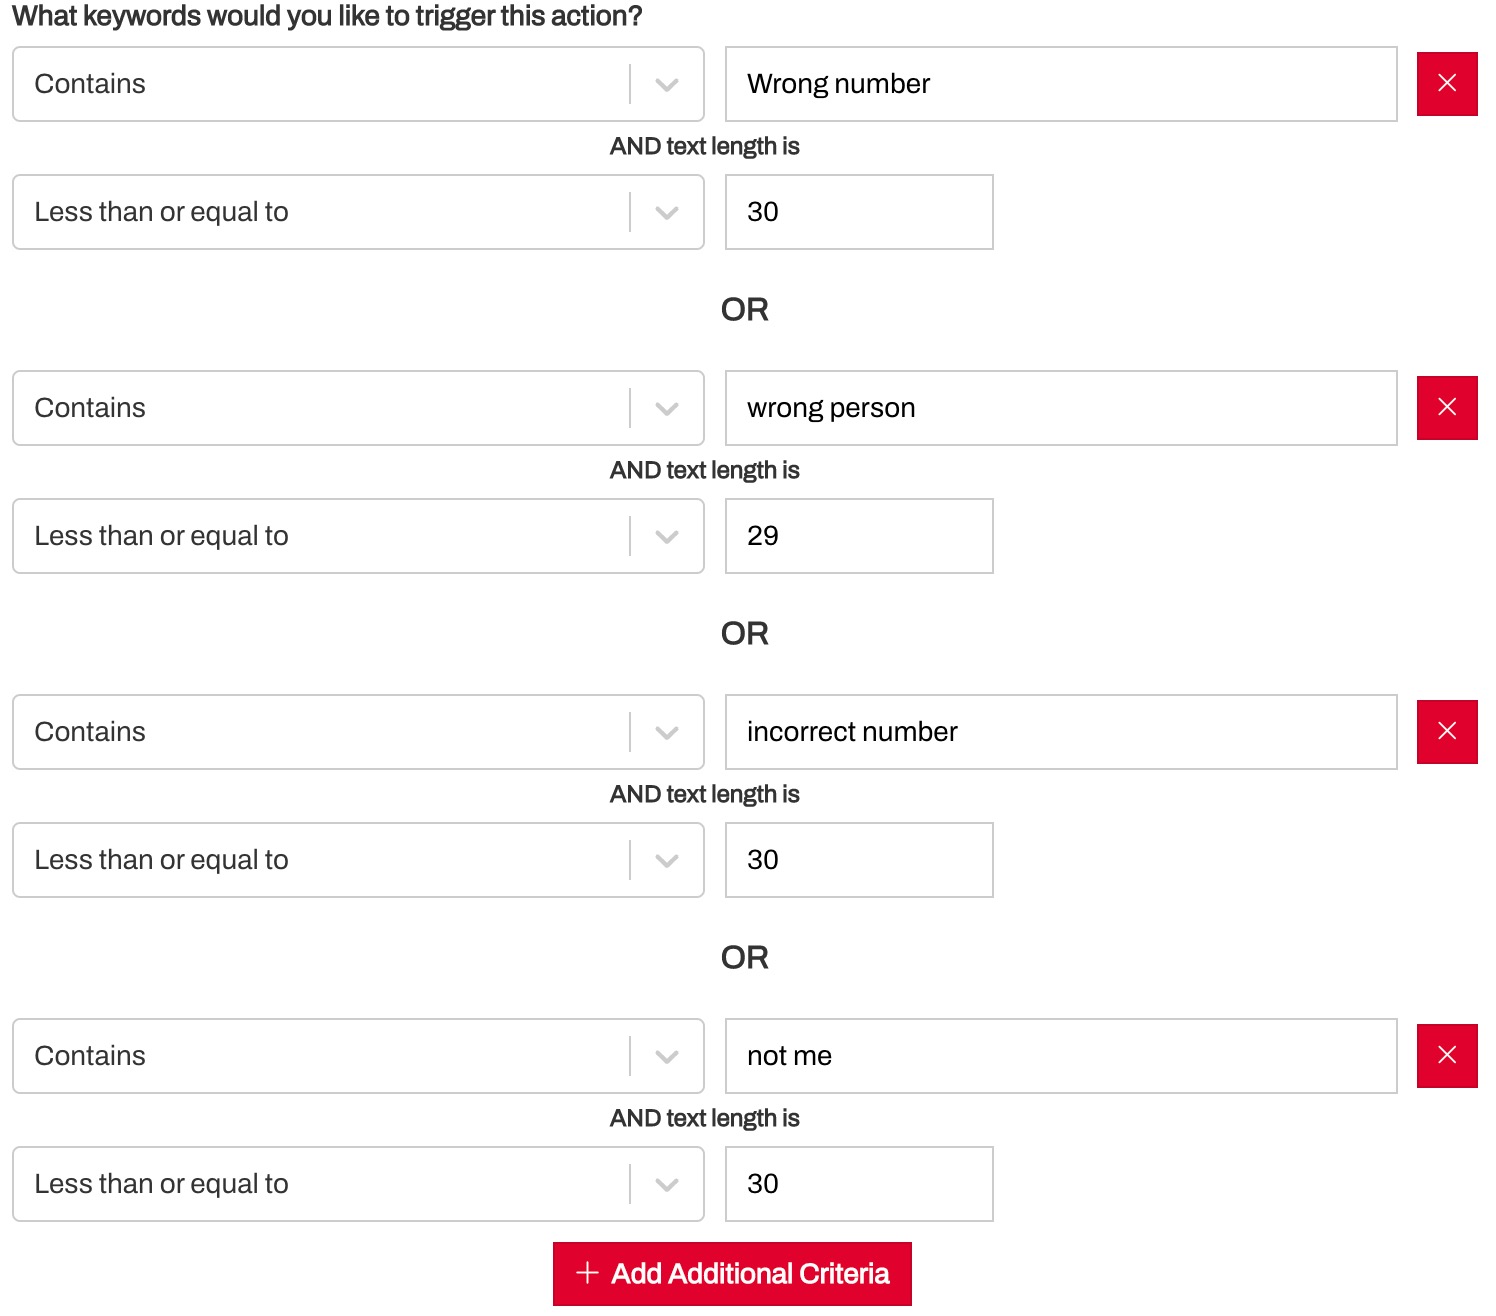
Keywords
Next, include each keyword or short phrase that will trigger the Automation action.
Exact Match vs. Contains
When you select Exact Match, the Automation will only trigger if the patient sends a message that includes the word(s) exactly as entered into the text box. Case is ignored, but the order of the words and punctuation are respected. This allows you to be highly selective with the patient responses that will trigger the desired action.

For most keywords, we recommend using Contains. This allows the Automation to scan the patient's Inbound Message for specific words. When using this option, you will be prompted to enter text length limits for the number of characters contained within the patient's Inbound Message. If a patient's Inbound Message falls outside the character limits, the Automation will not trigger.
It is important to note that the Contains function searches for whole keywords and will not trigger the Automation based on a partial keyword or keyword phrase match. Let's review an example. If the keyword is "sounds good," the Automation will not trigger if the patient sends in "sounds cool," but will trigger for "okay sounds good!"
We recommend using Less than criteria and 30 characters or less. By setting a relatively small character limit, you ensure that any lengthy patient message does not get overlooked as a result of the keyword action being triggered.

+ Add Additional Criteria
Enter each keyword and/or phrase in a separate line until all have been added. It is not uncommon to include many keywords. Tip: Check out common inbound keywords in the Inbound Message Automation Leading Practices article.
 Select Automation Action
Choose the desired action for the Automation to take when a matching keyword is received.
The options available are slightly different depending on which radio button you selected for: When do you want this Automation to trigger an action?
- Confirm Appointment: (Confirmation Message Only)
- Request to Reschedule Appointment: (Confirmation Message Only)
- Request to Cancel Appointment: (Confirmation Message Only)
- Create a Mention
- Send Response to Patient
- Open Channel
- Pend Channel
- Close Channel
Confirm Appointment, Request to Reschedule, Request to Cancel
This option is only available when the Automation is set up to send Based on Keywords Used by Patient in Response to a Confirmation Message.
Create a Mention
When you select this option, you will set up who the Internal Mention should be assigned to and the related message when configuring the Automation in the individual Practice.
Send Response to Patient
Use this option to automatically message back the patient when one of the keywords is received.

When using this action, determine which Hours to Send the message:
- After Hours Only
- Business Hours Only (as determined by the Practice or Line)
- Always
Important Note: If you have an After-Hours Auto-Response set up for the Practice or Line, the patient will receive the Inbound Automation Message instead of the After-Hours Auto-Response as long as the patient's message meets the inbound criteria. If the message does not meet the inbound requirements, the patient will receive the After-Hours Auto-Response.
Next, craft your message. Include Text to respond to patients who text in or Email to respond to patients who email in. Click here for Message Formatting Guidelines.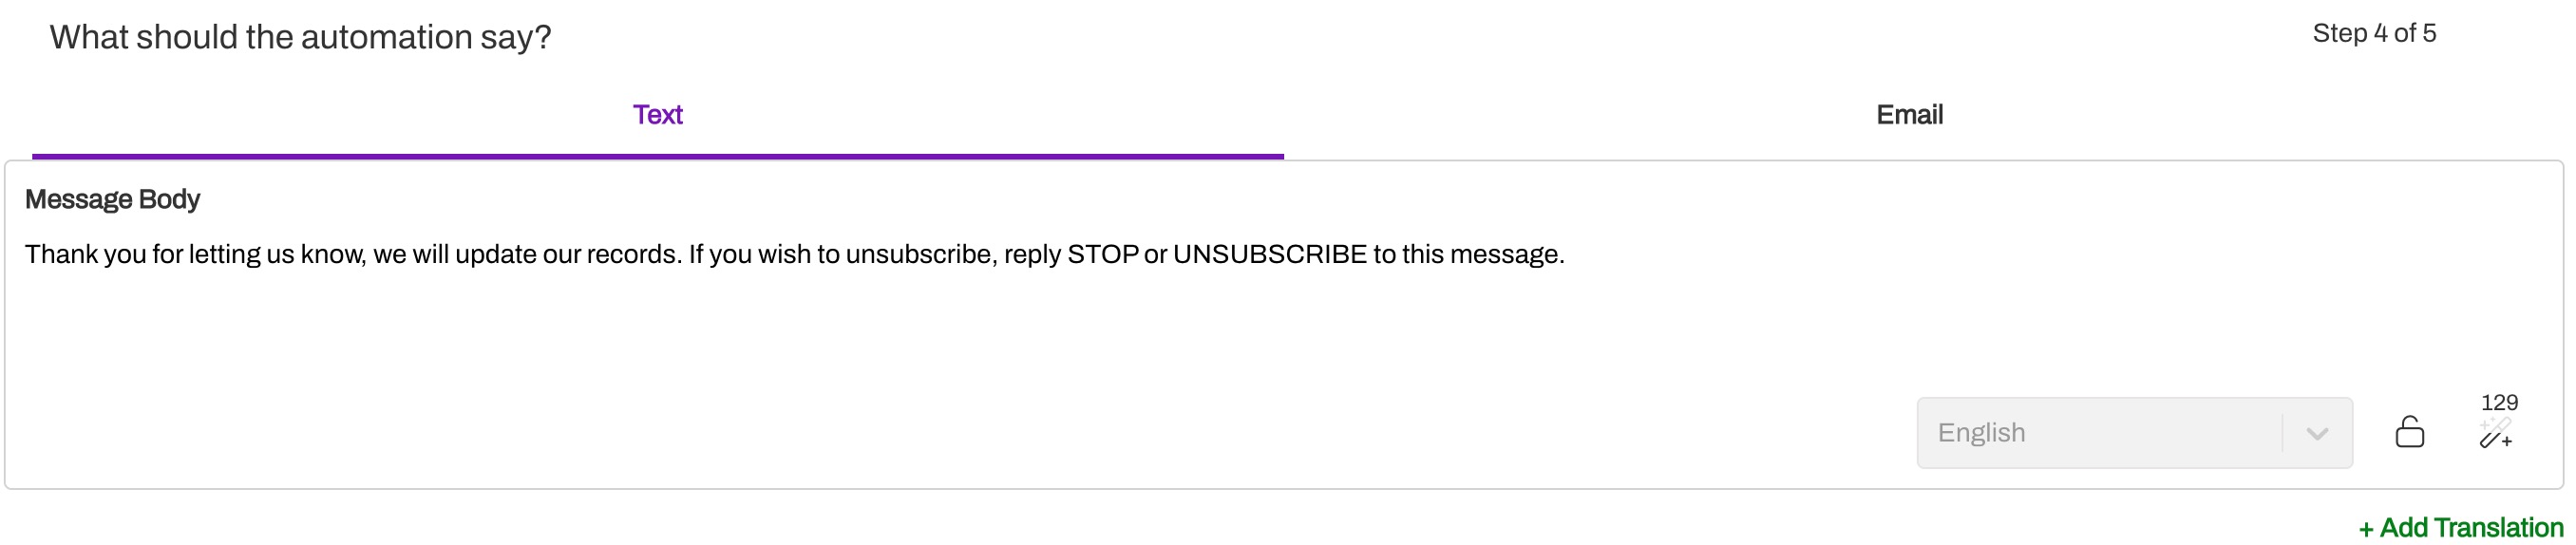
Open, Pend, or Close Channel
Choose this option to automatically update the status of the Patient's Channel.
Multiple Action Support
Artera supports one Action per Inbound Message Automation with standard Automations. However, there are many Inbound Message Automations that work best when paired with two or more actions. For example, if a patient texts in asking for the address, you would format one Automation to send a message back to the patient with the Location address for their next appointment. You would also want to create another Automation with the same keywords that would automatically close the Patient's Channel so that staff users do not need to spend time manually closing the Patient Channel.
To simplify this process (and prevent the need to recreate the entire Automation), use the (...) menu for the Automation you want to duplicate and select Use as Template. Then, you will only need to update the Action and save.
Now, you have created two Automations that have the same keyword parameters and two different actions. It is important to note that any action that changes the Patient's Channel Status will be the final action taken. In this example, the message will be sent to the patient first and the Patient Channel closing will follow, regardless of the order they were created in.
Conversation Flows
If you use Conversation Flows, you can set up a Conversation that will allow you to create one Inbound Message Automation that has multiple Actions associated with it.
Managing Automations
It's important to have an automation strategy to ensure that your Automations stay up to date over time. Click here to learn more.
Editing an Enterprise Automation
As an Enterprise user, you can edit the Default Automations so that the Automations are updated for all Practices that use them:
- Navigate to Default Automations.
- Select the automation you wish to edit by clicking the three vertical dots on the right side and choose Edit Automation.
- Select Update when done to save your changes.
Creating Automations From Template
You can create Default Inbound Message Automations and use them as a template for new Inbound Message Automations that have similar functionality. This is especially helpful when creating multiple actions for the same set of keywords.
-
Select the (...) menu of the Automation you would like to copy. Select Use as Template.

- Edit the appropriate sections of the Automation.
- Click Create Automation.